Elsner Solexa II 기술 설명, 설치 지침 - 페이지 9
{카테고리_이름} Elsner Solexa II에 대한 기술 설명, 설치 지침을 온라인으로 검색하거나 PDF를 다운로드하세요. Elsner Solexa II 20 페이지. Radio control system
Elsner Solexa II에 대해서도 마찬가지입니다: 운영 (13 페이지)
The measurement of the indoor temperature is influenced by
sources of heat and cold in the proximity.
For an exact measurement
•
avoid direct sunlight
•
do not install above a radiator
•
avoid draughts from windows/doors
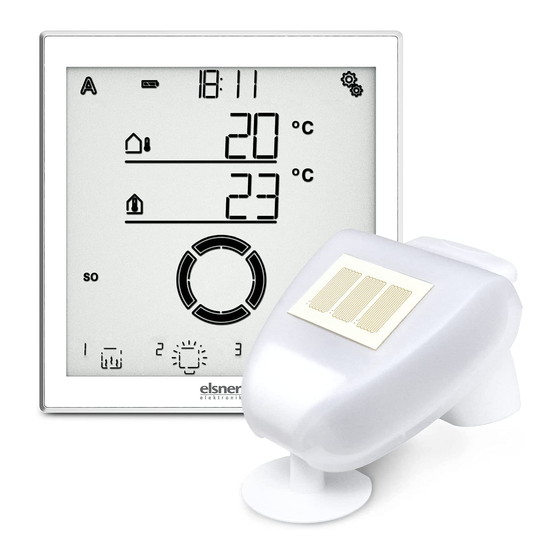
The display is battery-powered and communicates wirelessly with the weather station.
It should be positioned at a height where it is easy to read, e.g. 150 cm.
4.3.2. Assembling the wall bracket
The wall bracket consists of two parts: The wall bracket and the cover.
Advice for mounting with screws:
•
Turn the screws until the screw head is countersunk. Only then, the cover can
be stuck.
•
Don't tighten the screw too tightly. The wall bracket must not bend.
1
2a
Solexa II Control • from software version 1.9
Version: 28.09.2016 • Technical changes and errors excepted.
9
Ill. 1
Loosen the cover from the wall bracket.
Loosen in the disassembled/as delivered
state:
Separate both parts by holding the cov-
er on the outside and pressing out the
wall bracket with the thumbs.
Ill. 2 Front view
Install the wall bracket using suitable
aids (screws, adhesive pads).
(1) The two recesses in the locking must
be positioned vertically so that the dis-
play is correctly positioned.
(2a) The notch points downwards.
Installation/assembly