DW Blackjack Cube-LX 빠른 시작 매뉴얼 - 페이지 3
{카테고리_이름} DW Blackjack Cube-LX에 대한 빠른 시작 매뉴얼을 온라인으로 검색하거나 PDF를 다운로드하세요. DW Blackjack Cube-LX 16 페이지.
SETTING UP THE SERVER
STEP 1:
Connect external devices, power and network.
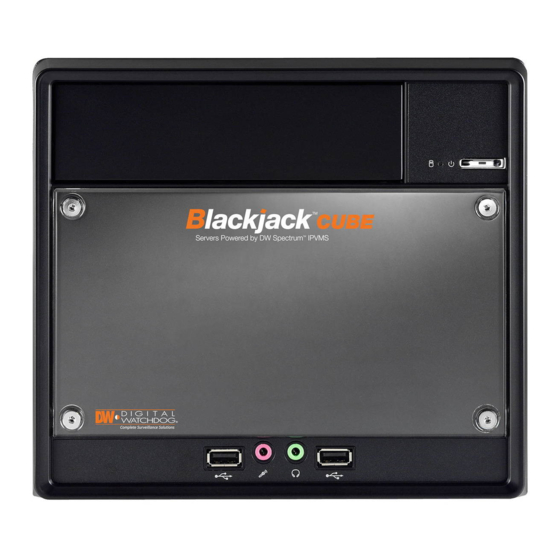
SETTING UP THE CUBE
1. Connect a monitor, USB keyboard, USB mouse and network cable to one of the Ethernet ports (B12 on the diagram).
SETTING UP THE CUBE
STEP 1:
Connect Peripherals, power and network
Configure the camera's network first, then configure the server's local network.
1. Connect a monitor, USB keyboard, USB mouse and network cable to the camera network(B12 on the diagram)
STEP 1:
Connect Peripherals, power and network
1. Connect a monitor, USB keyboard, USB mouse and network cable to the camera network(B12 on the diagram)
2. Connect the server to an appropriate power source. It is recommended to use a 750VA or higher UPS system.
2. Connect the server to an appropriate power source. Recommended to use 750VA or higher UPS system.
3. Power up the server if the server does not turn on automatically by pressing the power button on the front of the
3. Turn on the server if the server does not turn on automatically.
server. (F2 on the diagram).
2. Connect the server to an appropriate power source. Recommended to use 750VA or higher UPS system.
(Press the Power Button on the front of the Cube. F2 on the diagram).
* Connecting the power cable to the live power source may turn on the server automatically.
3. Turn on the server if the server does not turn on automatically.
* Connecting the power cable to the live power source may turn on the server automatically
(Press the Power Button on the front of the Cube. F2 on the diagram).
* Connecting the power cable to the live power source may turn on the server automatically
* Cable for the Local Network should be connected after the IP settings are configured.
* Cable for the Local Network should be connected after the IP settings are configured.
Quick Start Guide
3
3