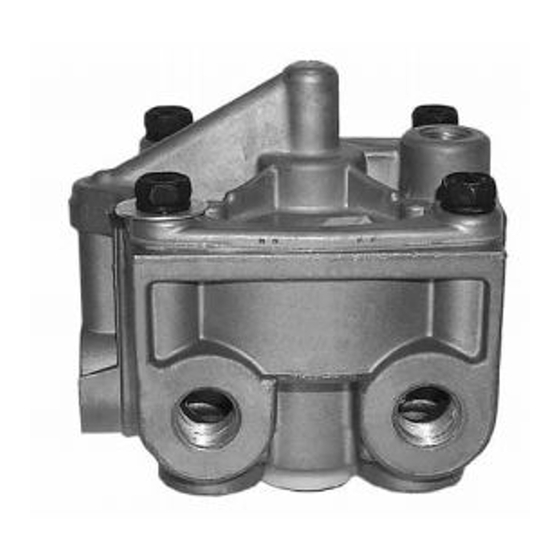
BENDIX R-12P PILOT RELAY VALVE 매뉴얼 - 페이지 6
{카테고리_이름} BENDIX R-12P PILOT RELAY VALVE에 대한 매뉴얼을 온라인으로 검색하거나 PDF를 다운로드하세요. BENDIX R-12P PILOT RELAY VALVE 8 페이지. Pilot relay valve

5. Following the vehicle manufacturer's recommended
procedures, deactivate the electrical system in a
manner that safely removes all electrical power
from the vehicle.
6. Never exceed manufacturer's recommended
pressures.
7. Never connect or disconnect a hose or line
containing pressure; it may whip. Never remove
a component or plug unless you are certain all
system pressure has been depleted.
8. Use only genuine Bendix
components and kits. Replacement hardware,
tubing, hose, fi ttings, etc. must be of equivalent
size, type and strength as original equipment and
be designed specifi cally for such applications and
systems.
9. Components with stripped threads or damaged
parts should be replaced rather than repaired. Do
not attempt repairs requiring machining or welding
unless specifi cally stated and approved by the
vehicle and component manufacturer.
10. Prior to returning the vehicle to service, make
certain all components and systems are restored
to their proper operating condition.
11. For vehicles with Antilock Traction Control (ATC),
the ATC function must be disabled (ATC indicator
lamp should be ON) prior to performing any vehicle
maintenance where one or more wheels on a drive
axle are lifted off the ground and moving.
PREVENTIVE MAINTENANCE
Important: Review the Bendix Warranty Policy before
performing any intrusive maintenance procedures. A
warranty may be voided if intrusive maintenance is
performed during the warranty period.
No two vehicles operate under identical conditions, as a
result, maintenance intervals may vary. Experience is a
valuable guide in determining the best maintenance interval
for air brake system components. At a minimum, the valve
should be inspected every 6 months or 1500 operating
hours, whichever comes fi rst, for proper operation. Should
the valve not meet the elements of the operational tests
noted in this document, further investigation and service
of the valve may be required.
6
®
replacement parts,
SERVICE CHECKS
1. Remove any accumulated contaminants. Visually
inspect the valve's exterior for excessive corrosion
or physical damage. Repair/replace the valve as
necessary.
2. Inspect all air lines connected to the valve for signs
of wear or physical damage. Repair/replace as
necessary.
3. Test air line fi ttings for excessive leakage and tighten
or replace as necessary.
OPERATIONAL AND LEAKAGE TESTS
1. Block the vehicle's wheels and fully charge the air
system.
2. Apply and release the service brakes several times
and check for prompt response of the brakes at all
appropriate wheels.
3. With the air system fully charged, apply a soap solution
™
to the R-12P
valve exhaust port. Leakage of a 1"
bubble in 5 seconds is permissible.
4. Make and hold a full brake application and again apply
a soap solution to the R-12P
of a 1" bubble in 3 seconds is permissible.
5. With the brakes still applied, apply a soap solution
around the valve where the cover meets the body. No
leakage at this point is permitted.
If the valve does not function as described; or if leakage is
excessive, repair the valve or replace it at any authorized
parts outlet.
NOTE: If a supply line single check valve is present (see
Figure 2), check it for leakage. Disconnect the inlet
side of the single check valve and coat the open
end with a soap solution. Make and hold a full
brake application. Leakage of a one inch bubble in
fi ve seconds is permissible. If the valve's leakage
is excessive, replace it with a 1/2" single check
valve.
REMOVAL
1. Drain all system air pressure.
2. Identify and mark or label all air lines and their
connections to the R-12P
valve, if present. Then disconnect the air lines.
3. Remove the R-12P
™
™
valve exhaust. Leakage
™
valve and the single check
valve from the vehicle.
