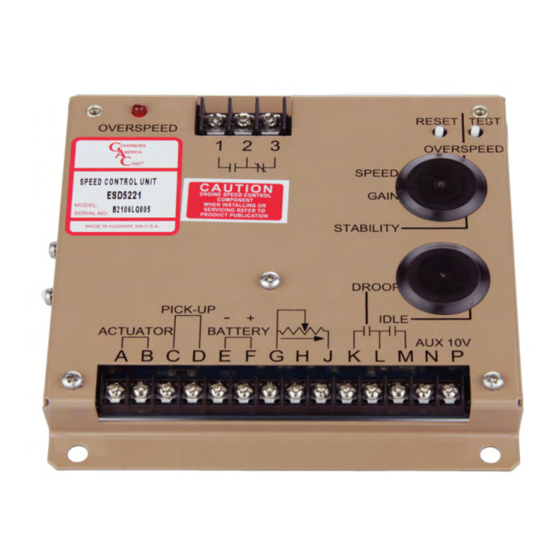
GAC ESD5550M 매뉴얼 - 페이지 7
{카테고리_이름} GAC ESD5550M에 대한 매뉴얼을 온라인으로 검색하거나 PDF를 다운로드하세요. GAC ESD5550M 8 페이지. Speed control unit

7
SySTEM TROUblESHOOTINg
InSUffIcIenT maGneTIc SPeeD SIGnaL
A strong magnetic speed sensor signal eliminates the possibility of missed or extra pulses. The speed control unit governs well with 0.5
volts RMS speed sensor signal.
A speed sensor signal of 3 volts RMS or greater at governed speed is recommended. Measurement of the signal is made at Terminals
C and D.
The amplitude of the speed sensor signal can be raised by reducing the gap between the speed sensor tip and the engine ring gear. The
gap should not be any smaller than 0.02 in [0.5 mm]. When the engine is stopped, back the speed sensor out by 3/4 turn after touching
the ring gear tooth to achieve a satisfactory air gap.
SYSTem InoPeraTIve
If the engine governing system does not function, the fault may be determined by performing the voltage tests described in Steps 1
through 4. Positive (+) and negative (-) refer to meter polarity. Should normal values be indicated during troubleshooting steps, and then
the fault may be with the actuator or the wiring to the actuator. Tests are performed with battery power on and the engine off, except where
noted. See your actuator publication for troubleshooting testing.
STeP
WIreS
cHecK
1
F(+) & E(-)
Battery Supply
Voltage
(12 or 24 V DC)
2
C(+) & D(-)
1.0 V AC RMS
minimum while
cranking
3
P(+) & G(-)
10 V DC, Internal
Supply
4
F(+) & A(-)
1.0 - 2.0 V DC while
cranking
InSTaBILITY
InSTaBILITY
SYmPTom
Fast Periodic
The engine seems
to jitter with a 3Hz
or faster irregularity
of speed.
Slow Periodic
An irregularity
of speed below
3Hz. (Sometimes
severe)
Non-Periodic
Erratic Engine
Behavior
1.
DC battery power not connected. Check for blown fuse.
2.
Low battery voltage
3.
Wiring error
1.
Gap between speed sensor and gear teeth too great. Check Gap.
2.
Improper or defective wiring to the speed sensor. Resistance between D and C should be 160 to
1200 Ω. See specific mag pickup data for resistance.
3.
Defective speed sensor.
1.
Short on Terminal P.
2.
Defective speed control unit.
1.
SPEED parameter set too low
2.
Short/open in actuator wiring
3.
Defective speed control
4.
Defective actuator, see your actuator's Troubleshooting guide.
1.
Readjust the GAIN and STABILITy for optimum control.
2.
Turn off any local electrical equipment that may be causing EMI interference.
3.
Set the Lead Circuit DIP switch SW1 to OFF
4.
If system is still unstable, set Soft Coupling SW2 to ON. This may indicate soft or worn couplings in drive
train.
5.
Remove E1 to E2 jumper. See section 4, Wiring diagram.
1.
Readjust GAIN and STABILITy
2.
Set Lead Circuit and Soft Coupling DIP switches SW1 and SW2 to ON in the following order: First SW1,
Second SW2, and Third SW1 & SW2.
3.
Check fuel system linkage during engine operation for:
•
binding
•
high friction
•
poor linkage
4.
Adjust DEAD TIME COMPENSATION by adding a capacitor from posts E1 to E2. See section 4, Wiring
diagram. Start with 10 mF and increase until instability is eliminated.
5.
Add small amount of droop (jumper K and L). See section 4, Wiring diagram.
1.
If increasing GAIN does not reduce the instability but not totally correct it issue may be with engine.
2.
If this is the case, there is most likely a problem with the engine itself. Check for:
•
engine mis-firings
•
an erratic fuel system
•
load changes on the generator set voltage regulator.
3.
If throttle is slightly erratic, but performance is fast, move SW1 to the OFF position.
ProBaBLe caUSe
ProBaBLe SoLUTIon
7
ESD5550-5570 Series Speed Control Unit 1-2021-E1 PIB1003
Governors America Corp. © 2021 Copyright All Rights Reserved
