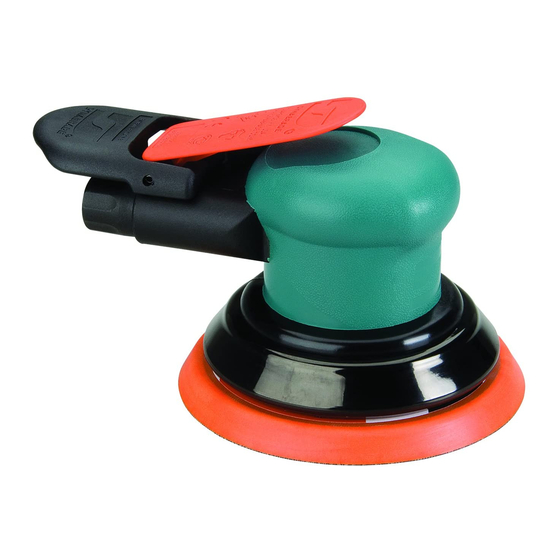
Dynabrade Dynorbital-Spirit 21060 매뉴얼 - 페이지 5
{카테고리_이름} Dynabrade Dynorbital-Spirit 21060에 대한 매뉴얼을 온라인으로 검색하거나 PDF를 다운로드하세요. Dynabrade Dynorbital-Spirit 21060 13 페이지. 12,000 rpm air powered random orbital sander
Dynabrade Dynorbital-Spirit 21060에 대해서도 마찬가지입니다: 운영 및 유지보수 지침 매뉴얼 (8 페이지), 운영 및 유지보수 매뉴얼 (13 페이지)

Buy parts on line at https://Dynashop.co.uk/ for all things Dynabrade
Central Vacuum/Machine Exhaust
7
Non-Vacuum to Vacuum Conversion Kits
Original
Converts
Non-Vac Tool
to
3-1/2" (89mm)
Self-Generated Vac-Ready
3-1/2" (89mm)
Central Vac-Ready
5" (127mm)
Self-Generated Vac-Ready
5" (127mm)
Central Vac-Ready
6" (152mm)
Self-Generated Vac-Ready
6" (152mm)
Central Vac-Ready
To Disassemble:
1. Disconnect tool from power source. Invert machine and secure in vise, using
2. Remove sanding pad with
50679
3. Remove
56028
Muffler Cap and
muffler body from housing (not applicable for Self-Generated Vac to Central Vac).
Non-Vac to Self-Generated Vac for Hook-Up to Self-Contained Dust Collection System
1. Attach
57083
Vacuum Adapter to either 57084, 57086,
sure the protrusions on the overskirt or shroud are aligned with the notches on the housing.
2. Place
95526
O-Ring on the muffler body between the shoulder and the four (4) protrusions. Using a 12mm hex wrench, attach the muffler body and
o-ring to the housing through the vacuum adapter.
3. Place vacuum nozzle into the vacuum adapter with the slots facing outward making sure that the knob on the nozzle is aligned with the slot in the adapter.
4. Place
57067
Vacuum Tube into the vacuum adapter with the grooves facing inward until the adapter "snaps" onto the tube and the tube cannot be pulled
out. If the tube can be pulled out, rotate it 1/4 turn and place it back into the adapter until it "snaps".
5. Rotate tube until holes line up. Insert dowel pin in holes until it is centered. Attach sanding pad, attach machine to portable dust collection system.
Non-Vac to Central Vac
1. Attach
57093
Vacuum Adapter to either 57084, 57086,
sure the protrusions on the overskirt or shroud are aligned with the notches on the housing.
2. Using a 12mm hex wrench, attach the muffler body to the housing through the central vacuum adapter.
3. Place muffler cap with inserts on muffler body making sure that the protrusions on the body fit in the pockets on the cap.
4. Attach weight-mated vacuum sanding pad with
Self-Generated Vac to Central Vac
1. Remove
96197
Dowel Pin with an 1/8" drive pin. Remove
2. Using a small flat screwdriver, pry vacuum nozzle until it is loose and then remove it by using two fingers to push and pull it until it hits the "legs" on
vacuum adapter. Place vacuum tube back into vacuum adapter far enough to push the "legs" back then push vacuum nozzle and vacuum tube
out the rest of way.
3. Using a 12mm hex wrench (supplied in
Remove the o-ring from the muffler body.
4. Remove
57083
Vacuum Adapter and attach
Then attach to the housing making sure that the protrusions on the overskirt or shroud are aligned with the notches on the housing.
5. Using a 12mm hex wrench, attach the muffler body and o-ring to the housing through the central vacuum adapter.
6. Place muffler cap with inserts on muffler body making sure that the protrusions on the body fit in the pockets on the cap. Attach sanding pad.
Central Vac to Self Generated Vac
1. Remove
57093
Central Vacuum Adapter and put the
Buy parts on line at https://Dynashop.co.uk/ for all things Dynabrade
Machine Exhaust Assemblies
Self Generated Vacuum (Vac-Ready)/Machine Exhaust
1
2
3
8
9
Kit
Part Number
57118
57119
57120
57121
57122
57123
Vacuum Conversion
(26mm) Open-End Wrench (supplied with sander) and lip-seal shroud from housing.
56027
Muffler Insert (2) from
57066
57087
Vacuum Overskirts or
57087
Vacuum Overskirts or
50679
(26mm) Open-End Wrench. Attach machine to central vacuum system.
57067
Vacuum Tube from
57098
Repair Kit), remove the
57093
Vacuum Adapter to either 57084, 57086,
57083
Vacuum Adapter in its place.
(continued on next page)
3
4
5
Non-Vacuum/Machine Exhaust
Index Key
No.
Part #
Description
1
57083
Vacuum Adapter
2
96197
Dowel Pin
3
57066
Muffler Body
4
95526
O-Ring
5
59088
Vac Nozzle
Optional: 30 quantity Muffler Insert available, P/N 56054.
Instructions..
57092
Collar (supplied in
57098
Muffler Body. Using a 12mm hex wrench (supplied in
57089
Vacuum Lip-Seal Shroud. Then attach to the housing making
57089
Vacuum Lip-Seal Shroud. Then attach to the housing making
57083
Vacuum Adapter by turning it clockwise while pulling backward.
57066
Muffler Body and
95526
O-Ring from the housing through the adapter.
57087
Vacuum Overskirts or
6
3
8
9
10
6
57067
Vac Tube
7
57093
Vacuum Adapter
8
56027
Muffler Insert (2)
9
56028
Muffler Cap
10
59273
Muffler Assembly
Repair Kit) or padded jaws.
57098
Repair Kit), remove
57089
Vacuum Lip-Seal Shroud.
