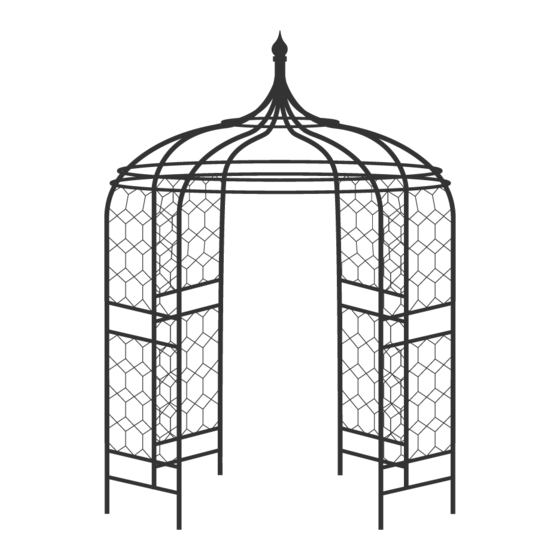
Agriframes 40520-TBK 빠른 시작 Quide - 페이지 3
{카테고리_이름} Agriframes 40520-TBK에 대한 빠른 시작 Quide을 온라인으로 검색하거나 PDF를 다운로드하세요. Agriframes 40520-TBK 4 페이지. Classic extra gothic gazebo matt black 3m

9. Join the Medium Top Ring pieces together, covering the join between the Top Ring pieces
with a moisture seal.
10. Repeat this process for the Large and Small Top Rings.
11. Ensure that the Rop Rings are level and concentric to the Gazebo Top, once satisfied with
the position of the rings, tighten the connectors.
Move the Top section to the intended location...
12. Move the Gazebo top to where the structure will be installed, ensure that the 4 pairs of legs
are positioned equidistance apart.
13. Once satisfied with the position of the curves, firmly push the structure into the ground to
make an impression or mark in the soil. These impressions indicate where the uprights need
to be inserted.
14. Remove the Gazebo top, using the Hole Maker create holes 15" deep, where you have
marked the ground. Ensure the holes are vertical and to the same depth.
Insert the Uprights...
15. Tap an end plug into the non-reduced end of the 84" uprights.
16. Insert an upright into the holes, ensure that the uprights stand vertical and are level to one
another.
17. Attach 2 spacer bars to each of the uprights, position the spacer bar as per Figure 3.
18. Slide a moisture seal onto the reduced end of the upright.
Lift the Top of the Gazebo onto the uprights...
19. Lift the constructed Gazebo Top onto the uprights, ensure that the Gazebo Top is lowered evenly
onto the uprights.
20. Cover the Joins with moisture seals.
Final checks...
21. Check that all of the joins have been covered by moisture seals.
Figure 3: Position the Spacer Bars on the Uprights
Agriframes, Journal house, Hartcliffe Way, Bristol, BS3 5RJ
Orderline: 0117 934 1790 Fax: 0117 934 17 91
Order on-line: www.agriframes.co.uk
