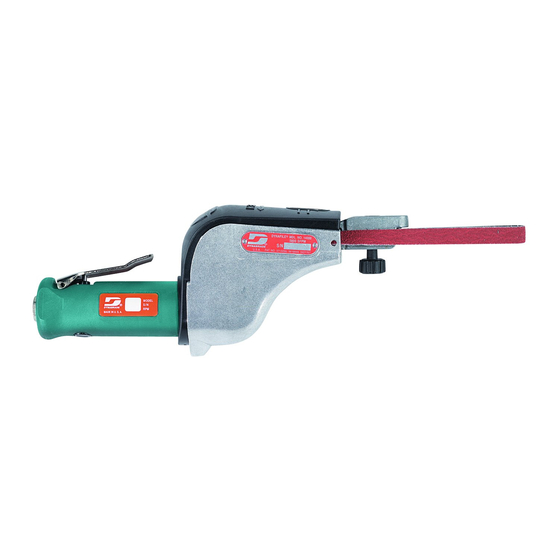
Dynabrade Dynafile 14000 안전, 운영 및 유지보수 매뉴얼 - 페이지 5
{카테고리_이름} Dynabrade Dynafile 14000에 대한 안전, 운영 및 유지보수 매뉴얼을 온라인으로 검색하거나 PDF를 다운로드하세요. Dynabrade Dynafile 14000 12 페이지. 20,000 rpm / versatility kit
Dynabrade Dynafile 14000에 대해서도 마찬가지입니다: 안전, 운영 및 유지보수 매뉴얼 (12 페이지)

Disassembly/Assembly Instructions - Dynafile
Important: Manufacturer's warranty is void if tool is disassembled before warranty expires.
Notice: A complete Tune-Up Kit, part number 95600, is available which includes assorted parts to help maintain motor in peak condition.
Please refer to parts breakdown for part identification.
Disconnect tool from power source before tool repair.
To Disassemble:
1. Disconnect the tool from air supply.
2. Secure the 11418 Housing in a padded vise.
3. Use a 9/64" hex key to loosen 95168 Screw and to remove the 01197 Air Motor, 11424 Wave Spring, and 11419 Cover.
4. To remove the 11421 Idler Arm Assembly use a 1/8" dia. punch and drive out the 95216 Pivot Pin.
Motor Disassembly:
1. Hold the 01197 Air Motor in a soft jaw (aluminum or bronze) vise securing it at the flats near the inlet area of the housing.
2. To remove the 01111 Drive Wheel insert a 3/16" hex key through the center of the drive wheel and into the 01120 Rotor.
3. Hold the drive wheel with pliers or pipe wrench and turn the 01111 Drive Wheel counter-clockwise to remove.
4. Use an adjustable pin wrench or 50971 Lock Ring Wrench to remove the 04087 Lock Ring by turning it counter-clockwise. Remove the 04078 Felt
Silencer and air control ring.
5. The motor assembly can be pulled out of the motor housing.
6. Fasten a 2" bearing separator around the portion of the 01013 Cylinder closest to the rear bearing/bearing plate assembly. Place the separator and
motor on the table of an arbor press so that the threaded rotor shaft points toward the floor.
7. Use a 3/16" dia. drive punch and press the rear shaft of the rotor out of the 01015 Rear Motor Bearing.
8. Remove the 01015 Bearing with 96211 Bearing Removal Tool and an arbor press.
9. Hold the vane portion of the rotor in a soft jaw (aluminum or bronze) vise and turn the 04081 Rotor Nut counter-clockwise.
10. The 01007 Bearing, 01008 Front Bearing Plate, 01121 Shims, and 01010 Spacer can now be removed from the 01120 Rotor.
Motor Disassembly Complete.
Valve Body Disassembly:
1. Position the flats of the 30420 Housing in a soft jaw (aluminum or bronze) vise with the air inlet pointing up.
2. Hold the 01494 Inlet Adapter stationary with a wrench and remove any air fitting. Important: The 01494 Inlet Adapter must be held securely to prevent
damage to the 30420 Housing.
3. Remove 01494 Inlet Adapter to access the 01438 Spring, 01472 Tip Valve, and 01464 Seal.
4. Use a 2.5mm drive punch punch to remove 01017 Pin and the throttle lever.
5. The 01477 Valve Stem can be pulled out of the 01247 Speed Regulator Assembly.
6. Use retaining ring pliers to remove the 95558 Retaining Ring and then push 01247 Speed Regulator Assembly out of the 30420 Housing.
Disassembly Complete.
Motor Assembly:
Important: Be sure parts are clean and in good repair before assembling.
1. Place 01120 Rotor in an aluminum or bronze jaw vise with a threaded spindle pointing upwards.
2. Slip 01010 Spacer onto rotor.
3. Place a .002" shim into front bearing plate as an initial spacing and slip 01007 Bearing into plate.
Note: 01121 Shim Pack contains .001" and .002" shims.
4. Install bearing/bearing plate assembly onto rotor.
5. Install 04081 Rotor Nut onto assembly.
6. Tighten rotor nut onto rotor (torque to 17 N•m/150 in. - lbs.).
7. Check clearance between rotor and bearing plate by using a .001" feeler gauge. Clearance should be at .001" to .0015". Adjust clearance by repeating
steps 1-4 with different shim if necessary.
8. Once proper rotor/gap clearance is achieved, install well lubricated 01011 Blades (4) into rotor slots. Dynabrade air lube P/N 95842 is
recommended for lubrication.
9. Install cylinder over rotor. Be sure air inlet holes of cylinder face away from bearing plate.
10. Press 01015 Rear Bearing into 01244 Rear Bearing Plate. Press bearing/bearing plate assembly onto rotor (96241 Bearing Press Tool is available). Be
sure that pin and air inlet holes line-up with pin slot and air inlet holes in cylinder.
Important: Fit must be snug between bearing plates and cylinder. If too tight, rotor will not turn freely. Rotor must then be lightly tapped at press fit
end so it will turn freely while still maintaining a snug fit. A loose fit will not achieve the proper preload of motor bearings.
11. Secure motor housing in padded vise so motor cavity faces upwards.
12. Install motor assembly into housing, making sure motor drops all the way into housing.
Note: Align the rear bearing plate node with the notch inside the housing.
13. Insert air control ring and 04078 Felt Silencer into 04087 Lock Ring and install onto motor housing (torque 23 N•m/200 in. - lbs.).
14. Motor adjustment must now be checked. With motor housing still mounted in vise, pull end of rotor and twist (10-15 lbs. force), rotor should turn
freely without drag. If drag or rub is felt, then increase preload or remove shim. Also, push end of rotor and twist (10-15 lbs. force), rotor should
turn freely without drag. If drag or rub is felt, then deload or add shim.
15. Install 10295 Screen and 01111 Drive Wheel.
(continued on next page)
5
®
