Aircraft in Miniature Limited Historic Wings Fokker Spin 1912 조립 지침 매뉴얼 - 페이지 2
{카테고리_이름} Aircraft in Miniature Limited Historic Wings Fokker Spin 1912에 대한 조립 지침 매뉴얼을 온라인으로 검색하거나 PDF를 다운로드하세요. Aircraft in Miniature Limited Historic Wings Fokker Spin 1912 10 페이지. 1:72 metal kit

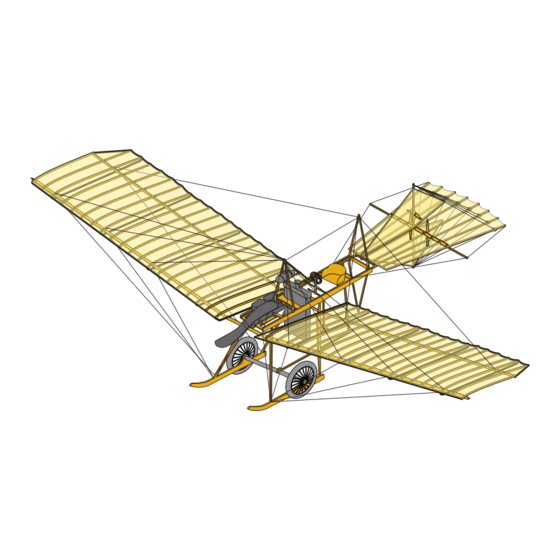
The first Fokker Spin was the first aircraft which Anthony Fokker built in collaboration with Jacob
Goedecker and business partner Franz von Daum in 1910. The many bracing wires made the aircraft
look like a giant spider, giving it the name of Spin (Dutch for "spider").
This first Spin was destroyed when von Daum flew it into a tree. The airframe was destroyed but the
engine was salvaged and was used in the second version.
This model is of the second version of the Spin was built soon afterwards. This aircraft was used
when Fokker taught himself to fly and earned his pilot license.
This Historic Wings kit is made from etched brass for the main structure, with cast metal and
etched nickel silver detail parts. The flying surfaces can be covered with the Litespan film
supplied, although many modellers may prefer to leave the structure uncovered to show the details.
Brass components can be soldered together, or joined with cyanoacrylate (super glue - CA
adhesive) or 5-minute epoxy (epoxy adhesive). If you have the skills and equipment we
recommend soldering for the brass parts.
To remove parts from the etched fret, you can use a pair of side cutters, or put the fret on a
ceramic tile, and press down on each attaching tab with a sharp knife. If you use the 'knife & tile'
option, put the attaching tab with the half-etched side of the tab face down. Whichever method is
used, it may necessary to remove the burr of the attachment tab with a needle file afterwards.
The wings are etched with integral ribs. Hold the leading or trailing edge in a vice or clamp,
and then hold each rib in turn with a pair of fine flat-nosed pliers, and twist that rib through 90
degrees. When all th e ribs have been turned, clamp the trailing edge, and do the process again.
Make sure of the orientation of the wing and ribs so that you twist them in the correct direction!
Where etched parts are joined with two inter-locking slots it may be necessary to enlarge a slot
with a needle file. This is because photo-etching is not an exact process, and
etching is slightly uneven across a sheet.
Cast Metal
Engine. . . . . . . . . . . . . . . . . . . . . . . . . . . . . . 1 off
Form tool - female . . . . . . . . . . . . . . . . . . . . 1 off
Form tool - male . . . . . . . . . . . . . . . . . . . . . . 1 off
Fuel tank . . . . . . . . . . . . . . . . . . . . . . . . . . . . 1 off
Figure - Anthony Fokker . . . . . . . . . . . . . . . 1 off
Main wheel tyre . . . . . . . . . . . . . . . . . . . . . . 2 off
Propeller . . . . . . . . . . . . . . . . . . . . . . . . . . . . 1 off
Fret 2
FUEL PIPE
MAIN WHEEL SPOKE DISCS
History
Introduction
Parts List
Etched metal
Fret 1 - brass . . . . . . . . . . . . . . . . . . . . . . . . 1 off
Fret 2 - nickel silver . . . . . . . . . . . . . . . . . . 1 off
Miscellaneous
Decals . . . . . . . . . . . . . . . . . . . . . . . . . . . 1 sheet
Instructions . . . . . . . . . . . . . . . . . . . . . . . . . 1 set
Fokker Spin - Fret 2
2011
RADIATOR HOSE
sometimes the
Spare and unused parts
are shown in red.
RADIATOR PIPE
