Galak Electronics VG-211 매뉴얼 - 페이지 5
{카테고리_이름} Galak Electronics VG-211에 대한 매뉴얼을 온라인으로 검색하거나 PDF를 다운로드하세요. Galak Electronics VG-211 6 페이지. Singing snowman
Populating the PC board
Make
sure
to
properly
components, locating them on the layout and on the
parts list included in these instructions. Do not remove
the LEDs from their individual packets until you are
ready to mount them, as they are color-coded.
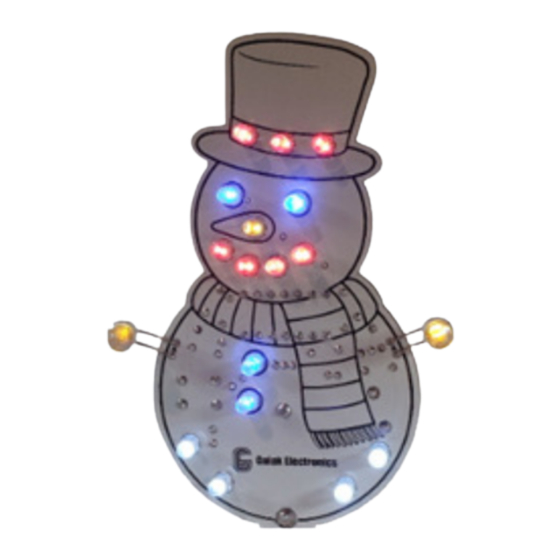
To simplify the process of populating the PCB, we
highly recommend mounting the LEDs first. The LEDs
are not labeled on the board, so follow the pattern to
the right. With the exception of LED1 and LED2 all the
LEDs are oriented with the cathode to the right,
meaning the shorter lead on each LED goes to the
right.
LED1 and LED2 are used create the arms. The shorter
leads go toward the top of the board. The rest of the
LEDs can be mounted however you like, but we
recommend using the pattern to the left for the best
results.
identify
each
of
Once you have
all of the LEDs
soldered and
trimmed, flip the
board over and start populating the board with the
lower profile components. In this case, they will be the
resistors R2-R9. Next, mount C2 and C3.
Now, mount the socket for IC2, orienting the arc to
align with the arc on the silkscreen. Now, you can
mount PB1 and C1. Note the orientation for C1. The
positive lead is the longer lead and should match up
with the "+" on the PC board.
Finally, mount SPK1 and battery holder BAT1 again
noting the orientation of each device. SPK1 is marked
on the bottom with a "+" symbol.
You are now ready to insert IC2 into the socket. Use
caution when handling the IC, as it is static sensitive.
Orient IC2 such that the arc on the IC aligns with the arc
on the socket and carefully press the IC into place. Do
not force it as you can bend the pins. If necessary, bend
the leads inward by holding the IC at each end and
gently pressing the pins against a flat surface.
the