Copernicus LLS100 조립 설명서 - 페이지 7
{카테고리_이름} Copernicus LLS100에 대한 조립 설명서을 온라인으로 검색하거나 PDF를 다운로드하세요. Copernicus LLS100 10 페이지. Teacher trolley
Copernicus LLS100에 대해서도 마찬가지입니다: 조립 설명서 (8 페이지)
Actual Size:
2
M6 x 30mm Screw
A
4x
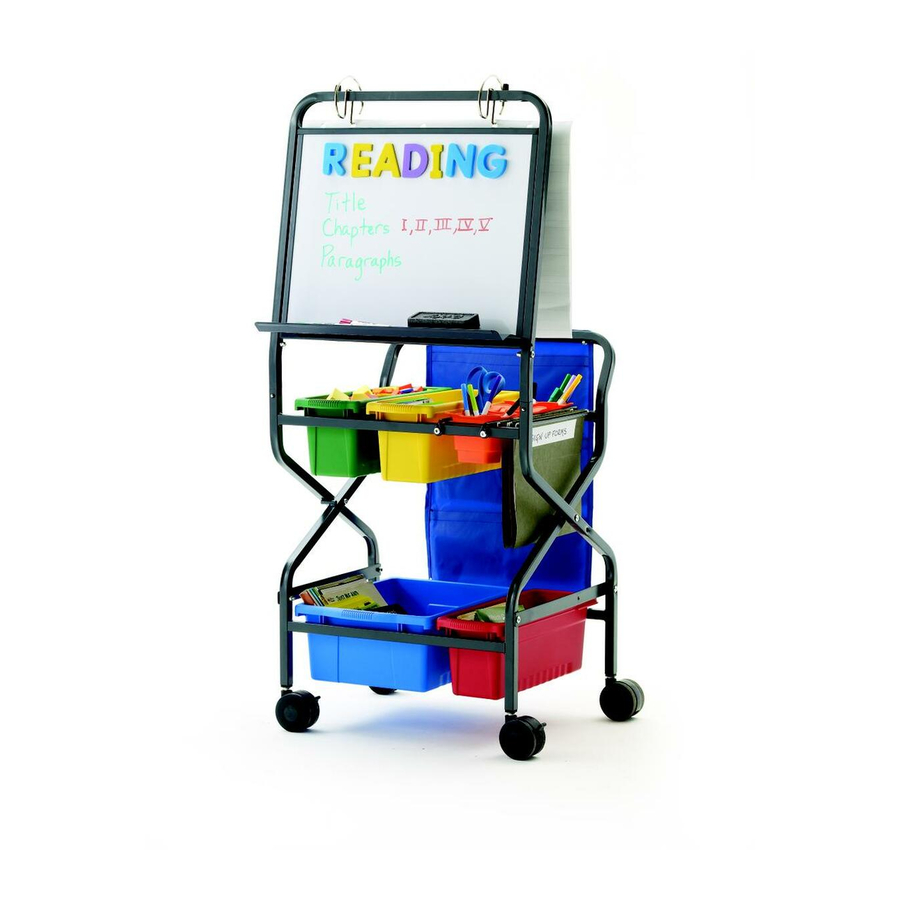
Install Tiny Tub Rack
Bolt Tiny Tub Rack to Frame with the File Folder Loop on the Outside
You will need: (Not to Scale)
3
Install Casters onto Frame
1
Flip Frame Over
M6 Lock Nut
E
4x
3" Locking Caster
4x
2
Press Casters Into Lower Frame Legs Until You Hear a Click
CLICK!
3
After Caster Instillation Flip Frame Right Side Up
LLS100 - Version A - Released May 26, 2021 - Copernicus Educational Products Inc.
You will need: (Not to Scale)
Tiny Tub Rack
1x
File Folder Loop
8mm/10mm Hex Wrench
1x
Allen Key
1x
7