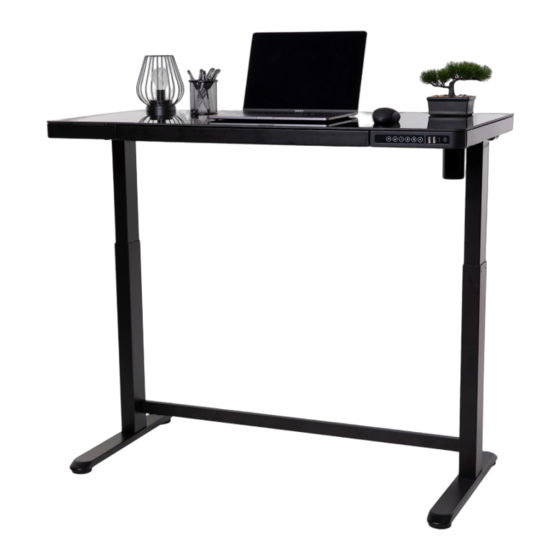
HIILO Homii 조립 지침 매뉴얼 - 페이지 7
{카테고리_이름} HIILO Homii에 대한 조립 지침 매뉴얼을 온라인으로 검색하거나 PDF를 다운로드하세요. HIILO Homii 11 페이지. Desk

Guide du panneau de controle/ Control Panel Guide
1. Peser et tenez sur les boutons haut ou bas pour regler la hauteur du bureau ; l'ecran affichera "bot" lorsque le bureau
atteindra son point le plus bas ; et ii affichera "top" lorsque le bureau atteindra son point le plus haut.
2. Boutons : 1,2,3,4 sont les quatre boutons de memoire de hauteur, une fois une hauteur est trouver, peser et tenez le
bouton environ 3s pour enregistrer la hauteur actuelle .
3.
REPOSITIONNEMENT/REINITIALIS ATION MANUELLE: Appuyez sur les boutons 3 et 4 en meme temps pour environs 5
secondes, !'indication RST apparaitra. Relachez boutons 3 et 4. Maintenant appuyer sur le bouton de descente jusqu'a ce
que la table s'abaisse a la position la plus basse et rebondisse un peu vers le haut et s'arrete. L'ecran affiche la hauteur la
plus basse"bot'; relachez le bouton de descente, la reinitialisation est terminee et la table peut etre utilisee normalement.
4. Le bureau a 2 ports USB Type « A » et un port type « C ». Ils peuvent fournir du courant et ils supportent les protocoles
de charge. Type « C » sortie: 5V3A/9V2A/12V1.5A; Type « A » sortie: 3.6-6.5V2.4A/6.5-9V2A/12V1.5A. Sortie totale : 18w
max. Lorsque le bureau est en opération, la sortie des ports arrêteras, une fois que le bureau s'arrête, la sortie reprendras.
5. Appuyez brievement sur le bouton "LOCK" pour obtenir la fonction de verrouillage anti-enfants, afin d'eviter tout
contact accidentel et de garantir leurs securite. Le bouton de verrouillage/deverrouillage est commutable, l'ecran
affichera "LOC" lorsque le bureau est verrouille.
6. Peser et tenez sur le bouton haut et bas en meme temps pour changer le niveau de sensibilite de collision. Lorsque
l'ecran affiche "A-0'; cela signifie que la fonction anti-collision est desactivee, "A-1 "signifie que la sensibilite anti-collision
est au niveau 1 (le mains sensible), "A-2" signifie que la sensibilite anti-collision est au niveau 2, "A-3" signifie que la
sensibilite anti-collision est au niveau 3, (le plus sensible).
1. Press and hold the up or down buttons to adjust the height of the desk; The screen will show "bot"when the desktop
runs to its lowest point; and it will show "top"when the desktop runs to its highest point.
2. Buttons: 1,2,3,4 are the four height memory buttons. Once desired height is reached, press and hold the button about
3s to record the current height.
3. REPOSITIONING/RESET: Press the 3 and 4 buttons at the same time for approx. 5 seconds, the RST reset indication will
appear. Release buttons 3 and 4, then press the down button until the table lowers to the lowest position and rebounds
up a bit then stops. The display shows the lowest height "bot'; release the down button, the reset is over and the table can
be used normally.
4. The desk has two USB ports and one type-C port, they can supply power to other electronics and support charging
protocol. Type-C Output: 5V3A/9V2A/12V1.5A; Type-A Output: 3.6-6.5V2.4A/6.5-9V2A/12V1.5A; Total output power of single
port: 18W Max. When the desk is lifting, the output will be stopped; when lifting stops, the output will be restarted.
5. Short press the "LOCK" button to activate the child lock function, to avoid children accidentally activating and to assure
their safety. The child lock/unlock button is switchable, screen will show "LOC" when the desk is locked.
6. Press and hold the up and down button to switch the collision sensitivity level. When the screen shows "A-0'; it means
the anti-collision function is off, "A-1 "means the anti-collision sensitivity is in level 1 (lowest sensitivity), "A-2" means the
anti-collision sensitivity is in level 2, "A-3" means the anti-collision sensitivity is in level 3 (highest sensitivity).
5
