AFL Hyperscale 6RU 설치 매뉴얼 - 페이지 13
{카테고리_이름} AFL Hyperscale 6RU에 대한 설치 매뉴얼을 온라인으로 검색하거나 PDF를 다운로드하세요. AFL Hyperscale 6RU 20 페이지. Front-access v-panel
AFL Hyperscale 6RU에 대해서도 마찬가지입니다: 설치 매뉴얼 (12 페이지), 설치 매뉴얼 (16 페이지)
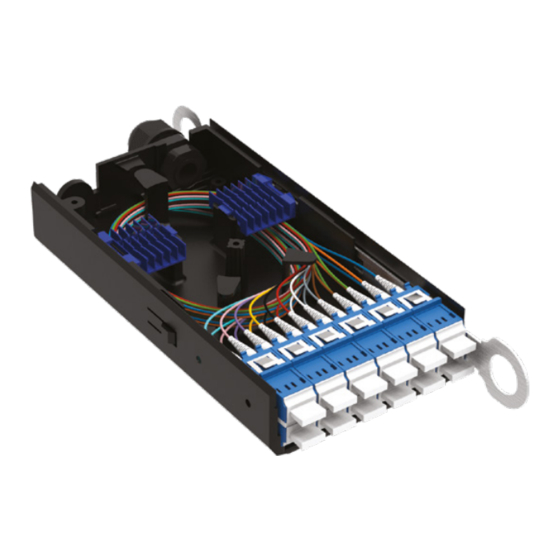
Cable Installation
Cable Fiber
Slack Loop
Cable Braid
Cable
Tie-Off Point
Cassette
Identification
Labels
Splice Tray 1 (BOTTOM): Tie off cable braid to splice tray. Starting with internal pigtail #1
25
fiber (GREEN), place splice protector into
Cable Fiber
Slack Loop
Cable Braid
Cable
Tie-Off Point
Splice Tray 2 (TOP): Tie off cable braid to splice tray. Starting with internal pigtail #7
26
fiber (GREEN), place splice protector into
Series
Splice Tray 1
(Bottom Tray)
YELLOW
YELLOW
holder. Coil fiber in suggested route shown.
Splice Tray 2
(Top Tray)
holder. Coil fiber in suggested route shown.
U-Series 6RU Front-Access V-Panel (FVP)
Internal SWR
Fiber Slack Loop
(Pre-Installed)
Tail
Identification
Labels
(RED),
splice to cable
Internal SWR Pigtail
Fiber Slack Loop
(Pre-Installed)
Tail
Identification
Labels
Cassette
Identification
Labels
(RED),
splice to cable
© AFL Hyperscale. All rights reserved
®
Pigtail
13