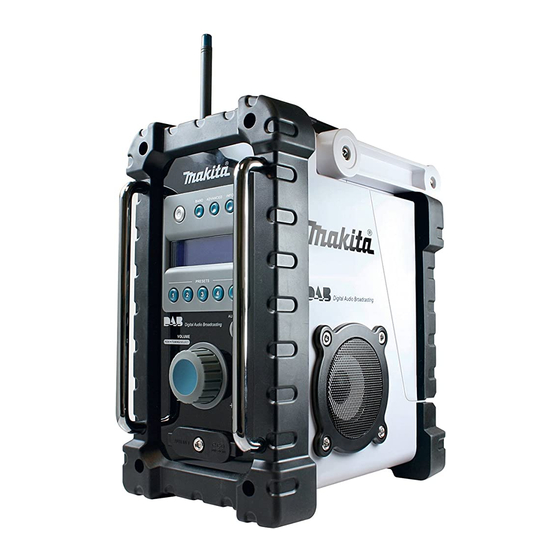
Makita BMR101 사용 설명서 - 페이지 7
{카테고리_이름} Makita BMR101에 대한 사용 설명서을 온라인으로 검색하거나 PDF를 다운로드하세요. Makita BMR101 9 페이지. Job site dab radio

- 1. Important Safety Instructions
- 2. General Safety Rules
- 3. Illustration of General View
- 4. Controls
- 5. Battery Installation
- 6. Scan/Manual Tuning Fm
- 7. Operating the Radio
- 8. Display Modes - FM
- 9. Storing/Recalling Stations in Preset Memories
- 10. Brightness Control
- 11. System Reset
- 12. Specifications
- 13. Maintenance
2. Select the desired waveband by pressing the Band
button. Make sure the soft bended rod antenna has
been well placed for best FM reception. Try to avoid
operating the radio next to a computer screen and
other equipment which will cause interference to the
radio.
3. Press and release the Auto Tune button and the radio
will search and stop automatically when it finds a radio
station. The radio will continue searching for the next
available station unless the operator presses the Auto
tune button to stop the scanning.
4. Rotate the Volume/Tuning Control/Select knob/button
to get the desired sound level. The LCD display will
show sound level changes.
Note:
Before operating the Tuning/Volume Control/Select
knob/button, press the Tuning/Volume control knob/
button to shift from the tuning control mode.
5. To turn off the radio, press and release the Power
button.
Manual Tuning - FM
1. Press and release the Power button to turn on the
radio.
2. Select the desired waveband by pressing the Band
button. Adjust the antenna as described above.
3. A single clockwise rotation of the Tuning/Volume
Control/Select knob/button will change the frequency
in the following increment:
FM: 50 or 100 kHz
Note:
If the radio is in the volume control status, press and
release the Tuning/Volume Control/Select knob/button
to shift to the tuning control mode.
4. Keep rotating the Volume/Tuning Control/Select knob/
button until the desired frequency is shown on the
display.
5. Rotate the Volume/Tuning Control/Select knob/button
to get the desired sound level.
6. To turn off the radio, press and release the Power
button.
Display modes - FM
Your radio has a range of display options for FM radio
mode.
1. Repeat pressing and releasing the Info button to cycle
through the different options.
a. Program station
b. Radio text
c. Program type
d. Time & date
e. Frequency
Indicates the name of the
station being listened to.
Indicates text messages such
as new items, etc.
Indicates the type of station
being listened to such as Pop,
Classic, News, etc.
Indicates the current time and
date.
Indicates the frequency of the
FM signal.
Storing stations in preset memories (DAB
and FM)
There are five memory presets for each waveband.
1. Press and release the Power button to turn on the
radio.
2. Tune to the desired station using one of the methods
previously described.
3. Press and hold down the desired Preset button until
the radio beeps. The preset number will appear in the
display and the station will be stored in the selected
preset button.
4. Repeat this procedure for the remaining presets.
5. Stations stored in the preset memories can be
overwritten by following procedures described above.
Recall stations from the preset memories
(DAB and FM)
1. Press and release the Power button to turn on the
radio.
2. Select the desired waveband.
3. Press the desired Preset button momentarily, the
preset number and station frequency will appear in the
display.
Brightness control
The backlight of the display can be adjusted.
1. Press and release the Advanced setting button.
2. Rotate the Volume/Tuning Control/Select knob/button
to scroll through the Advanced setting until the display
shows "Backlight." Press and release the Volume/
Tuning Control/Select knob/button to enter the setting.
3. Rotate the Volume/Tuning Control/Select knob/button
to choose for enabling or disabling the backlight
function, then press and release the Volume/Tuning
Control/Select knob/button to confirm the setting.
System reset
If your radio fails to work correctly, or some digits on the
display are missing or incomplete, carry out the following
procedure.
1. Press and release the Advanced setting button.
2. Rotate the Volume/Tuning Control/Select knob/button
until "Factory reset" appears on the display. Press and
release the Volume/Tuning Control/Select knob/button
to enter the setting.
3. Rotate the Volume/Tuning Control/Select knob/button
to choose "Yes" or "No." Select "Yes" by pressing the
Volume/Tuning Control/Select knob/button and a full
reset will be performed.
How to play other audios
CAUTION:
Unplug this apparatus before connecting other
audios.
• There are the two AUX sockets. The AUX 1 is located
on the front panel, and the AUX 2 is located on the
battery compartment.
• Connect a stereo or mono source (i.e. iPod, MP3, or
CD player) to the AUX IN with an audio cord.
7
