JamHub Tracker MT16 사용자 설명서 - 페이지 7
{카테고리_이름} JamHub Tracker MT16에 대한 사용자 설명서을 온라인으로 검색하거나 PDF를 다운로드하세요. JamHub Tracker MT16 20 페이지. Portable multitrack recorder
JamHub Tracker MT16에 대해서도 마찬가지입니다: 사용자 설명서 (20 페이지), 매뉴얼 (2 페이지)
Lights
9
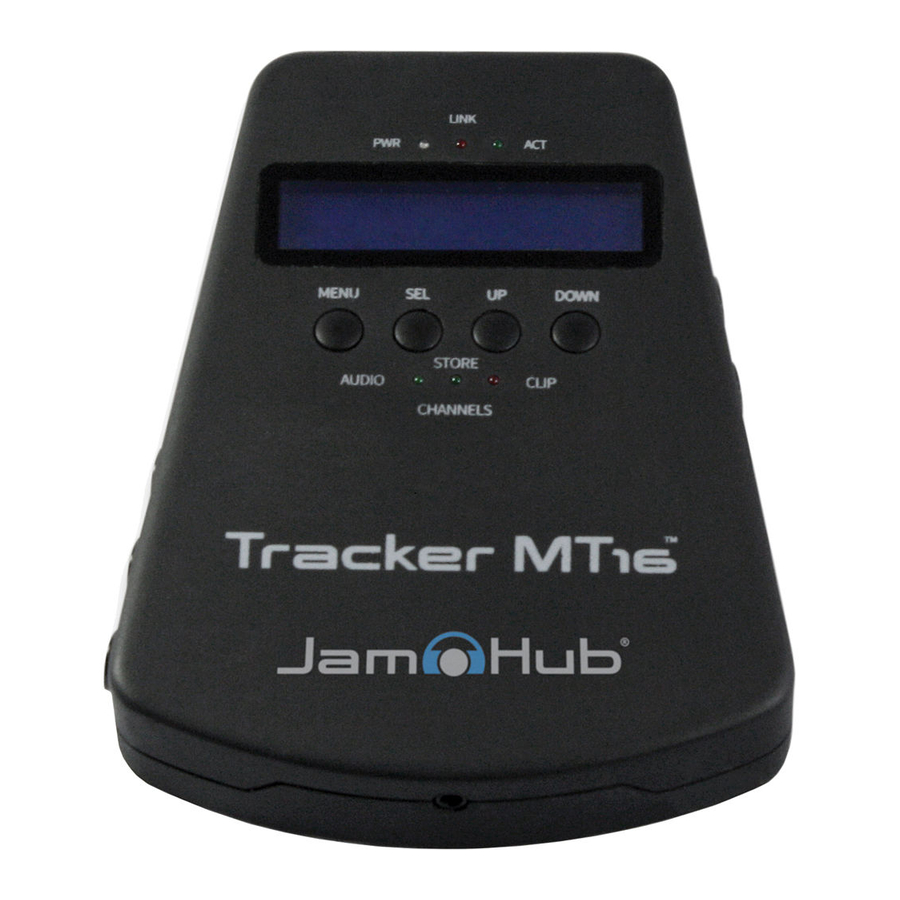
Above Display Lights:
9.
PWR - Your Tracker MT16 is powered
on with proper line voltage and ready
for use.
10. LINK – Network connectivity has been
successfully established and you are ready
to upload or download data.
11. ACT – Displays real-time data packet activity
in and out of your Tracker MT16.
Buttons
15. Move back one level in the menu. Hold down
for 2 seconds to go back to the top menu.
16. Select your current menu option and start a
new recording when armed to record. Hold
for 3 seconds to save some selected menu
functions.
10
11
15
16
12
Below Display Lights:
12. ARMED – Record mode is set to on and all
selected tracks will be recorded once the
button is pressed.
13. REC – You are capturing sound!
14. CLIP – Audio is beyond appropriate
levels on one or more channels and one
or more channels will need to be lowered
at the source.
Note: Any single channel will set the clip light
off letting you know that a channel is clipping
(distorting the sound) before it gets to the
Tracker MT16 inputs. Lower the level at the
source until the clip light no longer flashes.
17
17. Move up the menu or character hierarchy
18. Move down the menu or character hierarchy
13
14
18
7