Gardena 380 AC 사용 설명서 - 페이지 4
{카테고리_이름} Gardena 380 AC에 대한 사용 설명서을 온라인으로 검색하거나 PDF를 다운로드하세요. Gardena 380 AC 13 페이지. Accu rechargeable cylinder lawnmower
Gardena 380 AC에 대해서도 마찬가지입니다: 사용 설명서 (13 페이지), 사용 설명서 (13 페이지)
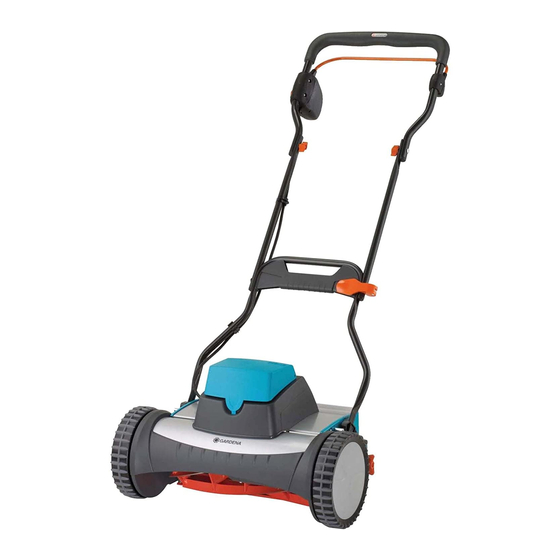
3. Assembly
Assembling the handle :
9
B
6
5
4
A
0
7
8
Fit Accu :
D
F
E
4. Function
Mowing correctly :
14
1. Insert the lower part of the
1
upright
for the upright
the stop and fix with the screws
2. Push connecting pieces
below into the lower part of the
1
upright
5
upright
3. Insert threaded rod
7
side) through the centre part of the
5
up-right
and the connecting piece
4. Push threaded bearing
1
5. Screw the clamping lever
it grips when moved. The centre part of the upright is fixed.
6. Push threaded rod
centre part of the upright
The safety starter lock
on the left.
7. Screw clamping lever
when moved. The upright is assembled.
8. Fix the motor cable
Warning ! Short-circuit – fire risk !
A
V Accu-contacts should never be bridged with metal !
The Accu is supplied charged at the factory but may lose charge if
C
it has been stored for a long time. Charge the Accu before using it
for the first time (see 5. Maintenance: Charging the Accu: ).
1. Press Accu cover
2. Insert the Accu
tions pointing towards the flat plugs
Warning !
A
The polarity + / - and the colours of the connections
on the Accu and the flat cable must match.
V Connect flat cable
matching the terminals (see adhesive label on
the Accu).
1. Secure Accu
2. Close Accu cover
To produce a well-maintained lawn we recommend cutting the
lawn one a week if possible. The lawn becomes thicker if cut
frequently.
Relatively long cut grass (> 1 cm) must be removed so that the
lawn does not become yellow and matted.
into the mountings
2
as far as
3
4
from
and middle part of the
.
6
(from the cable
, lower part of the upright
4
from the left.
8
into clamping lever
7
on to the threaded rod
6
from the left through the crossbar
5
and connecting piece
B
on the crossbar
7
on to the threaded rod
0
to the upright with the two cable clips
C
lightly at the front and open.
D
into the Accu compartment with the connec-
E
to the Accu connections,
D
with the retaining strap
C
.
1
2
3
.
1
7
.
6
until
9
4
.
9
must then be
6
until it grips
E
.
F
.
,
A
.