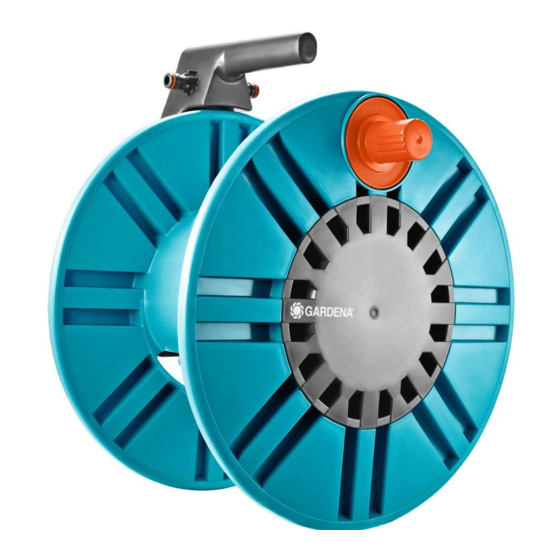
Gardena 2650 조립 지침 - 페이지 2
{카테고리_이름} Gardena 2650에 대한 조립 지침을 온라인으로 검색하거나 PDF를 다운로드하세요. Gardena 2650 3 페이지. Wall-mounted hose reel
Gardena 2650에 대해서도 마찬가지입니다: 조립 지침 (3 페이지)

D
Der Zusammenbau erfolgt entsprechend der Bildfolge.
Hinweise:
Griff in Trommelhälfte mit der größeren Achsen-Öffnung
x
(Bild 3) einführen.
Anschlussachse bis zum Einrasten einschieben und
x
Klemme mit 2 Schrauben festschrauben (Bild 4).
x
Handkurbel aufstecken (rastet hörbar ein) (Bild 5).
Abdeckung einschnappen (Bild 6).
x
Vor Einbruch der Frostperiode ist der Wandschlauch-
träger frostsicher zu lagern.
Sie erhalten zusätzliche Schlauchführungsrollen
x
(Art.-Nr. 2651) bei Ihrem GARDENA Händler.
G
Assembly according to the pictures.
Please insert the axle of the side panel with carrying
x
handle into the reel panel (Pic. 3).
x
Push in connection axle until it snaps in and secure
clamp with 2 screws (Pic. 4).
Insert rewind handle, you will hear a "click" if it is fitted
x
properly (Pic. 5).
Snap cover into place (Pic. 6).
x
You can order extra Hose Guides (Art. No. 2651) from
x
your GARDENA dealer.
F
Pour le montage de ce dévidoir mural, reportez vous aux
schémas explicatifs ci-joints.
Conseils:
Placez la poignée de transport sur le tambour côté mur
x
(celui où l'ouverture est la plus grande) (figure 3).
Introduisez le tambour sur l'axe jusqu'à encliquetage et
x
vissez à fond les deux demi-coquilles (figure 4).
Enfoncez la manivelle à fond, jusqu'au déclic (figure 5).
x
Mettez en place le capot de protection (figure 6).
x
x
Avant l'hiver, rangez votre dévidoir mural dans un end-
roit sec, à l'abri du gel.
Vous pouvez vous procurer d'autres guides-tuyau chez
x
les revendeurs GARDENA (réf. 2651).
V
Monteren volgens afbeeldingen.
Aanwijzing:
Draaggreep in de zijde van de trommel met de grootste
x
as-opening bevestigen (Afbeelding 3).
x
Aansluitas inschuiven tot deze vastklikt en klem met
2 schroeven vastschroeven (Afbeelding 4).
Handzwengel erop steken (klikt hoorbaar vast)
x
(Afbeelding 5).
Deksel vastklikken (Afbeelding 6).
x
Vorstvrij bewaren.
x
U kunt extra Slanggeleiders verkrijgen bij uw
x
GARDENA handelaar (Art. Nr. 2651).
2
S
Montera som bilderna visar.
Obs:
För in bärhandtagets centrumaxel i vindans mitt (Fig. 3).
x
Tryck in kopplingsaxeln så att den klickar fast och säkra
x
med klämman och de 2 skruvarna (Fig. 4).
Tryck fast veyhandtaget (Snäpplås) (Fig. 5).
x
x
Tryck fast täckplattan (Snäpplås) (Fig. 6).
x
Förvara väggslangvindan frostfritt.
x
Du kan köper extra Slang-guide i Din GARDENA butik
(Art. nr. 2651).
I
Per il montaggio attenersi alle illustrazioni corrispondenti.
Nota bene:
Inserire la maniglia di trasporto nella metà tamburo in
x
cui l'apertura asse è maggiore (fig. 3).
x
Innestare fino in fondo il raccordo di accoppiamento
(si deve sentire lo scatto) e bloccarlo con 2 viti (fig. 4).
Applicare la manovella (si deve sentire lo scatto) (fig. 5).
x
Fissare il disco di copertura (fig. 6).
x
Prima del gelo ricoverare l'avvolgitubo a muro in luogo
x
protetto.
Rulli di guida supplementari (art. 2651) sono acquistabili
x
presso i rivenditori GARDENA.
E
El montaje se efectua según el orden de las
ilustraciones.
Introducir el eje del soporte en el núcleo del tambor
x
(fig. 3).
Colocar el eje de conexión hasta que encaje y sujetar
x
con abrazadera mediar 2 tronillos (fig. 4).
Poner la manivela (hasta oir un click) (fig. 5).
x
Colocar la tapa (fig. 6).
x
x
En tiempo de heladas, es aconsejable guardar el
portamangueras en un lugar protegido.
x
Puede encontrar las guías de manguera en los
distribuidores de GARDENA (art. no. 2651).
P
Os diferentes passos estão ilustrados nas figuras.
Precauções:
Introduza o cabo do lado do tambor onde o eixo de
x
abertura é maior (fig. 3).
x
Puxe a conecção do eixo até partir e fixaro gancho
com 2 parafusos (fig. 4).
x
Fixar a manivela (encaixe perceptível) (fig. 5).
A tampa deverá encaixar (fig. 6).
x
Antes da época de gelo se instalar, armazene
x
o Porta Mangueiras em local protegido do frio.
Os guias de mangueira poderão ser adquiridos em um
x
dos representantes GARDENA (Art. no. 2651).
1
2
3
4
5
6
7
8
9
3
