Garmin GPSMAP 5212 - Marine GPS Receiver 설치 지침 매뉴얼 - 페이지 2

{카테고리_이름} Garmin GPSMAP 5212 - Marine GPS Receiver에 대한 설치 지침 매뉴얼을 온라인으로 검색하거나 PDF를 다운로드하세요. Garmin GPSMAP 5212 - Marine GPS Receiver 25 페이지. Weather and xm satellite radio gpsmap 4000 series; gpsmap 5000 series; gpsmap 6000 series; gpsmap 7000 series
Garmin GPSMAP 5212 - Marine GPS Receiver에 대해서도 마찬가지입니다: 중요 안전 정보 (4 페이지), 빠른 참조 매뉴얼 (2 페이지), 소유자 매뉴얼 (2 페이지), 소유자 매뉴얼 (2 페이지), 기술 참조 (30 페이지), 설치 지침 매뉴얼 (19 페이지), 설치 지침 매뉴얼 (25 페이지), 빠른 참조 매뉴얼 (2 페이지), 적합성 선언 (1 페이지), 인쇄 매뉴얼 (2 페이지), 보충 설명서 (24 페이지), 사용자 설명서 (6 페이지)
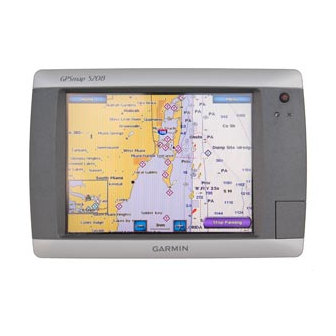
Garmin GPSMAP 5212 - Marine GPS Receiver 설치 지침 매뉴얼
Mounting the GPSMAP 4000/5000 Series Chartplotter
You can mount the GPSMAP 4000/5000 series chartplotters one of two ways. You can use the included bracket to bail mount the chartplotter, or
you can use the included template and hardware to flush mount the chartplotter.
You cannot bail mount the GPSMAP 5015/5215 chartplotters. Because of the larger size, you must flush mount the GPSMAP 5015/5215 chartplotters.
Bail Mounting the GPSMAP 4000/5000 Series Chartplotter
Use the included bracket to bail mount the GPSMAP 4000/5000 series chartplotter.
tools required (not included):
• Drill and drill bit
• Screwdriver
• Pencil
• Mounting hardware (screws or nuts, washers, and bolts)
NOTE: The mounting hardware (screws or nuts, washers, and bolts) are not included. The holes on the bail mount are 5/16 in. (7.9 mm) in
diameter. Choose mounting hardware that fits the holes in the bail mount and securely attaches it to your specific mounting surface. The size
of the drill bit required depends on the mounting hardware chosen.
to install the bail-mount bracket:
NOTE: You cannot bail mount the GPSMAP 5015/5215 chartplotters. Because of the larger
size, you must flush mount the GPSMAP 5015/5215 chartplotter.
1. Using the bail mount as a template, mark the location of the four mounting holes. Be sure to
leave at least 5 in. (12.7 cm) of clearance behind the 4000/5000 series chartplotter for the
wiring.
NOTE: Mount a GPSMAP 4008/4208/5008/5208 chartplotter 31 1/2 in. (80 cm), and a
GPSMAP 4010/4210/4012/4212/5012/5212 chartplotter 39 3/8 in. (1 m) from a magnetic
compass to avoid interference.
2. Using an appropriately sized drill bit, drill the pilot holes for your mounting hardware.
3. Secure the bail mount to the surface with screws and washers.
to install the GPSMAP 4000/5000 series chartplotter on the bail-
mount bracket:
1. Loosely attach the mounting knobs to the GPSMAP 4000/5000 series
chartplotter.
2. Slide the chartplotter onto the bail mount, and tighten the mounting knobs.
2
notice
Mounting
screws
Bail-mount
bracket
Mounting knobs ×2
GPSMAP 4000/5000 Series Installation Instructions