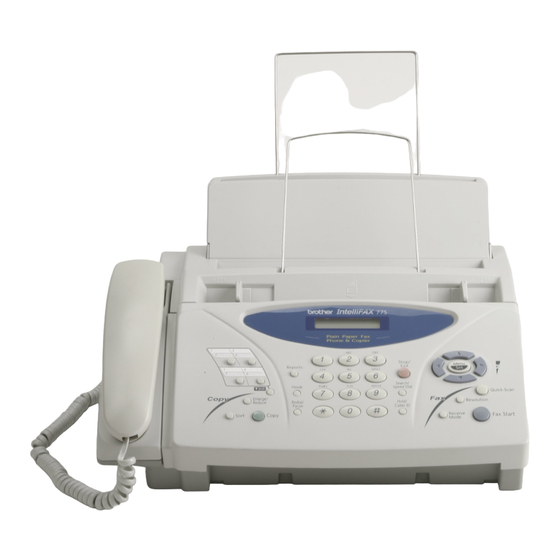
Brother IntelliFax-775SI 빠른 참조 카드 - 페이지 2
{카테고리_이름} Brother IntelliFax-775SI에 대한 빠른 참조 카드을 온라인으로 검색하거나 PDF를 다운로드하세요. Brother IntelliFax-775SI 2 페이지. Quick setup guide - english

Quick Reference Card
For complete instructions about all the features and functions of your fax machine, be sure to read your Owner's Manual.
Sending Faxes
Automatic Transmission
1
Place the original face down in the ADF.
Enter the fax number using One Touch,
2
Speed Dial, Search or the dial pad.
Press Fax Start.
3
Memory Transmission
1
Place the original face down in the ADF.
Press Quick-Scan. The LCD indicates how
2
much memory is available.
3
Enter the fax number.
Press Fax Start.
4
Sending a Cover Page
Place the original face down in the ADF.
1
2
Press Menu/Set, 3, 1.
3
When
NEXT FAX ONLY?
appears, press
Menu/Set.
Press
to select
ON
(or OFF), and then press
4
or
Menu/Set.
5
Press
to select a comment, and then press
or
Menu/Set.
6
Enter two digits to indicate the number of pages
being sent, and then press Menu/Set.
7
Press 1 to select additional settings—OR—
Press 2 if you are ready to fax.
8
Enter the fax number.
9
Press Fax Start.
Brother Fax-Back System
1-800-521-2846
Receiving Faxes
Select Receive Mode
Press Receive Mode to select FAX/TEL,
TAD:ANSWER MACH. (FAX-775 and FAX-775Si
Only), MANUAL, or
FAX
ONLY. If you select
FAX/TEL, make sure to set Ring Delay and F/T
Ring Time.
Turning ON Message Center Mode
(For FAX-885MC Only)
See Message Center , Chapter 9
1
Turn Message Storage ON.
Record the Outgoing Message
2
(MSG CTR
OGM).
3
Press
until it lights.
Manual Reception
1
Pick up the handset.
Press Fax Start if you hear fax tones (beeps).
2
When LCD shows RECEIVE, replace the
3
handset.
Easy Receive
Press Menu/Set, 2, 3.
1
2
Press
to select ON,
OFF
or SEMI.
or
Press Menu/Set.
3
Press Stop/Exit.
4
Brother Web Site
http://www.brother.com
Setup Auto Dial Numbers
Storing One-Touch Dial Numbers
Press Menu/Set, 6, 1.
1
2
Press the One Touch key where you want to store
the number.
3
Enter a number (up to 20 digits),
and then press Menu/Set.
Enter a name (up to 14 characters),
4
and then press Menu/Set.
Press
to select FAX, TEL,
5
or
or CHAIN, and then press Menu/Set.
FAX/TEL
6
Press Stop/Exit.
Storing Speed Dial Numbers
1
Press Menu/Set, 6, 2.
2
Enter a two-digit speed dial number,
and then press Menu/Set.
3
Enter a number (up to 20 digits),
and then press Menu/Set.
4
Enter a name (up to 14 characters),
and then press Menu/Set.
5
Press
to select FAX, TEL,
FAX/TEL
or
or
CHAIN, and then press Menu/Set.
6
Press Stop/Exit.
Dialing Options
One-Touch Dialing/Speed Dialing
Pick up the handset—OR—Press Hook or
1
Speaker Phone .
2
When you hear a dial tone, press the One Touch
key of the location you want to call—OR—
Press Search/Speed Dial, press #, and
then press the two-digit Speed Dial number.
¥ If you pressed Hook, to dial, pick up the
handset when the other party answers.
3
To hang up, replace the handset—OR—Press
Speaker Phone .
Searching the Auto Dial Numbers
1
Press Search/Speed Dial, and then enter the
first letter of the name you're looking for.
2
Press
or
to search the memory.
When the name is displayed, lift the handset for a
3
voice call.
—OR—Press Hook or Speaker Phone.
Press Fax Start to begin dialing.
4
5
If you pressed Hook to dial, pick up the handset
when the other party answers.
Message Center
(For FAX-885MC Only)
Recording OGM
1
Press Menu/Set, 8, 3.
2
Press
to reach
MSG CTR
OGM?,
or
and then press Menu/Set.
Press
to select
RECORD
OGM?,
3
or
and then press Menu/Set,
4
Pick up the handset to record a message.
5
Replace the handset.
Playing a Voice Message
Press Play/Record.
1
2
Use
(RWD) to repeat a message.
Use # (FWD) to skip a message.
Press Stop/Exit.
3
Printing a Fax Message
Press Play/Record.
1
After voice messages have played, press 1.
2
Erasing Messages
To erase voice messages individually
Press Play/Record.
1
2
Press Erase after the two short beeps, or while
the message is playing.
Press 1.
3
4
Press Stop/Exit.
To erase messages all at once
Press Erase.
1
2
Press
to select VOICE, FAX, or MSG, and
or
then press Menu/Set.
Press 1.
3
4
Press Stop/Exit.
