COZY W255F and 설치 및 운영 지침 매뉴얼 - 페이지 13
{카테고리_이름} COZY W255F and에 대한 설치 및 운영 지침 매뉴얼을 온라인으로 검색하거나 PDF를 다운로드하세요. COZY W255F and 20 페이지. Gas-fired vented wall furnace
COZY W255F and에 대해서도 마찬가지입니다: 설치 및 운영 지침 매뉴얼 (20 페이지)
MODEL
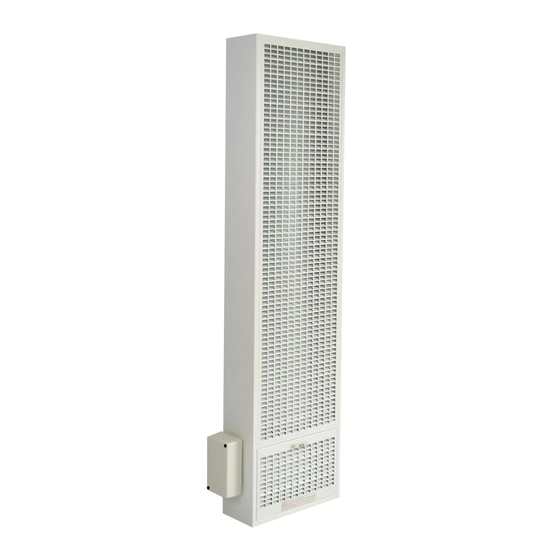
NOTE: This fan kit is to be installed after installation of wall furnace and with the wall furnace front panel in
place.
STEP 1.
This appliance, when installed, must be electrically grounded in accordance with local codes, or in
the absence of local codes, with the latest edition of the National Electric Code, ANSI/NFPA
No. 70. In Canada, see the current Canadian Electrical Code CSA C22.1.
STEP 2.
Set fan kit on top of the wall furnace front panel. Using the back top edge of the fan kit cabinet
as a guide, mark a horizontal line across the wall. Mark a small vertical line which aligns with the
slot located toward the rear of the fan kit casing.
STEP 3.
Using the four one inch screws provided, secure the wall mounting bracket to wall 1/8" below the
horizontal line. Fan attachment bracket must be up and threaded nut sert aligned with the small
vertical line. Note: Anchors (not provided) may be required.
STEP 4.
Remove junction box and connect 115v power supply in accordance with the wiring diagram.
Replace junction box.
STEP 5.
Set fan kit on top of wall furnace front panel. Slot should align with the nut sert. Secure fan kit
to wall mounting bracket with thumb screw provided.
Threaded Nut
Sert
Fan Attachment
Bracket
Wall Mounting
Bracket
One Inch
Screw (4)
WFF81-C
INSTALLATION INSTRUCTIONS
Thumb
Screw
Fan
Kit
OPTIONAL FAN KIT
Slot
Page 13
Wiring
Diagram
Junction
Box
Wall Furnace
Front Panel