Panasonic AG-HMC150 제품 설명서 - 페이지 6
{카테고리_이름} Panasonic AG-HMC150에 대한 제품 설명서을 온라인으로 검색하거나 PDF를 다운로드하세요. Panasonic AG-HMC150 22 페이지. Avchd camcorder
Panasonic AG-HMC150에 대해서도 마찬가지입니다: 브로셔 및 사양 (8 페이지), 정보 메뉴 (20 페이지), 브로셔 및 사양 (12 페이지), 브로셔 (16 페이지), 기본 지침 (20 페이지), 사용자 설명서 (35 페이지)
Sound
IS THIS THING ON?
Selecting sound inputs
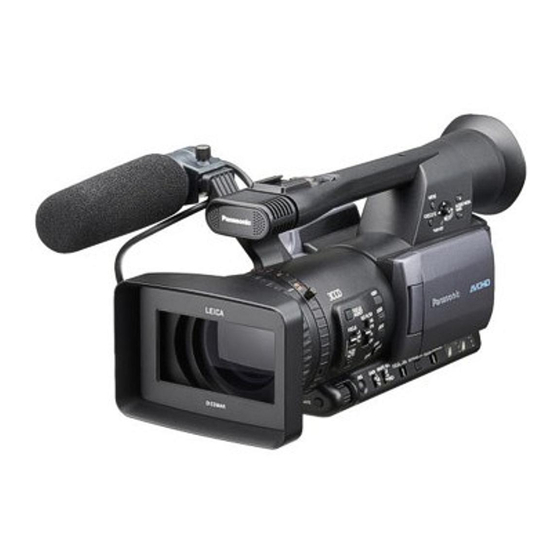
Two sources of audio can be recorded to the camera simultaneously.
Sound can be gathered from the camera's internal microphone, an
external microphone, a line level source such as an audio mixing
board or CD player, or any combi-
nation of two of those sources.
Routing audio signals is controlled
by two switches behind the LCD
monitor and two switches on the
front of the camera.
Setting the audio level
To set an appropriate audio level, use the AUDIO dials on the side of
the camera. The CH1 dial controls the level for the source selected
with the CH1 SELECT switch and the CH2 dial controls the level for
the source selected with the CH2 SELECT switch.
Two switches behind LCD panel
Monitoring the audio level
Use the audio meter on the bottom of the LCD monitor to view the
audio levels. Adjust the AUDIO dials so that the loudest sounds reg-
ister just below the white hash marks. If the audio is bouncing above
the white hash marks or you see the red slash on the meters, adjust
the AUDIO dials to lower the input level.
To monitor audio quality, plug headphones into the headphone jack
on the back of the camera. You can control the headphone volume by
pushing the - AUDIO MON/ADV + buttons. NOTE: Changing your
headphone volume will not change the audio levels being recorded.
Always use the audio meter to judge appropriate levels.
Easy-to-follow audio setup chart on next page
Two switches on front of camera
5