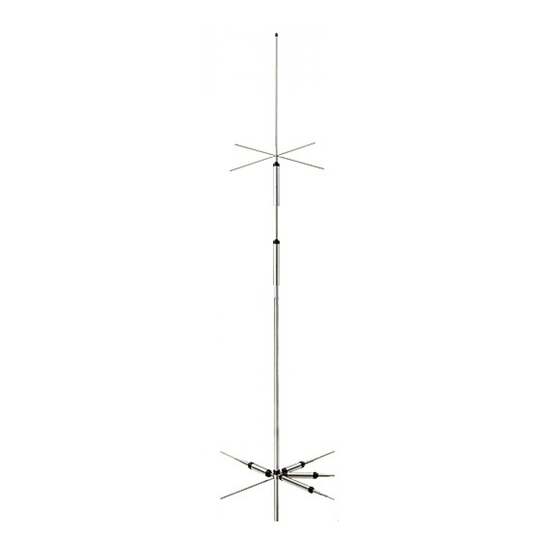
Diamond Antenna CP-5HS 사용 설명서 - 페이지 5
{카테고리_이름} Diamond Antenna CP-5HS에 대한 사용 설명서을 온라인으로 검색하거나 PDF를 다운로드하세요. Diamond Antenna CP-5HS 6 페이지. 40m, 20m, 15m, 10m and 6m (7/14/21/28-29 and 50mhz) five-band vertical antenna

-Note-------------------------------------------
《Installing the antenna》
①Donʼt install on a rainy or windy day
since it is dangerous.
②Donʼt attempt to install the antenna
only by yourself. Installing the antenna
alone on the roof may lead you
dangerous accident. Always ask your
friends for help installing the antenna.
③Donʼt drop the antenna, tools and
attachment when installing the antenna
in the height. Install the antenna before
assembling it on the ground.
《Antenna location》
①If the CP-5HS is located on the
roof of a house or top of a building,
look around the roof to see if there
are any obstacles such as an electronic
wire or TV antenna. The CP-5HS
has to be located as far away as
possible from those things to obtain
its maximum performance. Installing
the antenna too close to the building
wall may cause bad effect for electrical
characteristics of the antenna.
②Donʼt install the antenna where is
easily reachable by people.
③Install the antenna firmly not to fall
down due to the strong wind. Even
if falling down the antenna, locate
the antenna at the safe place where
people and building are not inflicted
injures.
《Before transmitting》
①Transmit after confirming if the
antenna works normally by an SWR
meter. If VSWR is less than 1.5, it is
no problem. If VSWR is higher, stop
transmitting and check if the parts
of the antenna and coaxial cable are
connected. If there are tall buildings
or obstacles or the distance between
the antenna and the ground is short,
VSWR may not be lowered.
※Diamond Antenna SWR/POWER meter
is an insertion type being connected
between a transmitter and an antenna.
Transmitting power and SWR can be
measured with very simple operations.
In addition with those conventional
measurement, PEP (peak envelope
power) on SSB mode can be measured
with a PEP monitor function. With our
Diamondʼs wideband and low insertion
loss directional coupler those
measurements can be performed with
minimum effect in transmission line.
<<During transmitting>>
①Touching the antenna during
transmission may cause to electrify.
Pay attention not to touch the antenna
especially for children if installing
on a balcony railing.
<<Rumbling Thunder>>
①The thunder seems to rumble in
the vicinity, donʼt touch the
antenna and coaxial. When you
donʼt use the radio, take off the
cable from the radio.
<<If there is something wrong, stop
transmitting immediately.>>
①Keeping transmitting with high VSWR
may cause the radio to be damaged.
Stop transmitting immediately and
check the following matters. If it
doesnʼt solve the problem, please
ask the dealer or Diamond Antenna
Corporation.
[Condition: If the antenna doesnʼt seem
to receive well or propagate well]
Check 1: Is the antenna too close to
the building wall? If the obstacles are
too close to antenna, VSWR is higher
and the radiation pattern is disturbed.
Please install the antenna from the
building as far away as possible.
Check 2:Did you assemble the antenna
correctly? Please read the instruction
again and reconfirm the assembly.
Check 3: Is the coaxial cable something
wrong? Please check if soldering the
connector is okay and the wire breaks
by the volt-ohm meter.
・ Antenna location
Resonate frequency of HF antenna
can change based on location.
Antenna should be mounted away
from tree, building and other antennas.
①If the CP-5HS is located on the
roof of a house or top of a building,
look around the roof to see if there
are any obstacles such as TV
antenna or water reservation tank.
The CP-5HS has to be located as
far away as possible from those
things to obtain its maximum
performance.
②If the CP-5HS is installed on a
balcony railing, installing the antenna
too close to the building wall may
cause bad effect for electrical
characteristics of the antenna. Locate
at least 2m to 5m (7ʼ to 16ʼ) away
from the building wall depending on
structure of the building.
<<Note>>
・ Fastening the radial element trap
coil assembly tightly may be
damaged.
・ In the case of spread around style
radial elements, the turn to fix the
radials is restricted. However, the
radials of the lower frequencies
are more influenced by the
surrounding condition. Set the
radials for 40m as far away as
possible from the buildings.
・ In the case of the one direction
style radial elements, set the
radial for 40m and one the
radial for 20m at the both end.
Pull one piece of the radial
element holder down 2cm and fix it.
・ In case of using the metallic stay
wire, set the wire on the lower
mast bracket set and attach the
insulators at within 1m from the
mast bracket set in order to
insulate.
・ It is possible to remove the radials
you donít use the band for.
One direction style radial elements
Spread around style radial elements
・ Assembly Instruction
①Put radial element in each radial
element trap coil assembly by
referring to the typical element
length listed in Table A and fasten
it with element fastener ring.
(Figure-6)
②Set grip nut rightly to treaded part
of each radial element trap coil
assembly.
Grip nut
③Connect pipe No.1, double element
trap coil assembly, and pipe No.2
in the vertical element section and
fasten them with tapping screws
(Fig 2)
and inner tooth washers by aligning
holes in each joint section.
④Attach four capacity hat assemblies
to each capacity hat holder section.
Capacity hat holders are set at the
specified sections in the factory.
Locations for those capacity hat
holders are fixed at about 8cm (3.1")
below the top end of double element
trap coil assembly for lower capacity
hat respectively.
2cm
(Fig-3)
(Fig-4)
(Fig-5)
Radial element
trap coil
Radial element fastener ring
Adjust length of radial element
(Fig-6)
