EPH Controls RF1A-OT 운영 지침 - 페이지 2
{카테고리_이름} EPH Controls RF1A-OT에 대한 운영 지침을 온라인으로 검색하거나 PDF를 다운로드하세요. EPH Controls RF1A-OT 2 페이지. With rfrp-ot
EPH Controls RF1A-OT에 대해서도 마찬가지입니다: 운영 지침 (2 페이지)
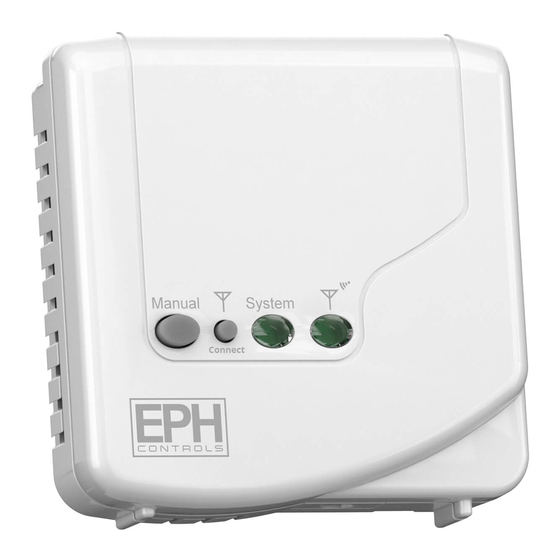
RF1A-OT - Wireless Receiver
with RFRP-HW-OT
5. Resetting the RF1A-OT receiver
Press the
button located on the side of the receiver. The RF1A-OT
RESET
receiver is now reset.
6. To connect the RFRP-HW-OT thermostat to an RF1A-OT
receiver
Please note, If you are installing a CP4-HW-OT, the RFRP-HW-OT thermostat
and the RF1A-OT receiver will have a pre-established RF connection so it is
not necessary to carry out the RF connection process below.
On the RF1A-OT receiver:
Press the
button on the RF1A-OT receiver.
Connect
On the RFRP-HW-OT thermostat:
Press the
button.
Connect
The thermostat will show "nOE" followed by "---"
Once an RF connection has been established the thermostat will show 'r01'
on the LCD screen.
Press the 'OK
The thermostat is now connected to the RF1A-OT receiver.
7. To disconnect the RFRP-HW-OT thermostat from an
RF1A-OT receiver
This can be done from either the thermostat or the receiver.
7.1 On the RFRP-HW-OT thermostat:
Press the
button.
Connect
The thermostat will begin to search through the RF channels.
Press and hold the 'Copy' button for 10 seconds.
'Adr' will appear on the screen of the thermostat.
Press the 'OK' button twice to complete the unpairing process.
The thermostat RFRP-HW-OT is now disconnected from the receiver
RF1A-OT.
7.2 On the RF1A-OT receiver:
Connect
Red & green lights if using as a hub receiver.
The RF connection is now cleared.
EPH Controls Ireland
[email protected] www.ephcontrols.com
Page 2 of 2
Operating Instructions
EPH Controls UK
[email protected] www.ephcontrols.co.uk
20221005_RF1A_OT_RFRP-HW-OT_Opins_PK