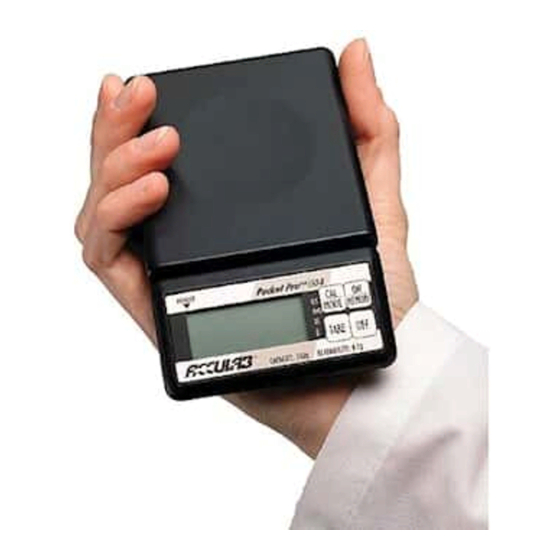
Acculab POCKET PRO PP-250B 사용 설명서 - 페이지 2
{카테고리_이름} Acculab POCKET PRO PP-250B에 대한 사용 설명서을 온라인으로 검색하거나 PDF를 다운로드하세요. Acculab POCKET PRO PP-250B 2 페이지.

Model PP-250B
®
Instruction Manual
Thank you for purchasing an Acculab Electronic Balance. With proper
care and treatment it will provide years of reliable service.
Please read all operating instructions carefully.
• Avoid lengthy exposure to extreme heat or cold. Your balance
works best when operated within the temperature limits listed in
the specifications. Allow the unit to acclimate to a stable tempera-
ture before calibration.
• Allow at least 2 minutes of warm up time before starting
calibration to give internal components sufficient time to stabilize.
• Keep your operating environment as clean as possible.
Electrostatic fields, gravitational fields, dust, dirt, moisture, vibra-
tion, air currents, and proximity to other electronic equipment can
all have an adverse effect on the reliability and accuracy of your
unit.
• Handle with care. Gently apply all items to be weighed onto the
center of weighing pan. Although designed to be quite durable,
avoid rough treatment as this may permanently damage the internal
sensor.
OPERATION
Battery Operation:
1) One nine (9) Volt ALKALINE BATTERY is required.
2) To install battery, open battery cover on bottom of balance and con-
nect battery to snap. Place battery into its compartment and replace the
cover. Always handle battery lead wires with care. DO NOT USE EXCES-
SIVE FORCE!
3) Remove battery when scale is not used for extended periods.
CALIBRATION
IMPORTANT: The calibration procedure should be done periodically
depending on usage.
For best results, repeat this procedure at regular intervals if balance is to
be actively weighing for prolonged periods.
NOTE: User calibration is performed through use of the key pad controls
and proper calibration weight. Removal of port cover on the right side of
unit will void warranty.
Calibration Procedure:
1) Turn balance on and allow unit to warm up and stabilize for two
minutes.
2) Press and hold the "CAL" key until calibration weight value appears
and flashes on the display.
3) With the calibration weight value still flashing, press the "OFF" key,
and the display will read "AL 0". After pausing for at least two seconds,
place the correct calibration weight gently on the center of weighing pan.
4) The display will momentarily show "AL F" and then return to active
weighing. The calibration is complete when the display correctly shows
the calibration weight, and the display has stabilized
5) Remove calibration weight and press the tare key to reset the zero
point.
NOTE: If "AL E" appears instead of "AL F", this indicates a calibration
error has occurred and the calibration process should be repeated. "AL E"
can occur if the calibration steps are not followed in the correct order or if
an incorrect calibration weight was applied.
FEATURES
• Power Up Segment Test: When first turning on the unit, all seg-
ments of the display will appear as shown below. This display will
remain for approximately three seconds and then reset to zero.
L
88.8.8.8
+
M
• Stable Reading Indication: A right-facing arrow appears on the
right side of the display indicating the weighing mode in which the unit is
operating. This arrow will disappear during weighing while the unit stabi-
lizes, and then reappear when a stable value is reached.
• Audio Tone: Pressing any of the four keys on the front panel will
emit a tone indicating registry of the function.
• Overload: When an applied load exceeds the unit's capacity, "E"
will appear on the display accompanied by intermittent beeps. Remove
excessive load immediately. The unit should return to normal operation.
• Negative Value: Any tared value or a value left in memory will be
displayed as a negative number once all weight is removed from the unit.
Press and release tare to return to normal operation.
• Tare: The tare feature is designed to allow the user to reset the bal-
ance to zero at any time. Tare can also be used to eliminate the value of
a pan liner, scoop, beaker, etc. from a sample or procedure, when the
weighed material needs to be held in a container and only the net weight
of the material is desired. Place the container only (without material) on
the weighing pan, wait for a stable reading and then press tare. The unit
returns to zero and the weight value of the container is permanently
removed from the remainder of the procedure.
NOTE: When all weight is removed from the weighing pan, the tared
value of the container will be displayed as a negative number. Press
and release the tare key again to return the balance to zero.
• Memory: The memory function is designed to allow the user to
store values and to then progressively add these values into a sample
or procedure. Unlike the tare feature, the unit returns to zero and a
memory indication appears at the upper left of the display. After a sub-
sequent weight is added, press memory again. The original value is
added to the current value giving the total gross weight of the current
sample. The memory feature is useful when multiple weighing of dif-
ferent samples is needed and a total gross weight of all samples is
required.
• Auto Off: An auto shut off feature is provided to conserve battery
power. The unit will automatically turn off after approximately four
minutes if no active weighing takes place. Auto shut off will occur with
or without a weight applied to the unit, however the unit will stay "on"
under active loading and unloading of weight values in excess of 0.1g.
9V Alkaline
Battery
Compartment
Factory Calibration Seal
DO NOT REMOVE
Removal of this seal will void
Tray Top
Display
Membrane
Keypad
warranty coverage. User
calibration performed
through keypad operation.
Refer to your instruction
manual.
