Axis Car Audio AX1803BT 설치 매뉴얼 - 페이지 5
{카테고리_이름} Axis Car Audio AX1803BT에 대한 설치 매뉴얼을 온라인으로 검색하거나 PDF를 다운로드하세요. Axis Car Audio AX1803BT 13 페이지. Bluetooth 12/24v dvd/cd multimedia player
Axis Car Audio AX1803BT에 대해서도 마찬가지입니다: 사용 설명서 (13 페이지)

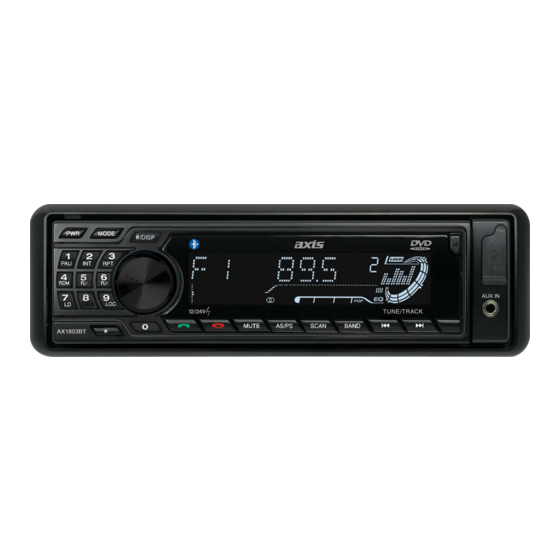
OPERATION INSTRUCTIONS
1. POWER
Press "PWR" (1) to manually turn on or off. Unit will automatically turn off when the vehicle's key is
removed or accessories is in off position.
2. VOLUME
Rotate the Volume Knob (2) left or right to adjust to the desired volume.
3.
SOURCE SELECT
Press "MODE" (9) to select- Tuner, Disc, BT, Aux, USB or Line In.
4.
SOUND CONTROL
Press Volume Knob (2) to enter sound control functions- Bass, Treble, Balance, Fader.
Rotate knob to adjust.
1
SEL
2
1. VOLUME
5.
EXTRA FUNCTIONS
EQ Preset
Press and hold volume knob (2) until "Eq" displays. Rotate knob to select- Flat, Classical, Rock, Pop.
Loudness
Press volume knob again to display "LOUD". Select On or OFF. This will improve sound when listening
at lower volumes. Loudness can also be turned on or off by pressing button "7 / LD" (7).
Stereo/Mono
Press again to display "ST". Select MONO or ST (Stereo) sound by rotating the knob.
Select Mono if FM radio becomes noisy.
Local/Distance
Press volume knob again to display "LOC". Select On or OFF (Distance) by rotating the knob.
When radio signal is strong select On; when signal is weak select off (distance).
This function can also be turned on or off by pressing "9 / LOC" (6).
6.
TUNER FUNCTIONS
Band Select
Press "BAND" (10) to select tuner groups- FM1, FM2, FM3, AM1, AM2.
Manual Tuning
Press l◄◄ or ►►l to select desired station. Press and hold desired Preset number to save.
Auto Tuning
Press and hold l◄◄ or ►►l until "Search" is displayed. The unit will find the next station with good
signal. Press and hold desired Preset number to save.
Automatic Scan
By pressing "SCAN" (13) the unit will scan for the next station and pauses for 5 seconds to allow you to
store the station into a preset before scanning for the next station.
Auto Store
Press and hold "AS/PS" (12) for more than 3 seconds and the unit will automatically store scanned stations
in that band. Note that this will replace stations already stored in pre-sets.
Preset Scan
Press and hold "AS/PS" (12) for more than 1 and less than 3 seconds and the unit will go to each preset in
that band for 5 seconds each. A good way to hear what is being broadcast on that band.
Press "AS/PS" when the desire station is found.
7.
TIME ADJUSTMENT
Press "#/DISP" (8) to display time, then press and hold until the hours flash. Turn the volume knob left or
right to adjust the hour. Press "#/DISP" again and the minutes will flash. Turn the volume knob left or right
to adjust the minutes. After 5 seconds the display will revert to normal.
Note: Time will display for only 6 seconds after the "#/DISP" button is pressed.
SEL
3
SEL
2. BASS
3. TREBLE
4
SEL
5
SEL
4. BALANCE
5
5. FADER
