Olympus WS-110 사용자 설명서 - 페이지 4
{카테고리_이름} Olympus WS-110에 대한 사용자 설명서을 온라인으로 검색하거나 PDF를 다운로드하세요. Olympus WS-110 9 페이지. Enregistreuer voval numerique
Olympus WS-110에 대해서도 마찬가지입니다: 사용 설명서 (15 페이지), 사용 설명서 (11 페이지), 빠른 시작 매뉴얼 (6 페이지), (영어) 지침 (15 페이지), (프랑스어) Mode D'emploi (15 페이지)

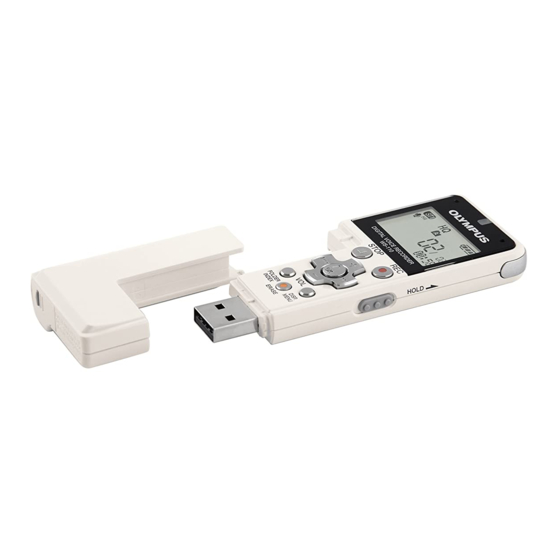
B2. Playback - basics
1. Select the folder you want to play back from - by pressing the FOLDER/INDEX
button until the letter for that folder is shown near the top of the display;
2. Select the track that you want using << or >> to move through the numbers.
Note: the duration of each track is shown at the bottom of the display.
3. Press Play (OK) to hear the track;
4. Adjust the volume if necessary using the VOL (+ and -) buttons.
The sound comes out of the built-in speaker but you can plug headphones, or
external speakers, in to the 'EAR' socket for better sound quality.
B3. Playback – tricks & tips
The following apply during playback.
Note: elapsed time is shown at bottom right of the display during playback.
To pause a track: press STOP. Then press Play (OK) to continue.
To return to the start of a track: press << at any point.
To jump straight to the start of the next track: press >> at any point.
To search for a recording aurally; listen to 2-3 seconds of the first track, press >>, listen
to 2-3 seconds of next track, press >> and repeat till you find the one you want!
To fast forward (in jumps) through a track: press and hold >> whilst watching the elapsed
time counter on the display; then release >> to listen.
To rewind (in jumps): press and hold <<, watch the elapsed time counter, then release.
To hear a recording a bit slower, or a bit faster: press PLAY again during playback (once
for slower, twice for faster, third time to get back to normal).
B4. Index Marks – jumping around inside a recording
Index marks allow you to 'mark' a particular point within a long recording, for example when
the speaker starts a new topic or when someone new starts talking. When you are listening
back to the recording you can jump between Index marks in order to locate specific items.
You can have up to 16 index marks in any one recording. Note that Index Marks do not
transfer across if you copy a file to a computer (as they are not a standard WMA feature).
To add an Index Mark during recording, simply press FOLDER/INDEX when you want to
mark a point. The recording carries on as normal but with an Index Mark inserted.
To add an Index Mark during play back (useful if you want to re-listen to a section several
times) simply press FOLDER/INDEX when you want to mark a point. The playback carries
on as normal but with an Index Mark inserted.
To jump between Index Marks during playback, press >> to go to the next Mark in that
recording or << to go to the previous Mark. (If there is no 'next Mark' in the recording then
pressing >> will take you straight to the end and << will take you straight to the beginning.)
To delete an Index Mark during playback, press >> to get to that Index Mark (you will then
see 'INDEX' flashing at the bottom of the display) and immediately press ERASE.
R Cullimore - Using Olypus ws110 digi-rec v5 - 3 Dec 08
Page 4 of 8
