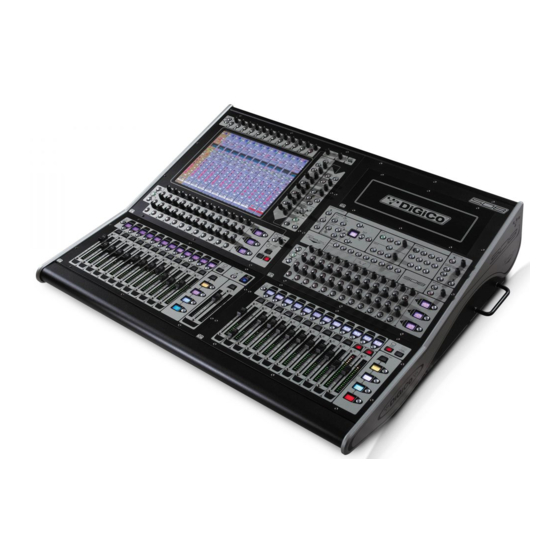
digico SD8 안전 지침, 설정 및 설치 매뉴얼 - 페이지 8
{카테고리_이름} digico SD8에 대한 안전 지침, 설정 및 설치 매뉴얼을 온라인으로 검색하거나 PDF를 다운로드하세요. digico SD8 13 페이지. Replacing and cleaning faders
digico SD8에 대해서도 마찬가지입니다: 매뉴얼 (9 페이지)

Setup & Installation Manual
Installation Introduction ...............................................................
Welcome to the Digico SD Installation and connection manual. This manual is provided for purchasers, in order to help
their installation and connection of their new console.
Digico hope that this manual answers all the questions which may be asked by system designers and installers, but should there
be any issues unresolved for your particular installation, the local distributor or the factory will be pleased to assist.
In general the installation of a SD series mixer presents no problems which are significantly different from those of any other
large format live sound console when used exclusively for analogue systems and when used in digital systems, integration is not
significantly different from other digital consoles.
System Description .......................................................................
The Digico SD console consists of a Worksurface, and 1 or 2 Input/Output Rack Units
All the console's audio inputs and outputs are connected to the Rack units, and each Rack units is connected to the Worksurface
via a pair of digital MADI links in either coaxial or within an Optocore optical format. Each pair can carry up to 56 audio inputs and
outputs.
There are 2 pairs of MADI connectors available on the Worksurface rear panel, including 2 bidirectional optical MADI connectors
(optional) allowing the connection of up to 2 Rack units or alternative madi connections. This gives a total capacity of 112
input and output sockets. However, the console is only able to assign between 60 audio channels (dependent on
version), so not all the channels in a 2-madi system can be used simultaneously.
Each Rack module contains input and output cards, which allow the same Rack unit to connect to different types of analogue and
digital audio devices.
As well as connecting the Worksurface MADI links to Rack Units, you can also connect them directly to any other MADI equipped
device, such as a digital multitrack recorder.
The Worksurface ...........................................................................
The SD Worksurface is in many ways very similar to any large analogue mixing console. One key difference, however, is that most
analogue signals are connected via the Rack units. The Worksurface rear panel does include a small number of signal connectors,
and some used only for synchronisation, not for audio I/O.
The Worksurface is supplied in 2 chassis sizes, for 24 input + 12 master section or 12 input + 12 master section faders.
Console Power Supply and Cooling ...........................................
Unlike most analogue consoles, the SD Worksurface is powered directly from the mains, with no external supply unit. The internal
mains supplies are highly efficient and require only little forced cooling. A low noise option of the Worksurface power supply units is
available.
However, it is important that airflow to the vents on the rear of the Worksurface are not restricted in any way.
Note there are 2 (Option) x IEC mains inlets for the dual redundant supplies. We recommend the use or a UPS to support the mixer in the
event of "brown outs" and for general power conditioning. If this is used, connect this to 1 supply only, whilst the other supply is directly
powered from the mains. In this way UPS problems are also bypassed.
Worksurface Connections ............................................................
Apart from headphones and talkback, a limited amount of audio is connected to the worksurface. This is principally intended to signals
used locally to mixer, the bulk of connections being intended to be connected via the external rack.
Sync and control connections are detailed later in this manual.
Headphone Connections ..............................................................
There is a headphone connector with a 1/4" (6.3mm) stereo jack under the armrest. These will drive down to 8 ohm loads, but note
there is considerable power/voltage available at low impedance. External volume limiting should be provided where required by local
regulations.
Keyboard ........................................................................................
The Worksurface unit includes a small computer keyboard with integral trackball. This is fitted to sockets on the rear panel and
stored in a space at the front the console flight case (where this is factory supplied). Note that the mixer is intended to operate with this
connected. The mixer will function wit this missing, but certain operations cannot be accessed and the boot time is considerably extended.
Lighting ..........................................................................................
The worksurface includes outputs for Litlite or compatible gooseneck type nominal 12V dc lamps.
The brightness is adjustable by a panel screen control. These are wired to the Lilite factory standard wiring scheme. Note certain Litlites
(especially those sourced in the UK) may be to a non-standard wiring scheme and need to be corrected to function.
Page 8
