Creda Aquawave White 설치 및 사용자 설명서 - 페이지 7
{카테고리_이름} Creda Aquawave White에 대한 설치 및 사용자 설명서을 온라인으로 검색하거나 PDF를 다운로드하세요. Creda Aquawave White 8 페이지. Electric shower (covers white, colour and heritage models)
HOW TO USE YOUR AQUAWAVE HERITAGE SHOWER (DETAILED)
Relates to the Heritage Shower Range ONLY, see unique section for Contemporary Range
1.
Ensure the electricity and water are turned on to the unit.
2.
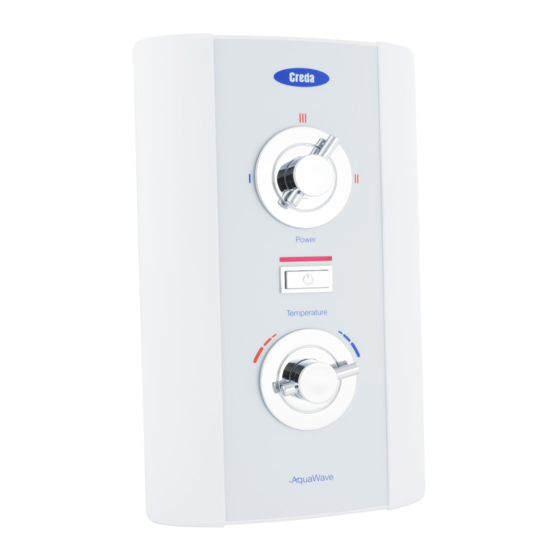
Your shower has 2 control knobs (see Diagram 6b).
Knob "A" controls the 3 power settings.
The most popular is "High".
There are also options for a "Med (medium)"
or "Cold" shower (see notes 7 and 8).
Knob "C" controls the temperature of the water.
For this example turn knob "A" to "High" and set
knob "C" so that the "arrows" are at "12 o'clock".
3.
Press button "B".
The water will flow and the neon indicator will illuminate.
4.
Allow about 20 seconds for the temperature of the water to stabilise.
It is recommended that you do not wholly enter the water spray during
this period, even if the shower has just been used.
IF WATER IS TOO HOT
Turn knob "C" clockwise so that the "arrows"
are at 1 o'clock and continue turning clockwise
until you get the water temperature of your liking.
Wait 20 seconds after each adjustment for the
water temperature to stabilise.
The final adjustment may be anywhere on the
scale.
If after turning fully clockwise, water is still too
hot, adjust knob "A" to "Med (medium)" setting
and re-adjust as above.
Water flow will be reduced on this setting.
Once a temperature setting to your liking has been achieved, knob "C" will rarely need adjusting.
5.
You must however take into account required adjustments for variations of incoming mains water
temperature between summer and winter (see "Effect of Seasonal Incoming Water Temperature
Changes" see page 13).
6.
When you have finished showering, press button "B" only. You have no need to adjust knobs "A or C".
The water will stop flowing neon indicator will go out.
10.5kW Variants Only - Water will continue to flow for approximately 7 seconds before switching off.
Switch off the electricity at the ceiling switch or local isolator.
7.
The "Med (medium)" setting of knob "A" reduces the power used by the shower giving a cooler shower or
the option of reduced water flow.
This option is mainly used for summer usage and if this is used then knob "C" must be re-adjusted.
8.
The "Cold" setting of knob "A" will supply water without any heating.
9.
Your shower is designed to stabilise temperature changes caused by water pressure fluctuations
(see "Effect of Other Water Devices on Incoming Water Supply" see page 13).
WARNING: DO NOT SWITCH THE SHOWER ON IF YOU SUSPECT IT OF BEING FROZEN.
WAIT UNTIL YOU ARE SURE IT HAS THAWED OUT.
WARNING: DO NOT OPERATE THE SHOWER IF WATER IS DISCHARGED FROM THE PRESSURE RELIEF
VALVE. MAINTENANCE IS REQUIRED BEFORE THE SHOWER CAN BE USED.
WARNING: CONSIDERATION SHOULD BE GIVEN TO SUPERVISING THE YOUNG, ELDERLY AND THE
INFIRM WHILST THEY USE THIS SHOWER.
IF WATER IS TOO COLD
Turn knob "C" anti-clockwise so that the
"arrows" are at 11 o'clock and continue turning
anti-clockwise until you get the water temperature
of your liking.
Wait 20 seconds after each adjustment for the
water temperature to stabilise.
The final adjustment may be anywhere on the
scale.
If after turning fully anti-clockwise water is still
too cold, set shower pattern on shower handset to
outer or inner pattern only.
10
6. Re-fit the front cover (see Diagram 4), and secure by replacing the top and bottom fastening screws.
Contemporary Models
a. Ensure the top control knob is aligned to the "
b. Ensure the "small bar" of the bottom control knob is aligned to 6 o'clock as shown (Diagram 4b).
Heritage Models
a. Ensure the top control Knob is aligned to the "HIGH" position as shown (Diagram 4a).
b. Ensure the bottom control Knob is aligned to 6 o'clock as shown (Diagram 4b).
6c. In the main body of the shower ensure the "raised pip" of the "camshaft", positioned to accept the
top control knob, is set to 12 o'clock (Diagram 4a).
6d. In the main body of the shower ensure the "bottom gear wheel", positioned to accept the bottom
control knob is turned fully anti-clockwise as shown (Diagram 4b).
6e. Check that the top control knob has been correctly aligned by ensuring that all three power settings
can be selected.
6f. Check that the bottom control knob has been correctly aligned by turning clockwise and ensuring that
the knob turns approximately one full turn and when turned back fully anti-clockwise, returns to
6 o'clock.
7. Fit the shower hose, and operate the shower first without the handset to flush out particles,
fit the handset and then operate the shower as on page 9/10 or 15/16 and check:
a. Water gets to a satisfactory temperature and water flow can be adjusted by control knob "C".
b. Power selection operates in all 3 positions, giving a change in water temperature.
c. Check again for leaks and that the holes in the shower handset are not blocked.
8. Demonstrate the showers operation to all users.
" position as shown (Diagram 4a).
7