Archon WD2010L 설치, 운영 및 유지보수 지침 매뉴얼 - 페이지 13
{카테고리_이름} Archon WD2010L에 대한 설치, 운영 및 유지보수 지침 매뉴얼을 온라인으로 검색하거나 PDF를 다운로드하세요. Archon WD2010L 16 페이지. Washdown stations
INSTALLATION/OPERATION/MAINTENANCE INSTRUCTIONS FOR
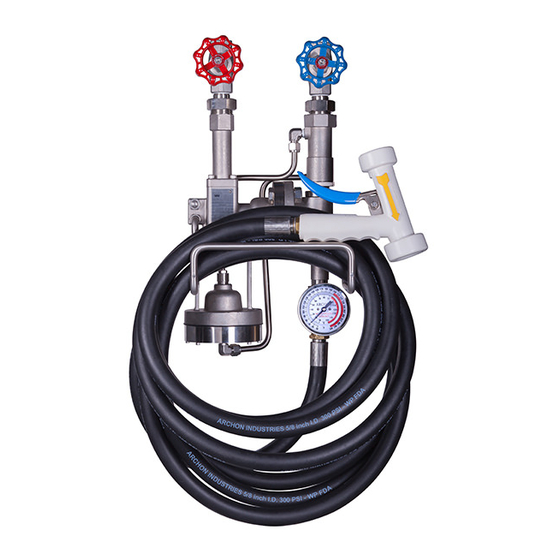
ARCHON MODELS WD2010L, WD2010, WD2010H WASHDOWN STATIONS
Do not rotate connector (Item 103, Figure 5) after assembling the diaphragm.
k.
Rotate the assembly in the vice so that the upper diaphragm casing (45) is upright. Place O-ring (39B) over
end of extension (74) and connect extension to valve body using four-4 cap screws (100B). Cap screws
should be torqued to 7-8 ft-lb.
l.
Install tubing (171) to valve body connections hand-tight only.
m. Install steam check valve (75B) and spring (140A) in the valve body. Install O-ring (39A) on the jet body
(82). Ensuring that the two sides line up laterally, loosely assemble steam valve body (11) to the jet body
(82) with two bolts and nuts (100), (4B). Do not tighten bolts.
m. Attach tubing (171) to jet body and tighten connections.
n.
Tighten two-2 bolts (100) at valve to jet connection. Bolts to be torqued to 30 ft-lb.
o.
Assemble hose rack (246) and place in lower holes in the mounting lugs. Secure in place with nuts (4A).
5. Re-Mounting
a.
Re-mount the assembled unit with pipe spacers (79) and bolts (100A).
b.
Tighten union coupling nuts (99) of manually operated steam and water valves (75S) (75W).
c.
Reconnect discharge hose and spray gun assembly to unit.
Refer to Section III Installation and Section IV Operation when returning washdown station to service.
CAUTION
13
Installation: 1004 Rev 4
Issued: February 7, 2013