Digikeijs DR5033 매뉴얼 - 페이지 6
{카테고리_이름} Digikeijs DR5033에 대한 매뉴얼을 온라인으로 검색하거나 PDF를 다운로드하세요. Digikeijs DR5033 10 페이지. 3-ampere, h-bridge dcc booster
Digikeijs DR5033에 대해서도 마찬가지입니다: 사용 설명서 (18 페이지), 사용 설명서 (18 페이지)

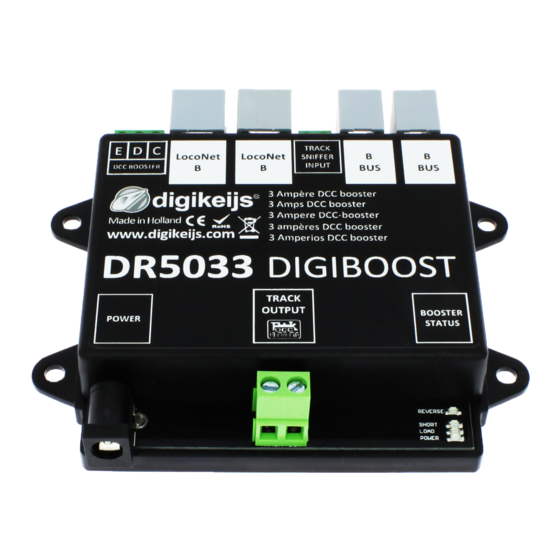
DR5033 BOOSTER 3 AMP
Connection
The DR5033 is connected to the control unit as indicated in the control unit manual.
•
Lenz™
units: via the CDE output on the control unit to the CDE input on the DR5033
•
Roco™
MultiMaus™: via the booster-out on the control unit and the B-BUS™ input on the DR5033. Up to 4x DR5033 boosters
can be linked to each other (for more, a
•
Roco
z21™
(white): via the B-BUS™ output on the control unit and the B-BUS™ input on the DR5033. Up to 4x DR5033 boosters
can be linked to each other (for more, a
•
Roco
Z21™
(black): as for the z21 (white), with the additional option of connecting the L.NET input on the DR5033 to the L-BUS
output on the Z21, enabling the features of an L.NET-connected DR5033 and enabling the DR5033 to be configured and read
out by the
Z21™
maintenance tool using LNCV programming.
•
Intellibox™
(I, I-IR, COM, Basic and II) /
trol unit to the L.NET input on the DR5033.
•
Intellibox™
(I, I-IR): via the CDE connection on the control unit to the CDE input on the DR5033.
•
Other units that do not have CDE / B-BUS™ / L.NET can be connected via the rail output on the control unit to the RailSniffer
input on the DR5033.
Configuration
The DR5033 is set at the factory so that all of the control units tested (Lenz™ LZV100, Roco™ MultiMaus™, Roco™ Z21™, Roco z21 ™
(white), Intellibox™, TwinCenter™ and DR5000) work out of the box.
If you have a control unit that supports LNCV programming, you can configure the following on the DR5033:
LNCV's
(order number 50330)
LNCV Description
0
Module address
1
Firmware version (1000 = 1.000)
3
Configuration
6
H-bridge temperature in °C
7
Load percentage
Switching address to turn the booster on
8
or off
Turn on automatically following a short
circuit in 3 ms steps. The standard value
11
is equivaent to approx. 3/4 of a second
(750 ms)
LNCV 3 Configuratie
Bit
Value
Description
0
Not used
0
1
Not used
Star the output from the booster as soon as
0
there is an input signal
1
Start the output from the booster when the
2
GO button is pressed or the connected
switching address is 'green'
Booster sends no 'GPON/GPOFF' L.NET
0
report, even when there is a short circuit.
The automatic short circuit repair is active.
2
Booster sends 'GPON/GPOFF' L.NET re-
4
ports. The control unit controls when the
booster turns back on.
0
Not used
3
8
Not used
www.digikeijs.com
Roco™
'braking module' is required; refer to the
Roco™
'braking module' is required; refer to the Roco manual).
Fleischmann™ TwinCenter™
Range
Default LNCV Description
1-9999
1
12
-
-
13
Zie onder 92
14
0-150
-
15
0-100
-
16
0-2048
0
17
64-30000 244
18
Default Bit
0
4
0
5
4
6
8
7
Roco™
/
Piko™
PowerPox™: via the
The waiting time after automatic polarity
reversal of the output prior to short circuit
being reported in 3 ms steps
The short-circuit or polarity-reversal ration
time in 3 ms steps
Optional switching address to reverse the
Polarity reversal ON to feedback A
Polarity reversal ON to feedback B
Polarity reversal OFF to feedback D
Polarity reversal OFF to feedback E
Value
Description
Booster sends no special L.NET report if there
0
is a short circuit.
Booster sends a special L.NET report if there
16
is a short circuit enabling the control unit to
display which booster has a short circuit.
Start the booster output without reversed
0
polarity (blue LED off)
Start the booster output with reversed polari-
32
ty (blue LED on)
0
Automatic polarity reversal off
64
Automatic polarity reversal on
0
Not used
128
Not used
manual).
LocoNet™
B output on the con-
Range
Default
32-250
48
16-250
32
0-2048
0
0-2048
0
0-2048
0
0-2048
0
0-2048
0
Default
16
0
64
0
P 6
