Shimano Ultegra 6770 Series 매뉴얼 - 페이지 6
{카테고리_이름} Shimano Ultegra 6770 Series에 대한 매뉴얼을 온라인으로 검색하거나 PDF를 다운로드하세요. Shimano Ultegra 6770 Series 24 페이지.
<SM-BTR1: Battery>
• The battery is uncharged at the time of purchase. Before riding, be sure to charge the battery until it is fully charged.
• When storing the battery away, remove the battery from the bicycle and install the terminal cover first.
• If the battery is stored away while the battery charge is 50% or higher (the indicator is illuminated green), the battery will last
longer.
It is recommended that you check the condition of the battery about once every half a year.
• If the battery is stored in cold locations, the performance of the battery may drop and the length of time that it can be used may
become shortened.
• The battery is a consumable item. The battery will gradually lose its capacity for charging after repeated use and after time has
passed. If the length of time that the battery can be used becomes extremely short, it has probably reached the end of its life,
and so you will need to purchase a new battery.
• The life of the battery will vary depending on factors such as the storage method, the usage conditions, the surrounding
environment and the characteristics of the individual battery pack.
• The charging time is approximately 1.5 hours. (Note that the actual time will vary depending on the amount of charge remaining
in the battery.)
• If the battery feels difficult to insert or remove, apply specified grease (DURA-ACE grease) to the part that touches the O-ring at
the side.
• For the DURA-ACE (7970), the bicycle can be ridden for approximately 1000 km on a full charge. For the ULTEGRA (6770), the
riding distance will be shorter. (Approximately 30% less according to tests carried out by Shimano.)
• Charging can be carried out at any time regardless of the amount of charge remaining. Always be sure to use the special battery
charger to charge the battery until it is fully recharged.
• If the battery has become fully spent, charge it as soon as possible. If you leave the battery without charging it, it will cause the
battery to deteriorate.
• If you will not be riding the bicycle for a long period, remove the battery from the bicycle and recharge it periodically. In
addition, take care not to let the battery become fully spent.
Information on disposal in countries other than the European Union
This symbol is only applicable within the EU.
Used batteries should be disposed of in accordance with local laws and regulations, or
ask the place of purchase or a bicycle dealer for disposal.
<EW-SD50/EW-SD50-I: Electric Wires / SM-EWC2: Electric Wire Covers>
• Secure the electric wires with cable ties so that they do not interfere with the chainrings, sprockets and tires.
• The strength of the adhesive is fairly weak, to prevent the paint on the frame from being peeled off at the same time when
removing the electric wire cover for reasons such as replacing the electric wires. If the electric wire cover is peeled off, replace it
with a new one.
When removing the electric wire cover, do not peel it off too vigorously. If this is not observed, the paint on the frame will peel
off too.
• Do not remove the wire holders which are attached to the built-in type electric wires (EW-SD50-I). The wire holders prevent the
electric wires from moving inside the frame.
<ST-6770: Dual Control Lever>
• Dummy plugs are installed at the time of shipment from the factory. Do not remove them except when necessary.
• Be sure to rotate the front chainwheel when carrying out any lever operations which are related to gear shifting.
• When routing the electric wires, take care to ensure that they do not interfere with the brake levers.
10
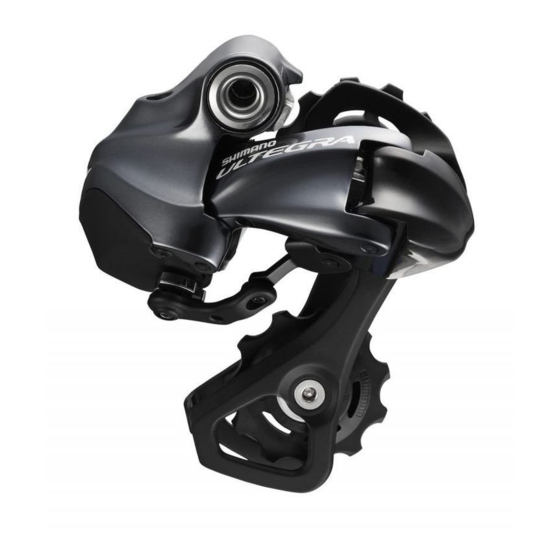
<RD-6770: Rear Derailleur>
• Always be sure to adjust the top adjustment bolt and the low adjustment bolt according to the instructions given in the
adjustment section. If these bolts are not adjusted, the chain may become clamped between the spokes and the large sprocket
and the wheel may lock, or the chain may slip onto the small sprocket.
• If the amount of looseness in the links is so great that adjustment is not possible, you should replace the derailleur.
• Periodically clean the derailleur and lubricate all moving parts and pulleys.
• If gear shifting adjustments cannot be carried out, check the degree of parallel of the rear dropouts.
• If there is a large amount of play in the pulleys which causes worrying noise while riding, replace the pulleys.
• The tension pulley has an arrow on it to indicate the direction of rotation. Install the tension pulley so that the arrow is pointing
clockwise when looking at the pulley from the outside.
<CN-6701: 10-speed Chain for Road Riding>
• As illustrated in Fig. A, we strongly recommend to set the connecting pin in the hole of the outer link on the front side in the
direction of travel. The chain's level of strength is enhanced compared to the method in Fig. B.
A
Inner link
Outer link
Connecting pin
B
Inner link
Outer link
Connecting pin
• Place the chain into the chain cutting tool as shown in the illustration. If the chain is set incorrectly into the chain cutting tool, it
will break the positioning plate.
Chain's
direction of
travel
11