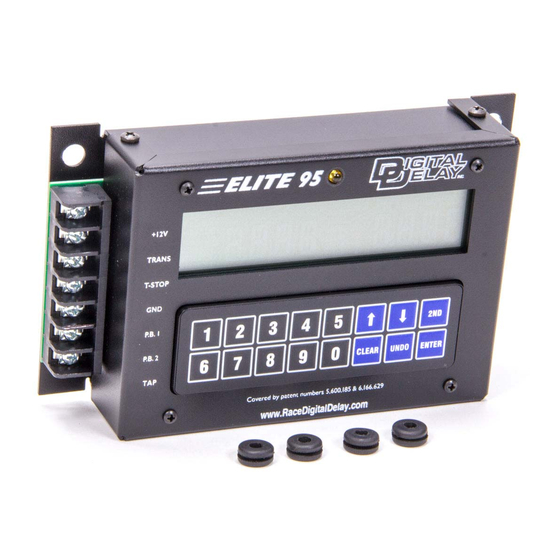
DIGITAL DELAY Elite 95 매뉴얼 - 페이지 8
{카테고리_이름} DIGITAL DELAY Elite 95에 대한 매뉴얼을 온라인으로 검색하거나 PDF를 다운로드하세요. DIGITAL DELAY Elite 95 11 페이지.

To display the How Late information, press the 3 key, the How Late information is shown to the left side of the
screen. To understand how to use the How Late information, it must first be understood that when the Elite 95 is set in either
Push-button Mode 2 or 3, both the primary delay ((Their Dial - Your Dial ) + Delay 1) and secondary delay (Delay 2) times
can be timing down the release of the Transbrake at the same time. When either the primary or the secondary delay reaches
zero the Transbrake is released. However, without the How Late information the driver would not know which Delay was
used to release the Transbrake or how much longer the other delay time would have run. To indicate that the Transbrake
released on secondary timer the left most digit will display a "2", if not, it will be a "1" for primary timer. The remaining
digits display the How Late time. The How Late time is how much delay time was left in the unused delay timer when the
Transbrake was released. For example if the number displayed is "2.012" the secondary timer was used to release the
Transbrake. Then if your reaction time was .510 on the time slip, add the How Late time to the .510 for a total reaction time of
.522 for the primary delay. With the time slip and the How Late information a driver can adjust both Delay timers as needed.
The How Late only works in Push-button Modes 2 and 3. If the Elite 95 is set in Push-button Mode 1 or 4 two dashes will be
shown for the How Late screen indicating the How Late feature is not currently available.
NOTE:
Both How Late and Tap Up/Down information are stored in memory until they are cleared by the user or replaced
by a new number after a pass. To clear the Tap and How Late information, press the 2ND key while the Tap and How Late are
being displayed.
Understanding the Driver's Reaction Tester
This Digital Delay exclusive Delay Box feature allows a driver using the buttons mounted in the vehicle to test their
reaction time. This can also be used to test different kinds of buttons and locations that buttons are mounted in the vehicle for
the quickest release possible. A new feature that averages the Driver's Reaction Time has been added to the Elite Series Delay
Boxes. It allows the Elite 95 to keep track of the driver's average reaction time during a reaction test session.
To select the Driver's Reaction Tester, press the 7 key, everything on the screen will turn on, this can also be used to
check for proper screen operation. Once in Reaction Test Mode, if a Push-button connected to either PB 1 or PB 2 is pressed
and held down, the screen will go blank. After about 2 seconds the yellow LED above the screen will turn on, at which time
the driver releases the Push-button being held. The left side of the display will now show the reaction time, the amount of time
from when the yellow light turned on to when the Push-button was released. The right side shows the average reaction time.
If the driver lets go of the button too soon, before the yellow LED turns on, dashes will be shown on the screen to indicate a
red light. If the driver does not let go of the button within .75 seconds after the yellow LED turns on, the display will show
reaction time of all nines to indicate a missed light. To do additional tests of the driver's reaction time, press and hold the
button again. The screen will go blank and the yellow LED will go out. Then as before, after about 2 seconds the yellow LED
above the screen will turn on, at which time the driver releases the Push-button being held. Again the reaction time will be
shown on the left side of the screen, and the new average of the driver's reaction time on the right side of the screen.
To exit the Driver's Reaction Test Mode press the number 1 key on the keypad. If neither PB 1 nor PB 2 button is
pressed; the unit will automatically exit the Driver's Reaction Test Mode after 30 seconds. Each time either Push-button is
pressed the 30-second time period resets.
NOTE: When in the Driver's Reaction Test Mode, the Transbrake solenoid will not be activated when a Push-button is
pressed. This is to prevent any damage to the solenoid from over-heating.
A By-pass Push-button is used to engage the Transbrake solenoid without starting a timing cycle. This can be helpful
if the vehicle needs the Transbrake engaged to back up. If a By-pass Push-button is desired, connect one side of a Push-button
to the Transbrake terminal and the other side of the Push-button to +12 Volts. Applying +12 Volts to either of the outputs will
not damage the unit.
Connecting or shorting any output terminal directly to ground will cause damage to the unit. This damage will
not be covered by the warranty. It is strongly recommended that a 15 Amp fuse be put in each of the wires coming
from the output terminals.
Understanding the How Late
Understanding and Connecting
a By-pass Push-button
8
