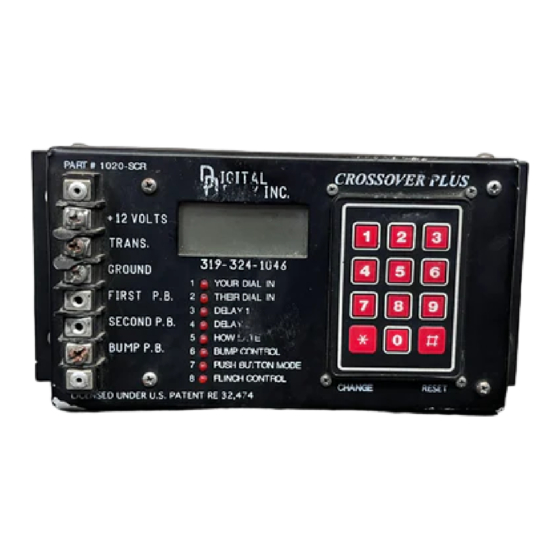
DIGITAL DELAY Crossover Plus SCR 사용 설명서 - 페이지 5
{카테고리_이름} DIGITAL DELAY Crossover Plus SCR에 대한 사용 설명서을 온라인으로 검색하거나 PDF를 다운로드하세요. DIGITAL DELAY Crossover Plus SCR 10 페이지.

+12VDC Terminal:
Volt source with enough amperage capable of driving the transbrake.
(Using an in-line fuse just large enough to handle the current draw
of the transbrake solenoid, normally 15 Amps., is recommended.)
Transbrake Terminal:
Transbrake solenoid. Connect the low side of the 2-Step, the red
wire, here if used.
When entering new information into the unit, there
must be a number (0-9) in every valid space on the
display or the transbrake terminal will not function.
Ground Terminal:
on the battery or to a good steel ground, not aluminum.
Button-1 Terminal:
connected to Button-1 terminal is used to control the primary
delay and the secondary delay in sequence. In dual Push Button Mode
the push button connected to Button-1 terminal is used to control
the primary delay only.
Button-2 Terminal:
connected to Button-2 terminal is used to control the recovery
if turned on. In dual Push Button Mode the push button connected to
Button-2 terminal is used to control the secondary delay only.
Tap Terminal:
button to the Tap terminal. This allows you to subtract or add a
programmable amount of time from the first delay time started
every time the Tap Push Button is depressed.
Note: In single Push Button Mode the Tap Up or Down only affects the
primary delay and has no effect on the secondary delay.
The Terminal Strip
Connect the +12VDC terminal to a switched +12
Connect the Transbrake terminal to the
Connect the Ground terminal to the Neg. terminal
In single Push Button Mode the push button
In single Push Button Mode the push button
If taping up or down is desired connect a push
5
