Motorola RADIUS GP300 사용 설명서 - 페이지 6
{카테고리_이름} Motorola RADIUS GP300에 대한 사용 설명서을 온라인으로 검색하거나 PDF를 다운로드하세요. Motorola RADIUS GP300 47 페이지. Portable radios
Motorola RADIUS GP300에 대해서도 마찬가지입니다: 매뉴얼 (15 페이지)
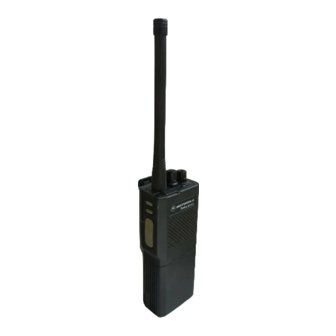
Quick Reference Card
Antenna Installation
Rotate the antenna clockwise until hand tight
into the antenna connector on the top of the
radio.
Battery Installation or Replacement
1. Turn off the radio and hold it with the back of
the radio facing up.
2. Disengage the battery latch on the bottom of
the radio by pushing and holding the latch
towards the front of the radio. (See Figure 1.)
Battery
Latch
Figure 1.
3. While holding the battery latch, slide the bat-
tery down from the top of the radio about 1/2
of an inch. Once the battery is free from the
control rails, lift it directly upward to remove.
4. To install a fresh battery, align the belt clip
end of the battery with the control rails on the
radio. (See Figure 2.) Slide the battery
toward the top of the radio until it is fully
engaged by the battery latch.
Figure 2.
To Receive
1. Turn the radio on and rotate the CHANNEL
SELECTOR to the desired channel position.
(See Figure 3.)
2. Listen for a transmission or hold the MONI-
TOR BUTTON to hear back-ground noise.
Adjust the VOLUME CONTROL to a comfort-
able listening level. (See Figure 4.)
3. To monitor a channel (disable PL/DPL) press the
side mounted CONTROL BUTTON. The LED
glows yellow for 4 seconds to confirm that the
coded squelch is disabled. To reverse the moni-
tor status, press this button again.
On/Off/Volume
Channel
Accessory
LED
Selector
Connector
Indicator
Figure 3.
Monitor Button
(Volume Set) or
(Scan Nuisance Delete)
Control Button
Push-To-Talk
Button (PTT)
Figure 4.
Control