Acom 1010 운영 매뉴얼 - 페이지 11
{카테고리_이름} Acom 1010에 대한 운영 매뉴얼을 온라인으로 검색하거나 PDF를 다운로드하세요. Acom 1010 20 페이지. External radio frequency power amplifier
Acom 1010에 대해서도 마찬가지입니다: 회로도 문서 (14 페이지), 회로도 (15 페이지)

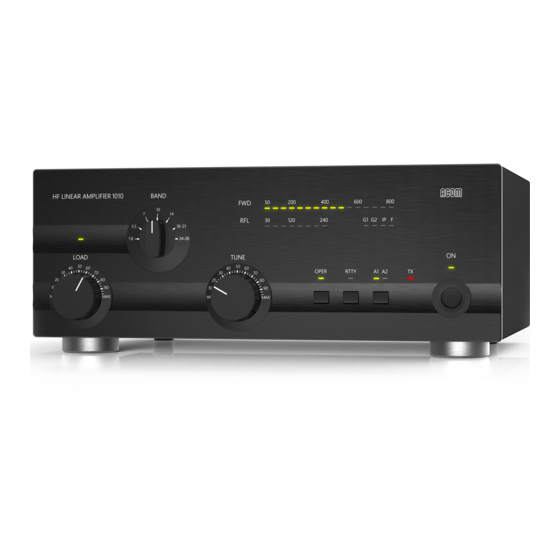
- G2 - when illuminated, a screen-grid overload condition exists; reduce the drive power and/or refresh
the tuning (Section 4-5) for safe operation;
- IP - when illuminated, a plate current overload condition exists; reduce the drive power and/or refresh
the tuning (Section 4-5) for safe operation;
- F – when illuminated, the amplifier automatic protection has tripped. If F is accompanied with one of
the G1, G2, or IP condition indicators, the cause of the protection trip will be evident. When F alone is
illuminated, check the keying wiring, Section 2-4(d). See Section 4-6 for details about the auto-protection
system.
4. OPERATION
Operation of the amplifier is simplified through ACOM's innovative TRI tuning aid, Auto-Operate function,
and automatic protection systems. To make full use of the amplifier's potential and to configure it to
local conditions, the following information should be read carefully.
4-1. Turning ON and OFF
In order to turn on the amplifier, press the power switch ON at the bottom-right corner of the front
panel. The LED indicator above the switch will glow green and the audible cooling fan will start. Following
a series of automatic self-tests, the OPER LED will begin to flash green and will continue to do so during
the 150-second warm-up period. Throughout this period, the amplifier will remain in the standby mode,
and the transceiver may continue to be used. Also during this period, the A1-A2 button may be pressed
to change antennas, i.e., between the antennas connected to the ANT1 and ANT2 terminals on the rear
panel of the amplifier. Switching between the antennas does not affect the warm-up process.
To avoid damage not covered under warranty, do not change the antenna output
during a transmission, i.e., never press the A1-A2 button when transmitting.
When you intend to have a short operating break, it is better to place the amplifier
in the standby mode rather than turning it off. Tube life is shortened by repeatedly
turning it on and off.
After the warm-up period is complete, the OPER LED stops flashing and remains illuminated green.
4-2. Changing Operate and Standby Modes
The OPER button changes between two modes. When the green light above the button is illuminated,
the amplifier will remain ready to operate, even automatically returning from standby after a high-drive
protection trip. That is, after a protection trip, e.g., from an overdrive event, the amplifier will normally
shift to the STBY mode for several seconds, but it will automatically return to the OPER mode after
that. This is the Auto-Operate feature. Alternatively, the OPER button may be depressed manually to
go to and remain in the STBY mode, such as when you leave the station for a while. The green LED
goes off and the Auto-Operate function is suppressed temporarily. Pressing the OPER button again
restores the Auto-Operate feature.
CAUTION
NOTE
10
