Clare Controls ClareVision Plus 빠른 시작 매뉴얼 - 페이지 3
{카테고리_이름} Clare Controls ClareVision Plus에 대한 빠른 시작 매뉴얼을 온라인으로 검색하거나 PDF를 다운로드하세요. Clare Controls ClareVision Plus 6 페이지. Ip cctv cameras
Clare Controls ClareVision Plus에 대해서도 마찬가지입니다: 빠른 시작 매뉴얼 (9 페이지), 빠른 시작 매뉴얼 (9 페이지), 빠른 시작 매뉴얼 (2 페이지), 매뉴얼 (9 페이지)
Installation Option 1: PoE (Power over Ethernet)
Preferred Setup Method
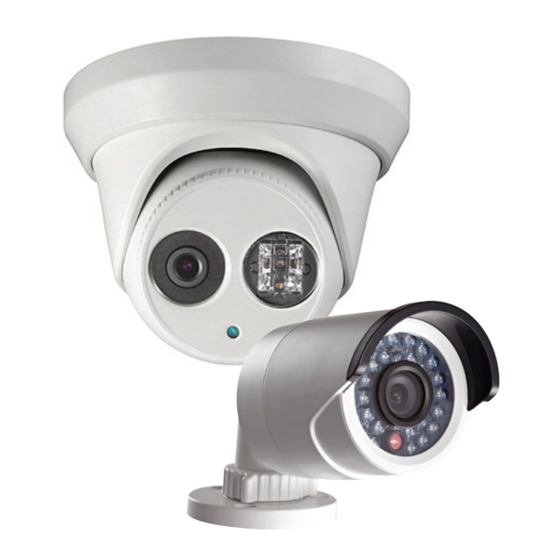
Connecting cameras using PoE: you will need access
to the ClareVision+ App, camera, and your home network.
Note: A PoE injector should be used if your network
switch does not support Power over Ethernet.
Home routers do not support PoE. Injectors sold
separately. (Order part: CC-POE-10)
1. Connect the camera to the PoE injector.
2. Connect the injector to the router and then
plug in the power supply for the injector.
3. Download and open the ClareVision+ App.
4. To view live camera footage, proceed to Cloud
P2P setup.
Easily View Recorded Video Footage
If you are using an NVR or a micro SD card
use the ClareVision+ App to view all recorded footage.
1. Tap
.
2. Tap
> Remote Playback, click on the
3. Pick a date range and camera(s) to view.
4. Recorded video will be displayed.
* ClareVision+ micro SD cards come pre-formatted for ClareVision+
cameras. Other micro SD cards will need formatted before use.
3
, you can
*
.