CALECTRO Uniguard Superflow UG-3-J 설치 지침 - 페이지 3
{카테고리_이름} CALECTRO Uniguard Superflow UG-3-J에 대한 설치 지침을 온라인으로 검색하거나 PDF를 다운로드하세요. CALECTRO Uniguard Superflow UG-3-J 5 페이지.
CALECTRO Uniguard Superflow UG-3-J에 대해서도 마찬가지입니다: 설치 지침 (4 페이지), 설치 지침 (4 페이지)
4
Bor hul i kanalen:
• Uden UG-beslag, Ø38mm
• Med UG-Beslag, Ø51mm (se punkt 10)
• Mål diameteren på kanalen.
• Afkort kanalspyddet hvis nødvendigt.
• Kanalspyddet bør mindst dække 90% kanaldiameteren.
OBS! Se punkt 8.
• Montere endestykke
• Montere den sorte pakning på kanalspyddet.
• Montere kanalspyddet i detektoren.
• Fastgør kanalspyddet med låse skruen.
• Montere kanalspyddet og detektoren i kanalen.
• Fastgør detektoren med 3 skruer ved
pilenes markering.
OBS – VIGTIGT!
Luftstrømsindikeringen (formen på detek-
torens beslag og pilen på kapslingen)
skal have samme retning som luftstrømmen.
Elektrisk installation
• Fjern låget ved hjælp af hurtiglåsen.
• Før kablet gennem kabelgennemføring.
Hvis der benyttes en anden type gennemføring,
så afmonter de medfølgende ved at presse
den ene side ind i hullet og derefter den
anden (1-2)
CA
12.2012 DK 2015.12.07
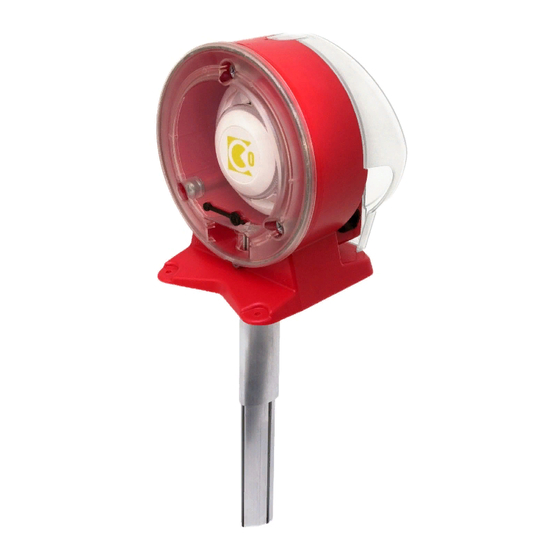
Røgdetektor FDKC-2
Afkort ikke I denne ende!
Do NOT cut this end!
3
Låse skrue.
Locking screw.
6
(1)
(2)
1
Drill a hole in the duct:
• Without UG-bracket, ø 38 mm.
• With UG-bracket and/or venturi pipe with booster
fan, ø 51 mm (see para 10).
2
Ändplugg.
End plugg.
Pakning.
Gasket.
4
Hurtiglås
Snap locking.
Montageanvisning
• Measure the diameter of the duct.
• Shorten the pipe, if necessary.
• The pipe should penetrate at least 90%
of the width of the duct.
NOTE! See para 8.
• Insert the end plug.
• Mount the black gasket on the pipe.
• Insert the pipe into the bottom of the
Uniguard.
• Secure the pipe with the locking screw.
• Mount the pipe and the detector on the duct.
• Secure the bottom of the Uniguard with
the 3 screws, positions marked.
NOTE - IMPORTANT!
The air flow direction arrows (see
the Uniguard foot's shape or on the
housing top) must have the same
direction as the air flow in the duct.
Electrical installation.
• Remove the cover by opening the snap
locking.
• Enter the cable through one of the
Klikseal glands.
When using another type of cable gland
dismount the ones already installed by
first pressing one side through the hole
and then the other one (1-2).
Specifikationerne kan ændres uden varsel.