Zanussi ZFC 310 운영 및 설치 매뉴얼 - 페이지 6
{카테고리_이름} Zanussi ZFC 310에 대한 운영 및 설치 매뉴얼을 온라인으로 검색하거나 PDF를 다운로드하세요. Zanussi ZFC 310 9 페이지. Chest freezer zfc 220; zfc 310
Zanussi ZFC 310에 대해서도 마찬가지입니다: 운영 및 설치 매뉴얼 (4 페이지)
GB
INSTALLATION
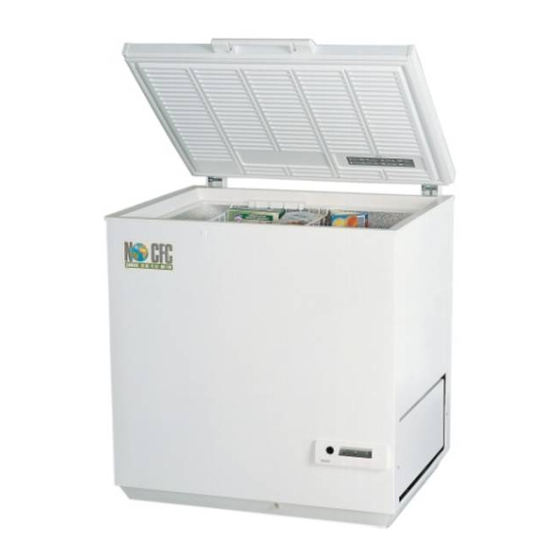
POSITION (1)
Place the freezer horizontally on a firm surface,
resting on all four plastic feet. Use a wooden block or
similar object to compensate for any bumps/holes in
the surface.
The room should be dry and adequately ventilated.
Temperatures of the external environment have an
impact on the energy consumption of the device.
Therefore:
-do not put the device to a place exposed to
sunshine ore besides a radiator or oven,
-put it to a place where the temperature of the
environment
corresponds
classification for which the device was designed.
Climatic classification
SN
N
ST
T
If the freezer has been handled standing on end it
should be allowed to stand in normal position for
about 12 hours before switching it on.
Please ensure that when the appliance is installed it
is easily accessible for the engineer in the event of a
breakdown.
SWITCHING ON (2)
Before switching on, the freezer should be cleaned
inside. See under "Maintenance".
Set the thermostat button in middle position. Allow the
freezer to run for several hours before placing food inside.
ELECTRICAL REQUIREMENTS
Before switching on, make sure that the voltage of your
electricity supply is the same as that indicated on the
rating plate, located inside the lid.
Warning:
This appliance must be earthed.
this appliance complies with the following EC
Directives:
- 73/23/EEC of 19. 02. 1973 - Low-Voltage Directive
- 89/336/EEC of 03. 05. 1989 (including Amendment
Directive 92/31/EEC - EMC Directive.
Some of the models are not available in all countries.
Testing has been carried out in accordance with ISO
5155 regarding the determination of freezer capacity,
energy consumption and hold-overtime.
Information for test institute: A plan of the positioning of test
packages may be obtained directly from the manufacturer.
HOW TO USE
TEMPERATURE CONTROL (3)
The thermostat ensures that the required
temperature is maintained in the freezer. Adjust the
temperature by turning the button with a coin that fits the
groove. Turning the thermostat button towards no. 7 makes
the temperature in the freezer colder, and turning the button
6
to
the
climatic
Ambient temperature limits
from +10°C to +32°C
from +16°C to +32°C
from +18°C to +38°C
from +18°C to +43°C
towards no. 1 makes the temperature warmer. The correct
setting can be found by measuring the temperature of the
top package in the middle of the freezer. This should not
have a temperature higher than –18°C.
OPENING/CLOSING THE LID
The lid is fitted with a tightly closing sealing strip to
prevent moisture getting inside the freezer and
increasing the amount of frost formed.
When the lid is opened the air inside the freezer
becomes slightly warmer and expands.
As soon as the lid is closed again the air is cooled
immediately.
This may lead to the creation of a vacuum which makes it
hard to open the lid immediately after it has been closed.
This is quite normal.
Wait a few minutes until the vacuum has disappeared, then
open the lid by pulling gently. Never pull the handle violently.
CONTROL PANEL (4)
The green light is illuminated as long as the freezer
is connected.
The yellow light is illuminated when the "Super" button is
depressed. See under "Freezing".
The red light is illuminated when the temperature in the
freezer is higher than the thermostat setting (alarm).
1. Thermostat button
2. Green light
3. Red light
4. Yellow light
5. „SUPER"
The red alarm light can be due to:
Insertion of a large amount of fresh food. The red
alarm light will go out after a while.
Opening the lid too long. The red alarm light will go
out after a while.
A defect in the system. See under "If something does
not work".
FREEZING
It is important that fresh food placed in the freezer
is frozen quickly, and that the food already in the
freezer is heated as little as possible in this connection.
If more than 3-4 kg of food is to be frozen:
Press the square "Super" button (yellow light comes
on). The freezer will now run continuously, creating a
sufficient reserve of the temperature required.
Press the "Super" button 6-24 hours before placing
fresh food in the freezer, depending on how much
food is to be frozen.
Place the food in the freezer and leave the "Super"
button on for about 24 hours more.
Then press the "Super" button again (yellow light
goes off). The freezer will return to normal storage
temperature. If you forget to press the "Super" button
again, the freezer will not be damaged by running at
the "Super" setting for some time - but energy will be
wasted.