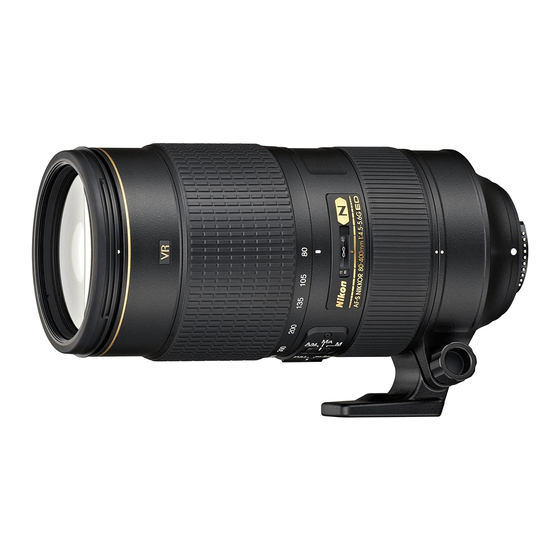
Nikon AF VR Zoom-Nikkor 80-400mm f/4.5-5.6D ED 사용 설명서 - 페이지 6
{카테고리_이름} Nikon AF VR Zoom-Nikkor 80-400mm f/4.5-5.6D ED에 대한 사용 설명서을 온라인으로 검색하거나 PDF를 다운로드하세요. Nikon AF VR Zoom-Nikkor 80-400mm f/4.5-5.6D ED 22 페이지. Nikon d200: product brochure
Nikon AF VR Zoom-Nikkor 80-400mm f/4.5-5.6D ED에 대해서도 마찬가지입니다: 브로셔 및 사양 (18 페이지)

21
Specifications and designs are subject to change without any notice or obligation on the
part of the manufacturer.
I
• Rear lens cap LF-1
• Semi-soft case CL-M1
D-type AF Zoom-Nikkor lens having built-in CPU and
Nikon bayonet mount. Special vibration reduction (VR)
mechanism incorporated
80 to 400mm
f/4.5 to f/5.6
17 elements in 11 groups (including 3ED lens elements)
30°10' - 6°10' with 35 mm (135) format Nikon film-SLR
cameras and Nikon FX format digital SLR cameras
20° - 4° with Nikon OX format digital SLR cameras
24°20' - 5° with IX240 system cameras
80,105,135,200,300,400mm
Output to camera body
Manually via separate zoom ring
1:25 (at 80mm)-1 :4.8 (at 400mm)
Autofocus or manual focus via separate focus ring
Lens-shift method using voice coil motors (VCMs)
Graduated in meters and feet from 2.3m (8 ft) to infinity (00)
f/4.5 - f/32 on both standard and aperture-direct-readout
scales
Provided
Fully automatic
Via full-aperture method with AI cameras or cameras with
CPU interface system; via stop-down method for other
cameras
77mm (P
=
0.75mm)
Approx. 91 mm dia. x171 mm extension from the camera's
lens mounting flange; overall length is approx. 179mm
Approx. 1360g (48 oz.) with tripod collar;
approx. 1210g (42.7 oz.) for lens only
Attachment size:
Dimensions:
Weight:
• Do not get water on the lens or drop it in water as this will cause it to rust and
malfunction.
• Reinforced plastic is used for certain parts of the lens. To avoid damage, never
leave the lens in an excessively hot place.
Supplied accessories
• 77mm snap-on front lens cap
• Bayonet hood HB-24
Optional accessories
• 77mm screw-in filters
Specifications
Type of lens:
Focal length:
Maximum aperture:
Lens construction:
Picture angle:
Focal length scale:
Distance information:
Zooming:
Max. reproduction ratio:
Focusing:
Vibration reduction:
Shooting distance scale:
Aperture scale:
Minimum aperture lock:
Diaphragm:
Exposure measurement:
20
Using a tripod (Fig. E)
This lens is equipped with adetachable rotating tripod collar. When using atripod,
attach it to the lens' tripod collar instead of the camera. To attach the tripod collar to
the lens, follow these steps:
1 Loosen the tripod collar lock screw
CD
slightly.
2 Insert the lens by aligning the tripod collar alignment index on the lens with the
mark ...- on the tripod collar
®.
3 Turn the lens to an appropriate position index @ (three indexes are provided
every 90°) on the tripod collar by aligning the tripod collar alignment index on
the lens, then tighten the screw. (If the screw is not tight, the lens may
accidentally come off the tripod collar.)
Removing the tripod collar
First loosen the tripod collar lock screw until the tripod collar rotates freely. Do not loosen
the lock screw too much as it may come off. Then align the tripod collar alignment index
on the lens with the mark ...- on the tripod collar and pull off the tripod collar.
Attaching bayonet hood H8-24
Line up the white index on the hood with the hood mounting index on the front of the
lens and turn the hood clockwise (as viewed from the front of the lens) until it click
stops. To facilitate attachment or removal of the hood, hold it by its base rather than
its outer edge. To store the lens hood, you can attach it in the reverse position.
Reproduction ratio and shooting distance
Normal focusing extends from infinity to 2.3m (7.5 ft.). Amaximum reproduction
ratio of approx. 1:25 is obtained at the 80mm setting, while areproduction ratio of
1:4.8 is possible at 400mm.
Lens care
• Clean the lens surfaces with ablower brush. To remove dirt and smudges, use a
soft, clean cotton cloth or lens tissue moistened with ethanol (alcohol) or lens
cleaner. Wipe in acircular motion from center to outer edge, taking care not to
leave traces or touch other parts of the lens.
• Never use thinner or benzene to clean the lens as this might damage it, result in a
fire, or cause health problems.
• To protect the front lens element, an NC filter is recommended at all times. Alens
hood also helps protect the front of the lens.
• When storing the lens in its lens case, attach both front and rear caps.
.When the lens will not be used for along time, store it in acool, dry place to
prevent mold. Also store the lens away from direct sunlight or chemicals such as
camphor or naphthalene.
I
