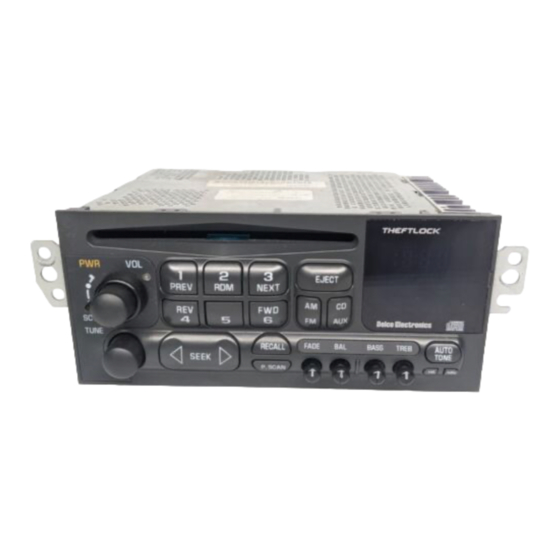
Discount Car Stereo BLU-C5 설치 지침 매뉴얼 - 페이지 11
{카테고리_이름} Discount Car Stereo BLU-C5에 대한 설치 지침 매뉴얼을 온라인으로 검색하거나 PDF를 다운로드하세요. Discount Car Stereo BLU-C5 12 페이지. Music streaming module for seelect 1997-04 corvette
Discount Car Stereo BLU-C5에 대해서도 마찬가지입니다: 설치 매뉴얼 (9 페이지), 설치 지침 (12 페이지), 설치 매뉴얼 (10 페이지), 설치 매뉴얼 (8 페이지), 설치 매뉴얼 (12 페이지)

Frequent asked questions
1.
Does the BLU-C5 require the 12-disc CD changer to work?
NO;
CD changer not required but if present; it must be disconnected. To
retain CD changer functionality; purchase our
2. It is possible to install the BLU-C5 at radio instead of trunk/hatch?
YES;
select the PXHGM4 or PXHGM4 with USB installation harness from
product page.
3. Can I install the BLU-C5 without removing radio?
YES;
If vehicle has a 10-pin plug (See Fig. 6) in trunk/hatch, it can be used
as the connecting point for the BLU-C5. Factory 12-disc changer (if present);
must be disconnected. For this install you must select PXHGM2
installation harness from product page.
4. Streaming is interrupted when using turn signal, headlights or wipers,
Do I have a defective module?
In rare occasions users may experience streaming interruptions when
using these accessories which indicates the accessory (e.g. wiper motor
etc.) is loading down the circuit to which the BLU-C5 is connected. Please
locate alternate ACC supply.
5. Ignition switch "ON" but blue LED is not flashing. Why is that?
Check ACC wire for power (Go to page 5). Also check Add-a-fuse crimp
integrity; often times a bad crimp may result in lack of power.
6. Nothing changes when pressing "AUX" button. What would cause this?
Ensure dip-switch #3 and 8 are "ON" or down, otherwise try to reset:
1. Disconnect 22-pin plug from module or disconnect negative battery
terminal (one or the other)
2. Set all 8 dip-switches to "OFF" or "UP"
3. Module or battery must remain disconnected for 12-15 minutes
4. After time has expired, set dip-switches 3 and 8 to "ON or down
5. Reconnect 22-pin plug to module or reconnect negative battery terminal
6. Turn ignition to ACC and radio "ON", press AUX button. If all went well,
radio display should change to Disc 1 Track 1.
Warning: Set Dip switches prior to reconnecting module or battery
terminal, otherwise you will have to repeat steps 1-6
A2D-C5
instead.
7. Why do I have to connect an accessory wire to fuse box. Is there not
an accessory wire at the radio or CD changer plug?
The short answer is no there is not. As of 4/6/20 (revision); routing
accessory wire is no longer required for modules installed at the
radio with PXHGM4 and PXHGM4+ USB harnesses. The revised module
does not require routing accessory wire to fuse panel and will turn on/off
with radio PWR button which means module will continue playing even after
ignition has been turned off. Modules installed to 10-pin plug in trunk/hatch
with PXHGM2 harness, requires routing accessory wire to fuse panel below
passenger toe board.
8. Can I connect the accessory wire to radio fuse (15A) which appears to
powers on/off with ignition switch?
NO! Radio fuse (5) is battery powered and not recommended. Radio power
is controlled by BCM, (See question 12). Please refer to recommended fuse
positions for Acc. Wire on pg. 3 of this guide.
9. How do I remove radio from dashboard?
Please click video links below for help removing radio:
https://www.youtube.com/watch?v=Gcrlufo1ctc
https://www.youtube.com/watch?v=WTbWYNJTSDs
10. Why does this kit not include a microphone (Does it not support
hands-free calls)?
NO;
BLU-C5 module supports Bluetooth streaming only. For hands-free
purchase our
A2DIY-C5CD
or
C5CD-HF
11. I would like to also connect my Mp3 player to the radio, is this possible?
YES. With the
PX35
aux cable (Seen below), users are able to connect and
play any device with standard headphone jack (3.5mm). Please note aux
device playback will be less loud than streaming. Simply pause or unpair
smartphone and aux device will play.
or our
A2DIY-C5
or
C5-HF
