ClearOne CONVERGE PRO 2 빠른 시작 매뉴얼 - 페이지 6
{카테고리_이름} ClearOne CONVERGE PRO 2에 대한 빠른 시작 매뉴얼을 온라인으로 검색하거나 PDF를 다운로드하세요. ClearOne CONVERGE PRO 2 9 페이지. Next generation audio dsp platform
ClearOne CONVERGE PRO 2에 대해서도 마찬가지입니다: 빠른 시작 매뉴얼 (12 페이지), 설치 매뉴얼 (11 페이지), 빠른 시작 매뉴얼 (8 페이지)
MOUNTING
Installation
Your CONVERGE Pro 2 product comes pre-installed with rack mount ears that fit a standard 19" rack, and a
screw/washer kit� Rack mounting eliminates the need for space between multiple units�
3
Mount the unit by securing the rack-mount ears to two posts or mounting strips in the rack using the four screws
and washers provided� Because the rack-mount ears support the weight of the entire chassis, be sure to use all
four screws and washers to fasten the two rack-mount brackets to the rack posts�
CONTROLS AND CONNECTIONS
Refer to the following diagrams and descriptions for CONVERGE Pro 2 front panel controls and back panel
connectors�
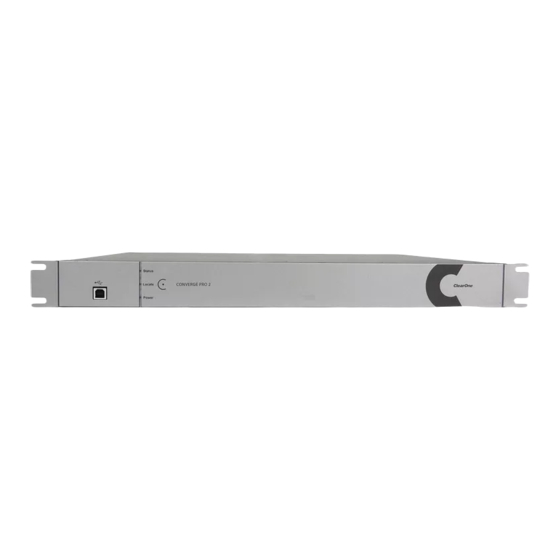
CONVERGE Pro 2 Front Panels
A
B C
CONVERGE Pro 2 Front Panel Control Descriptions
A.
USB Type B Port: Provides convenient front panel connectivity for laptops, MAC, and PCs�
B.
LED
»
Power: Solid blue indicates the unit is powered on�
»
Status:
• Off (no light): Unit still initializing
• Fast blinking blue: Stack Syncing in progress
• Slow blinking blue: Unit not configured
• Solid blue: Configured unit
• Fast blinking red: Stack Sync error
»
Locate: Blinking blue indicates that the "Locate" command has been received�
C.
Locate Button (C): "Locate" Capacitive Touch Button identifies hardware devices from software devices,
or software applications from hardware devices� Shows model number, unit name, IP address�
4