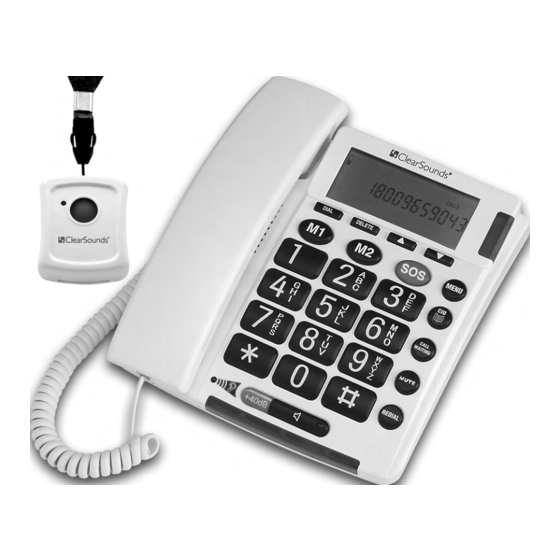
ClearSounds Talk500-ER 빠른 설정 매뉴얼 - 페이지 3
{카테고리_이름} ClearSounds Talk500-ER에 대한 빠른 설정 매뉴얼을 온라인으로 검색하거나 PDF를 다운로드하세요. ClearSounds Talk500-ER 4 페이지. Amplified sos alert telephone
ClearSounds Talk500-ER에 대해서도 마찬가지입니다: 특징 (1 페이지)

3. Plug one end of the coil cord into the handset's modular jack.
4. Plug the other end of the coil cord into the left side of the telephone base.
Note: Peel the plastic label from your phone's display before using your phone.
The phone book can hold up to 30 entries, all 30 entries can be assigned to be an SOS Emergency Call
respondent. To make an entry an Emergency number, select Emergency ON while entering the number
in the phone book to indicate it is an Emergency Number. The first person entered into the phone book
with Emergency ON will automatically become the 1
location will be #1. After other entries are added to the phone book, the calling order for the SOS
numbers can be changed while entering or through editing the phone book. The SOS icon will appear on
the screen for any phone book entries that are part of the SOS Calling System. The location of the name
on the SOS list will be on the screen in upper right hand corner.
To add a number to the phone book
1. Press the phone book button
2. Press and release the MENU button until STORE NUMBER appears.
3. Press the DIAL button. The cursor will flash in the first position.
4. Enter the phone number you want stored with a maximum of 22 digits using the number pad and
confirm with DIAL button.
5. Enter the name (maximum of 16 letters) and press DIAL. Press ▲ or ▼, to select EMERGENCY
ON/OFF. Press DIAL again to save if you are selecting OFF. If you want to select EMERGENCY
ON, press ▲ or ▼, then press DIAL.
6. The display now shows the location number where the emergency number is stored. You can
change the location where the number is stored by pressing on the ▼ arrow. Press DIAL again to
save the location.
7. The display then shows SAVED.
8. The display now shows number and NAME RECORDING.
9. To record voice, hold down DIAL button, speak clearly into microphone after a beep and "VOICE"
icon flashing. Release the button when you are finished or the unit will stop recording after 3
seconds. The voice prompt will then be played automatically.
10. You can repeat steps 2 to 6 to enter more numbers or press the
Note: If an entry is moved up on the SOS List, it will take the place of a previous entry and will shift all
the entries down.
If an entry is moved to a lower location on the SOS list, it will take the place of the previous entry and will
shift all the other entries higher.
When adding additional numbers to the phone book all the numbers will be displayed alphabetically. The
EMERGENCY numbers will dial in the order you placed them when an SOS call is activated. When the
memory location is full, FULL will displayed.
RECORDING A MESSAGE FOR EMERGENCY CALLS
1. Press and release MENU until RECORD MESSAGE Appears
2. Hold down DIAL until you hear a beep and VOICE flashes; then speak into the microphone while
simultaneously pressing the DIAL button. The maximum recording time is 20 seconds.
3. Release DIAL when finished recording. The phone then plays back the message automatically.
Note: When recording a message, remind your caller to press 0 to talk (maximum 3 minutes), and then
also to press 1 and 2 (in sequential order) if they are able to help and there is no need to continue the
SOS calling. Once your caller picks up the call, the speakerphone will be activated for 3 minutes. If your
caller does not press 1 then 2 the conversation will disconnect and dial the next number. If the callers do
not press 0, they will only be able to listen to your recorded message.
Setting up Emergency Numbers
st
respondent for an Emergency Call and their SOS
ICON button to exit.
