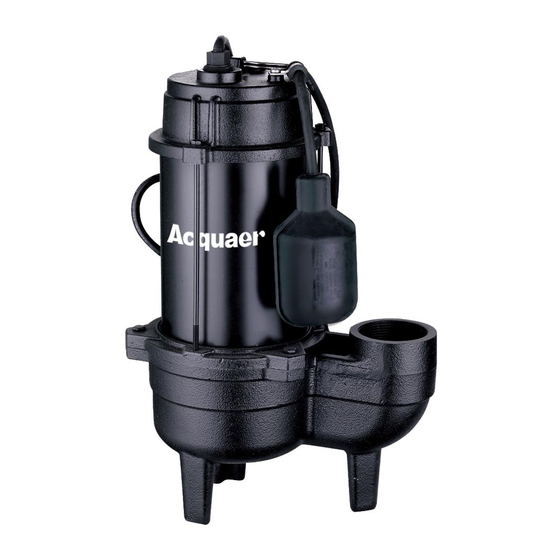
Acquaer SEC075T-1 소유자 매뉴얼 - 페이지 6
{카테고리_이름} Acquaer SEC075T-1에 대한 소유자 매뉴얼을 온라인으로 검색하거나 PDF를 다운로드하세요. Acquaer SEC075T-1 9 페이지. Submersible sewage pump
Acquaer SEC075T-1에 대해서도 마찬가지입니다: 소유자 매뉴얼 (15 페이지)

TROUBLESHOOTING
WARNING: Do not disassemble the motor housing. This motor has NO repairable internal
parts, and disassembling may cause an oil leak or dangerous electrical wiring issues.
Problem
Possible Cause
1.Blown fuse
2.Tripped breaker
3.Plug disconnected
4.Corroded plug
Pump does not
5.Thermal overload
start or run
6.Motor failed
1.Check if the check valve is installed
backwards.
The pump runs
2.The impeller or volute openings are
but does not
fully or partially clogged.
deliver water.
3.The pump is air-locked. Start and stop
several times by plugging and
4.The inlet holes in the pump base are
clogged.
5.The vertical pumping distance is too high.
The pump runs
and pumps out
1.The float is stuck in the up position.
sump, but does
2.The float switch is defective.
not stop.
1.The pump is air-locked.
The pump runs
2.The vertical pumping distance is too high.
but only delivers
3.Inlet holes in the pump base are clogged.
a small amount
4.The impeller or volute openings are fully
of water.
or partially clogged.
1.The inlet holes in the pump base are
The motor runs
clogged.
for a short time
2.The pump impeller is partially clogged.
and then stops.
3.The impeller or volute openings are fully
or partially clogged.
Corrective Action
1.Replace fuse
2.Reset breaker
3.Secure plug
4.Clean plug prongs
5.Disconnect the pump from power
for 30 minutes, then reconnect
6.Contact customer service for
replacement
1.The arrow on the check valve should
point in the direction of flow.
2.Remove the, pump and clean.
3.unplugging the cord. Check for
clogged vent hole in the pump case or
discharge pipe and/or no vent hole in
the pump case or discharge pipe.
4.Remove the pump and clean the
openings.
5.Reduce the distance or change the
discharge fittings of the pump.
1.Be sure the float operates freely in
the basin.
2.Replace the float switch.
1.Start and stop several times by
plugging in and unplugging the cord.
Check for a clogged vent hole in the
pump case.
2.Reduce the distance or change the
discharge fitting of the pump.
3.Remove the pump and clean the
strainer and openings.
4.Remove the pump and clean.
1.Remove the pump and clean the
openings.
2.Remove the pump and clean.
3.Remove the pump and clean. Also
clean the strainer if one is installed.
6
PRÉPARATION
AVERTISSEMENT: Utilisez toujours la poignée pour soulever la pompe. N'utilisez jamais le
cordon d'alimentation pour soulever la pompe. Pour éviter les brûlures de la peau,débranchez
et laissez le temps de refroidir la pompe après les périodes d'utilisation prolongée.
Temps d'Assemblage Estimé (Nouvelle installation):30 minutes ( ou plus long en cas d'installer le
nouveau puisard).
MatérielsRequis pour l'Assemblage (non inclus):
pipe de décharge de 2 pouces, bande d'étanchéité de filetage,clapet anti-retour de 2 pouces, Coude
de 2 pouces, union de 2 pouces, pipe de raccord de 2 pouces, vanne de 2 pouces
Accessoires Requis pour l'Assemblage ( non inclus ):
Clé, Tournevis cruciforme,
INSTRUCTIONS D'INSTALLATION
1.
Raccordement de la pipe de décharge à la pompe
Enroulez les filetages de la pipe de décharge de 2 pouces avec le ruban
d 'étanchéité.
Fixez la pipe de décharge (1) à la décharge de la pompe (2).
2.
Placez la pompe dans une bassine
lacez la pompe sur une surface dure à l'intérieur d'un bassin d'eaux
usées.
3.
Raccordement du clapet anti-retour
Connectez la pipe de décharge (1) au coude (2), à l'union (3), au clapet
anti-retour (4), et à la vanne (5).
1
2
3
11
