3M Air-Mate PAPR 520-03-63R01 사용자 지침 - 페이지 12
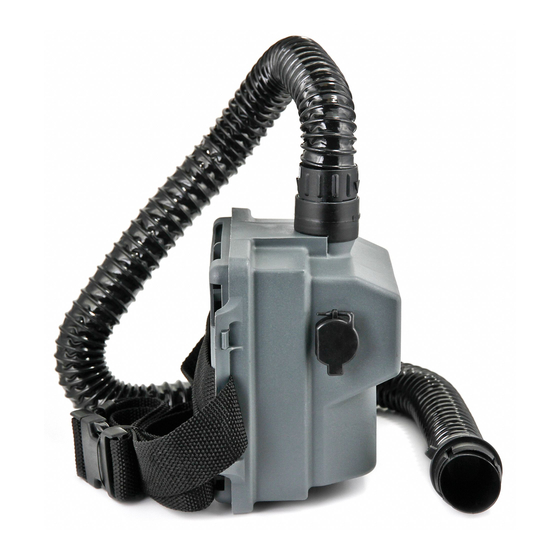
{카테고리_이름} 3M Air-Mate PAPR 520-03-63R01에 대한 사용자 지침을 온라인으로 검색하거나 PDF를 다운로드하세요. 3M Air-Mate PAPR 520-03-63R01 17 페이지. Belt-mounted high efficiency powered air purifying respirator
3M Air-Mate PAPR 520-03-63R01에 대해서도 마찬가지입니다: 매뉴얼 (2 페이지)
INSPECTION
Failure to conduct an inspection and complete all necessary repairs before use may adversely affect respirator
performance and result in sickness or death.
An inspection must always be performed prior to each use of the respirator as follows:
1. Remove the back cover and filter.
2. Check that the filter gasket is clean, in good condition and properly installed.
3. Examine the blower housing for cracks or warping.
4. Check that the battery latch is fully extended under the retaining ledge in the blower housing.
5. Examine the inside of the blower housing and fan assembly. The presence of dust or other particulate
matter inside the blower may indicate a damaged filter or improper seating of the filter/cartridge to the
gasket. Contact 3M Technical Service for assistance.
6. Examine the outside of the battery for cracks. Replace if damaged.
7. Inspect the breathing tube and replace if punctured, cracked or worn.
8. Bend the breathing tube to verify that it is flexible.
9. Successfully complete the applicable User Performance Check.
USER PERFORMANCE CHECK
Failure to pass a user performance check and complete all necessary repairs before use may adversely affect
respirator performance and result in sickness or death.
1. Ensure that the breathing tube is connected to the PAPR unit. Hold the free end of the tube up by
grasping the slotted connector and covering the slots of the connector with thumb and forefinger. Drop
the black, bullet-shaped airflow indicator (pointed end first) into the slotted connector. (Fig. 3)
2. Switch the PAPR unit on. Hold the tube so that it is vertical and at eye level. The indicator should
"float" on the air coming out and the lower band on the indicator should be above the connector's rim.
3. If the lower band on the indicator rises above the slotted connector edge, airflow is sufficient. If the
indicator fails to rise to this level, airflow is insufficient. This may be the result of a battery with a low
charge, a clogged filter or another malfunction. Refer to "Troubleshooting" section.
12