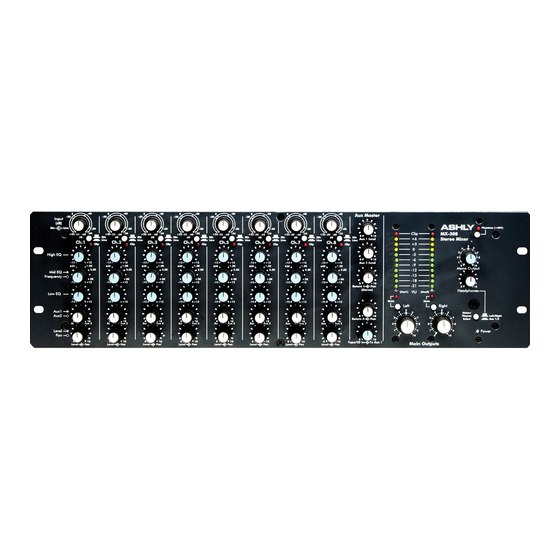
Ashly MX-508 운영 매뉴얼 - 페이지 7
{카테고리_이름} Ashly MX-508에 대한 운영 매뉴얼을 온라인으로 검색하거나 PDF를 다운로드하세요. Ashly MX-508 12 페이지. 8-channel, mic/line mixer
Ashly MX-508에 대해서도 마찬가지입니다: 기술 노트 및 사양 (2 페이지), 운영 매뉴얼 (12 페이지), 운영 매뉴얼 (16 페이지), 사양 시트 (2 페이지)

Operator Manual – MX-508 Mixer
MX-508 Rear Panel
1.
Microphone Input - The microphone input is
an active balanced type with a nominal
impedance of 1200 . Its noise performance is
best with a 200
transformer option is available. The Mic input
connector is a standard 3-pin XLR female
2.
Input Pad - The Pad is a 20dB attenuation
switch on the rear panel for use with the mic
input when the input is being overdriven with
the Gain control at its minimum setting.
3.
Line Input - A standard 1/4" TRS active
balanced connection, with a balanced input
impedance of 20K .
4.
Channel Send & Return Patch - The channel
patch point allows an effect (EQ, compressor/
limiter, etc.) or direct out recording device to be
used on an individual channel. The MX-508 has
both single jack insert capabilities as well as
separate send and return jacks.
To use the separate send/return jacks, connect
the send jack to the input of the device to be
inserted, and use the return jack its output.
Unbalanced (tip-sleeve) mono plugs are
required for this configuration.
To use the single jack insert, use a balanced
(tip-ring-sleeve) stereo plug in the send jack
only, where the send output signal is on the tip,
and the return signal is applied to the ring.
To use the send jack as a Direct Line Output (pre
EQ), you must use a special cable with tip and
ring connected at the MX-508 Send and a tip-
sleeve mono plug at the other end. Connecting
tip and ring at the mixer is necessary for
uninterrupted signal within the mixer.
Always switch the unit off before making substantial changes to the settings or connectors. Use
four screws and washers when rack mounting. This unit has specific electrical and signal
requirements, please take special care to double check all connections and settings and refer to
the specifications section of this manual. The unit should be connected to a standard 3-wire
grounded electrical outlet supplying 100-240 Volts, 50-60 Hz. To reduce the risk of ground
loop hum, connect all audio equipment to the same electrical power source. Removal of the
ground pin is both unlawful and dangerous, as a potential shock hazard could result. Overall
power consumption is less than 30 watts.
microphone. A plug-in
All Rights Reserved
5.
Aux Send Outputs - The Aux Outputs are
used to drive monitors, or any function which
requires isolated level control from the main
outputs. They are pseudo-balanced 1/4" tip-
ring-sleeve.
6.
Aux Return Inputs - The return inputs are 1/4"
unbalanced. Return 1 is stereo, while Return 2
is mono. To use return 1 as mono, connect only
to the Right return 1 input.
7.
Tape/CD Input - Tape Output - The stereo
inputs on RCA connectors have a nominal
operating level of -10dBu. The tape outputs are
-10dBu "pre-master", so they are not affected
by the settings of the Main output controls.
8.
Transformer Balanced Outputs - The
transformer outputs use male XLR connectors
and provide isolation for 600
controlled by the L & R Master levels, with a
nominal operating level of +4dBu.
Note: The transformer-balanced outputs are
designed to drive up to +24dBu into 600
loads. With output transformers, the level
increases as the impedance of the terminating
load exceeds 600 . Unlike a direct-coupled
output, transformers are affected by termination
impedance. Expect a slight increase in output
level when driving high impedance inputs with
these outputs. The output meters will remain
accurately calibrated to the levels present on
the transformerless outputs, regardless of the
load on the transformer outputs.
9.
Main Outputs – The Main Outputs are also
controlled by the L & R master. They are 1/4"
balanced TRS jacks with a nominal operating
level of +4dBu into any load
Page - 7
Safety Instructions – 3
Introduction - 4
MX-508 Mixer – 5
Connectors & Cables – 5
Physical Description - 6
Front Panel
Rear Panel
Installation – 7
Typical Applications - 8
Factory Configs - 8
Troubleshooting - 9
Dimensions - 9
Specifications - 10
Warranty - 11
lines and are
