Bobrick B-828 Instructions For Installation - Page 2
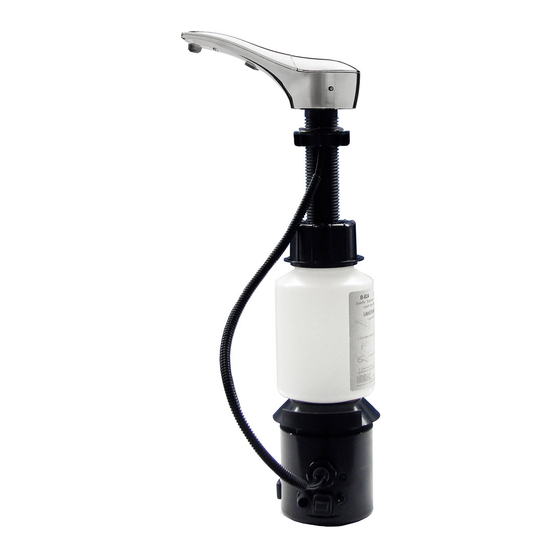
Browse online or download pdf Instructions For Installation for Dispenser Bobrick B-828. Bobrick B-828 4 pages. Automatic counter-mounted soap dispenser
Also for Bobrick B-828: Troubleshooting Manual (3 pages), Cleaning And Maintenance (2 pages)

Installation:
1. Place Counter Gasket
over mounting hole
to align with profile of
dispenser.
2. Insert Stem with tube
and all Fiber Optic Cables
carefully through mounting
hole.
3. Place the Wave Washer
on top of the Mounting
Nut Install Mounting Nut
on Stem and thread
upwards. (Minimum 2-1/4"
(55mm) diameter
clearance needed below
mounting nut).
NOTE: The outer diameter of
the Mounting Nut may need
to be filed down if space
under the counter is tight.
NOTE: Make sure Fiber
Optic Cables and Tubing are
INSIDE Mounting Nut. Do not
tighten completely until end of
installation.
4. Thread the Stem Locking
Nut onto the Stem. The
ribs on the Nut are to be
towards the top. Once
it goes past the two
red o-rings, the nut will
automatically stop
threading.
Replacement Parts List
Part Name
- A/C Adapter
- International AC Adapter Plug Kit
(U. K., Europe, Australia)
- Mack Gasket Kit
(To secure Top Assembly under the counter due to irregular counter surface)
- External A/C Multi Adapter Kit
- Nozzle Tip Replacement Kit Foam
- D Size Battery Pack
(Batteries not included)
- Foam Mixer Housing
- Installation Hardware Packet with Foam Mixer Housing
(Includes Wave Washer, Counter Gasket, Mounting Nut, BobKey, Stem Locking Nut)
- Top Housing Assembly Foam
(Includes Installation Hardware Packet and Foam Mixer Housing)
- Bottom Housing Assembly Foam
5. Attach the tubing to
the top barb of the
Foam Mixer Housing.
6. The Bottle Cap can only
be placed onto the Stem
in one orientation.
The flat section on the
Stem is to be aligned with
the flat section on the
Bottle Cap.
7. Rotate the Bottle back
and forth to align the flat
section of the Stem to the
flat section on the Bottle.
8. Push the Bottle Assembly
up onto the Stem while
also inserting the Foam
Mixer Housing into the
hole in the post on the
Bottle Cap.
Fully insert the Bottle
Assembly over the Stem
until it stops. Both red
o-rings must be inside the
Bottle Cap.
Part No.
3974-57
3974-58
824-167
824-201
828-310
824-241
828-322
828-443
828-525
828-550
2
9. While pushing upwards
on the Bottle, Thread
the Stem Locking Nut
down onto the Bottle
Cap threads
NOTE: After assembly, hold
the Stem and lightly rotate
the Bottle back and forth
and tug down to be sure it is
on tight. If it is loose, repeat
Steps 7 and 8.
NOTE: Tug Tubing on
Foam Mixer Housing down
from under the counter to
straighten out the tubing.
10. Connect the small
diameter tube from the
Foam Mixer Housing
to the air tube adapter
located on the Bottom
Housing.
11. Thread Fiber Optic
Connector Tip into
Bottom Housing. Keyed
feature on Connector
Tip ensures Fiber Optic
Cables are always
located correctly.
12. Thread Fiber Optic Nut
onto Connector Port
and hand snug only.
Do not over-tighten.
NOTE: DO NOT bend or
kink Fiber Optic Cables.
TOP FILL ONLY !
Filling Instructions: (use foam soap only)
Unit will dispense commercially Marketed Bulk Foam Soap.
1. Insert tip of BobKey provided into opening of concealed locking mechanism to disengage door.
2. Door will disengage and rotate clockwise for filling from the top.
3. Fill dispenser with commercially marketed bulk foam hand soap (Do not use liquid or lotion soap).
4. Close door counter-clockwise to lock in place.
13. Align the Top Assembly
above the counter to
the desired position
and tighten the
Mounting Nut against
the bottom of counter
so the Top Assembly
Apply a bead of Silicone
does not easily rotate.
around the base of the
Make sure Fiber Optic
Cables are not between
Top Housing above the
counter to prevent
the underside of the
spilled soap from going
counter and top of
through the mounting
Mounting Nut. See
hole.
Steps 3 and 4.
14. Plug AC Adapter into
wall and other end into
Bottom Housing base.
3
