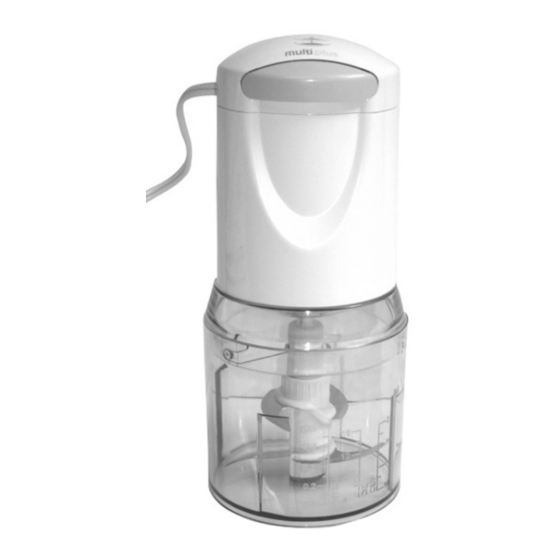
Euro-Pro QUAD BLADE FP107 Owner's Manual - Page 3
Browse online or download pdf Owner's Manual for Food Processor Euro-Pro QUAD BLADE FP107. Euro-Pro QUAD BLADE FP107 4 pages. 120v, 60hz., 250 watts mini chopper

OPERATING INSTRUCTIONS
Assembling the Food Chopper
CAUTION
: Make sure that the unit is
unplugged from the power source before
inserting or removing the chopping
blades and before cleaning.
WARNING: USE EXTREME CAUTION
WHEN HANDLING THE BLADES.
THEY ARE EXTREMELY SHARP
IMPORTANT:
Remove protective
blade covers before using.
1. Place the food chopper bowl on a
clean, dry, level surface.
2. Remove the protective blade cover
from the lower blade.
3. Holding the lower blade by the shaft,
place it over the spindle pin of the
chopping bowl. (Fig. 1)
Shaft
Spindle
pin
Fig. 1
4. Carefully insert the upper blade over
the lower blade rotating it until it locks
onto the lower blade. (Fig. 2)
CAUTION: Be careful not to hold by
the blades as the blades are very
sharp.
Upper
Blade
Lower
Blade
Fig. 2
Blades
Assembled
NOTE: The lower blade can be used
alone, however better results are
achieved for fine chopping when both
blades are used.
5. Place the food that you want to
process into the chopping bowl and
place the safety cover/splash guard
on the bowl. Turn the safety
cover/splash guard clockwise to make
sure that it locks in place. Make sure
that the locking tabs on the cover
slide into the locking guides on the
chopping bowl. (Fig.3)
Locking
Guide
Locking
Tab
Fig. 3
Note: Do not add more
than 2 cups dry or 1 cup
liquid ingredients as this
will strain the motor and
may cause overflow.
5. Place the power unit on
the chopping
bowl lid. (Fig. 4)
Fig. 4
Using The Food Chopper
Always disconnect unit from power
source before cleaning or changing
accessories.
WARNING: Do not operate the food
chopper continuously for more than
15 seconds or when empty.
1. Plug the power cord into the electrical
outlet.
2. Press the On-Off/Pulse button for a
few seconds for first speed. If you
press longer you engage a second
speed. (Fig. 5)
Fig. 5
3
OPERATING INSTRUCTIONS
NOTE: If the safety cover/splash guard is
not securely locked in place, the unit will
not operate.
Be careful not to over process. For
coarsely chopped foods, use repeated
short pulsing action until the desired
consistency is reached.
3. Hold the chopping bowl firmly while
depressing the On-Off/Pulse Button to
ensure the unit stays in place.
4. Make sure that the blades have
stopped completely before removing
the safety cover/splash guard.
PROCESSING EXAMPLES USING THE QUAD BLADE ASSEMBLY
The processing times indicated below are approximate and also depend on the
quantity of the food to be processed and the degree of fineness you require.
DO NOT OPERATE THE FOOD CHOPPER CONTINUOUSLY FOR MORE THAN 15
SECONDS AT A TIME AND NEVER OPERATE THE APPLIANCE EMPTY.
MAX.
INGREDIENT
QUANTITY
Parsley/Herbs
1 oz / 30 g
Onions
5 oz / 150 g
Shallots
5 oz / 150 g
Garlic
5 oz / 150 g
Rusks
1 oz / 20 g
Nuts – Soft
3.5 oz / 100 g
(pecans, walnuts)
Nuts - Hard
3.5 oz / 100 g
(peanuts, almonds)
Eggs (hard boiled)
2
Boiled ham
3.5 oz / 100 g
Beef
3.5 oz / 100 g
Cookies/Crackers
6-8 at a time
Prunes
4.5 oz / 130 g
Dried Apricots
3.8 oz / 110 g
NOTE: If processing hot food, always allow food to cool before placing in the bowl.
Always remove all bones from meat before processing.
5. Remove the blade assembly by its
shaft before you empty the contents
of the chopping bowl. (See Fig. 1)
6. Never add ingredients into the
chopping bowl before placing the
blade assembly in the chopping bowl.
IMPORTANT: Protective blade covers
are for storage purposes only. Remove
protective covers before using quad
blades.
PREPARATION HINTS
Wash & dry thoroughly. Pulse until
desired texture is reached.
Cut onion into 1-inch pieces and then
pulse until desired texture is reached.
Cut into small pieces and pulse until
desired texture is reached.
Peel cloves and pulse until desired
texture is reached.
Break into smaller pieces and pulse
until desired texture is reached.
Pulse until desired texture is reached.
Do not over process.
Pulse until desired texture is reached.
Do not over process.
Cut hard boiled eggs into pieces and
pulse until desired texture is reached.
Cut into 1-inch pieces and pulse until
desired texture is reached.
Cut into 1-inch pieces and pulse until
desired texture is reached.
Break cookies/crackers into pieces and
pulse until desired texture is reached.
Pulse at a high speed until desired
texture is reached.
Pulse at a high speed until desired
texture is reached.
4
