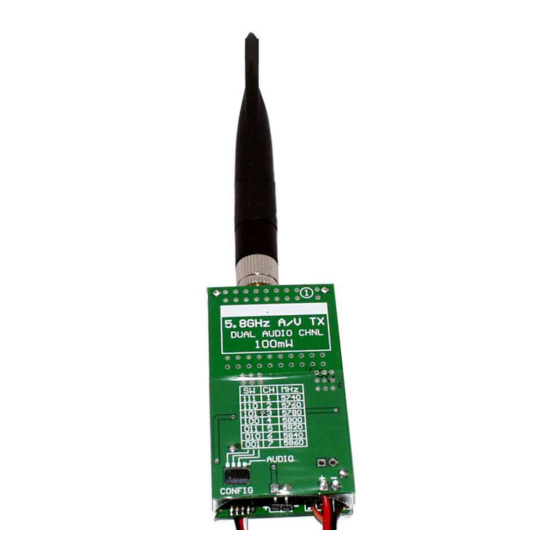
DPCAV AV681TX Quick Start Manual - Page 3
Browse online or download pdf Quick Start Manual for Transmitter DPCAV AV681TX. DPCAV AV681TX 8 pages. 5.8ghz a/v transmitter kit
Also for DPCAV AV681TX: Assembly Instructions Manual (8 pages)
å
Figure 4, Side
ä ä ä ä ,
5
SIDE
POST INSTALLATION: See Figure 5.
9
5.1
Carefully cut the standoff post header so that
you have one piece that is 2-pins and two pieces
that are 1-pin.
9
5.2
Install the 2-pin
9
5.3
Install a 1-pin
9
5.4
Install a 1-pin
ã ã ã ã ,
6
SIDE
POWER CABLE INSTALLATION AND VREG TEST.
9
6.1
Install your preferred DC power cable/connector (such as a female BEC) to the
DC-IN pads. Be sure to observe the marked polarity. Label the cable "
8.5VDC BAT-IN
9
6.2
If you will be powering your 5VDC camera from the transmitter then install your
camera's power cable to the CAM PWR pads (observe marked polarity). Label
the cable "
9
6.3
Visually inspect side
problems before proceeding.
9
6.4
Temporarily apply power (6.5VDC to 8.5VDC) to the DC-IN cable. Using a digital
voltmeter, verify 5.0VDC (±0.15V) at the P1 pads and the CAM-PWR cable.
AV681TX-Kit, Rev C
å å å å ,
4
SIDE
COMPONENTS: See Figure 4.
9
4.1
Install R1, R2, and R3 (2.2K resistors).
9
4.2
Install C8 (.1uF cap).
post at J1.
POWER
post at the hole next to C1+ .
GND
post at the hole next to C7+.
GND
."
5VDC @150mA CAM-OUT
ã
for assembly errors and solder issues. Correct all
Page 3
Figure 5, Stand-Off Posts
."
6.5-
© Nov-03-2008