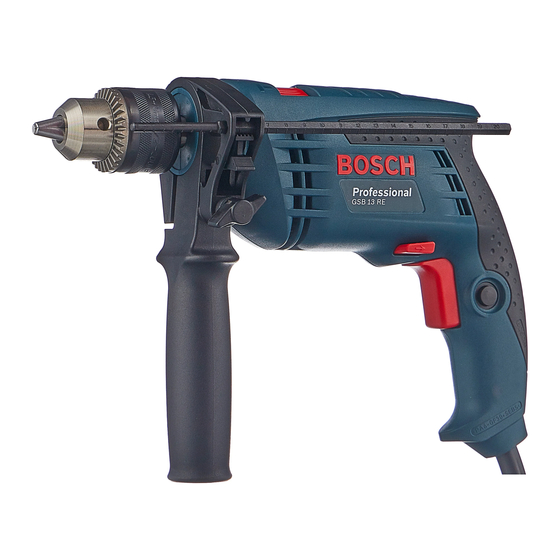
When drilling use the auxiliary handle.
Hold tools by insulated gripping surfaces when performing
an operation where thecutting tool may contact hidden
wiring or its own cord.
Contact with a "live" wire will make exposed metal parts of the
tool "live" and shock the operator.
Do not work materials containing asbestos.
Asbestos is considered carcinogenic.
Take protective measures when dust can develop during working
that is harmful to one's health, combustible or explosive.
Example: Some dusts are regarded as carcinogenic. Wear a dust
mask and work with dust/chip extraction when connectable.
If the drilling tool jams it will cause the tool to jolt. If this occurs
switch the tool off immediately.
When working with the machine, always hold it firmly with both
hands and provide for a secure stance.
Be careful when screwing in long screws; danger of sliding off.
(GSB 13 RE and GSB 16 RE)
For screws, work using the first gear or with a low speed.
(GSB 13 RE and GSB 16 RE)
Place the machine on the screw/nut only when switched off.
(GSB 13 RE and GSB 16 RE)
Always switch off the machine and allow to come to a stop
before placing it down.
Never allow children to use the machine.
Bosch is only able to ensure perfect functioning of the
machine if the original accessories intended for it are used.
Auxiliary handle
When drilling use the auxiliary handle 9.
Depending on the application, the auxiliary handle can be
adjustable in different positions.
Depth stop rod
For serial drills of same depth you have to put the depth stop 10 in
the auxiliary handle and to adjust the according to your necessity.
Inserting the accessory
Key type chuck (fig. A)
Open the chuck wide enough so that the tool can be inserted.
Insert the accessory and tighten all 3 bores equally with the chuck key.
Caution! The chuck may be very hot: During longer
working periods, especially when impact drilling, the
chuck can become very hot. In this case we recommend
wearing protective gloves.
Screwdriver Tools (fig.B)
When using screwdriver bits 13, a bit holder 14 should always be
used. Use only the screwdriver bits that fit the screw head.
Set selector switch 2 to the drill symbol for the screwing function.
Initial operation
Do not drill, fasten or cut into blind areas where electric, gas or
water lines may exist. Use appropriate detectors to determine
if these lines are hidden in the work area or call the local utility
company for assistance.
Contacting electric lines may cause fire or electric shock.
Striking a gas line will probably result in explosion. Breaking into a water
pipe will cause property damage or may cause an electric shock.
Check for correct mains voltage: The voltage of the power source
F 000 622 255 | 09.2011
Manual GSB 13 e GSB 16_Professional.indd 15
must agree with the voltage specified on the nameplate of the
machine.
SWITCHING ON AND OFF
Brief activation
Press or release the On/Off switch 4.
Continuous use
Switching on: Press On/Off switch 4 and retain with locking
button 3.
Switching off: Press and release On/Off switch 4.
STEPLESS SPEED CONTROL (GSB 13 RE and GSB 16 RE)
The machine runs with variable speed between 0 and maximum
depending on the pressure applied to the On/Off switch 4.
Light pressure results in a low rotational speed thus allowing
smooth, controlled starts.
Do not load the machine so heavily that it comes to a standstill.
PRESELECTING THE SPEED (GSB 16 RE)
With thumbwheel for speed preselection 5, the require speed
can be preselected even during operation. The require speed
depends on the material and the working conditions, and can be
determined through practical testing.
CHANGING THE ROTATIONAL DIRECTIONS (GSB 13 RE and
GSB 16 RE)
Operate the rotational direction switch 5 only at a
standstill.
Using the rotational direction switch 6, the direction of rotation of
the machine can be changed (right or left). By actuating the On/
Off switch 4, the rotational direction switch 6 can be locked.
Right Rotation (fig. C)
Press the rotational direction switch through to the left stop (for
drilling, impact drilling, driving screws, etc.).
Left Rotation (figure D)
Press the rotational direction switch through to the right stop (for
loosening and unscrewing screws and nuts).
DRILLING, DRIVING AND IMPACT DRILLING
Drilling and Driving
Push selector switch 2 to the right.
Impact Drilling
Push selector switch 2 to the left.
The switch 2 notches in distinctly and can be operated whilst the
machine is running. Hard metal drills are necessary when working
with concrete, stone and brick.
Pratical advice
Check the material to be drilled and select the correct bit. Do
not drill with a bit that is inadequate for the job, because this will
damage either your workpiece or the bit itself.
Small workpieces
Use a vise or clamps to hold your workpiece. Loose pieces could
grip int the bit and cause accidents.
Wall tiles and ceramics
Begin to drill without impact and activate the impact system after
drilling through the enamel surface.
By doing this, you prevent the bit to slide or the material to split.
15
English |
Bosch Power Tools
29/11/11 09:38

