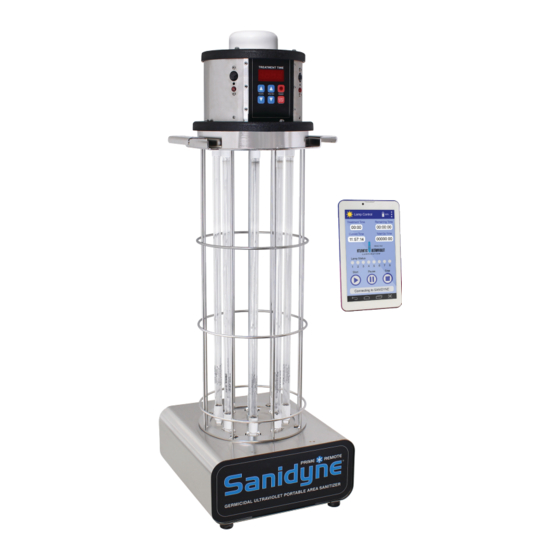
Atlantic Ultraviolet Sanidyne 40-0634C Installation Operation & Maintenance - Page 10
Browse online or download pdf Installation Operation & Maintenance for Accessories Atlantic Ultraviolet Sanidyne 40-0634C. Atlantic Ultraviolet Sanidyne 40-0634C 20 pages.

Step 3: Once pins are aligned
correctly, press lamp base into lamp
socket until it is properly seated.
u
P
nit
laCement
• The Sanidyne
Prime Remote is intended for indoor use only. The Sanidyne
®
liquid intrusion such as dripping water, condensation or mist, and used only in a clean, dry location with temperature ranges
between 40°F and 95°F.
• Electrical power supplied to the Sanidyne
Prime Remote.
The Sanidyne
•
circumstances should this sanitizer be permitted to operate with humans, plants, or animals present in the Operation Area.
• The intrusion sensors will detect movement if anyone is in the treatment area and the lamps will be switched off until unit is
reset by pressing the START/STOP button on keypad on the top of the unit.
• For maximum efficiency the Sanidyne
the treatment area. The Sanidyne
of the room and the ultraviolet rays are unobstructed.
UNIT OPERATION
P
-o
re
Peration
1.
Fully charge the Hand-held Remote Controller (Shown in Figure 3). NOTE: Charger provided operates on 100 volts to 240
volts 50/60Hz and has a NEMA 1-15 plug.
2. Once a location has been chosen for the Sanidyne
doors to the area where treatment operation will take place.
It is the user's responsibility to post signs, or notices for all personnel and persons in the building or
facility so that they be made aware that the Operation Area is off limits during treatment.
3.
Connect the Sanidyne
requirements listed on the Sanidyne
An approved Promate
worn prior to the next step by the operator as well as anyone else in the operation area. In addition the
operator and anyone present MUST use protective gloves and clothing to protect skin from UV rays.
4.
Turn power on using the Power Switch located on the rear of the Sanidyne
shown on Figure 1 – View A-A). Switch will glow RED when power is on. Once unit receives power, the RED lights located
just below the Occupancy Sensors on the top of the unit will glow RED. (See Occupancy Sensors (4 Total), shown on
Figure 1 – Dimensional Data). This is not a warning, it indicates that the sensors are aware of your presence.
10
Step 4: Applying pressure
with your thumb on outside of
Sanidyne
Prime Remote, snap
®
lamp base into the appropriate clip
directly above its lampholder.
Prime Remote unit must match power requirements listed on the Sanidyne
®
Prime Remote is intended for use in UNOCCUPIED AREAS ONLY. Under no
®
Prime Remote should be located as centrally as possible, away from the corners of
®
Prime Remote Portable Area Sanitizer is most effective when it is located in the center
®
Prime Remote, post supplied Promate
®
Prime Remote to a properly grounded outlet power source which matches the power
®
Prime Remote (See Power In location shown on Figure 1 – View A-A).
®
™
Face Shield (1) is supplied with each unit. Promate
Step 5: Install the remaining seven
lamps as described in steps 1– 4.
Prime Remote should be protected from
®
™
Danger Signs on all access
™
Face Shield MUST be
Prime Remote (See Power Switch location
®
®
