Dromida Sync 251 FPV Quick Start Manual - Page 5
Browse online or download pdf Quick Start Manual for Quadcopters Dromida Sync 251 FPV. Dromida Sync 251 FPV 17 pages.

FLYING FPV
Your phone can be mounted in the
holder on the controller or inserted
in the VR headset (DIDZ1558) for a
more immersive feel.
The range of the 5G Wi-Fi
FPV camera is about 200 feet
outdoors and 50 feet indoors,
but may be less if the location
has a lot of electromagnetic
interference or metal objects in
the walls.
If you are new to FPV, start by
flying line of sight until you can
maneuver the drone without
having to think about which
control to use. Practice by keeping both sticks centered and making only
small movements.
When you are ready to start FPV, we recommend that a spotter be available to
tell what the drone is doing. Master each of the following steps before moving to
the next one.
Step 1
• Take off.
• Hover at about 3 feet.
• Move a few inches to the right in any direction and return to the hover point. Repeat
moving left, forward, and backward.
• Slowly land.
The goal is to get used to the view from the camera, the sensitivity of the
controls, and judging your height.
Step 2
• Take off.
• Fly slowly (about 10 feet away.)
• Turn around and return to the launch point.
• Slowly land.
The goal is to maintain your height until you are ready to land.
Step 3
• Set up a course.
Keep it simple at first. When you can fly while maintaining your altitude, set up a
course with gates or obstacles at different heights.
The goals are to fly the entire course while maintaining the altitude and increase
your speed around the course.
REPAIR AND MAINTENANCE
Blade Replacment
Each arm and rotor blade is marked with the letter "A" or "B". The blade must be
installed on an arm with the same letter or the quadcopter will not be able to fly.
Carefully remove the blade.
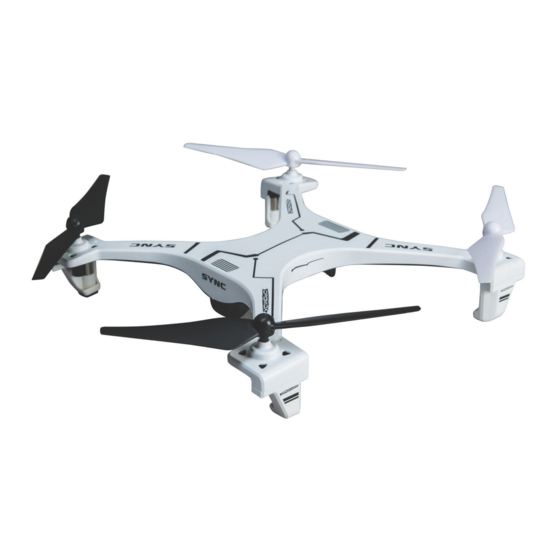
Black blades are on the front motors. White blades are on the rear.
Motor Replacement
1. Remove the two
screws from the foot.
2. Carefully remove the
foot. The motor will
unplug and come out
with the foot.
3. Plug in the new motor
and place it into the
frame so the wires line
up together.
4. Replace the foot carefully, so the wires get routed without getting pinched.
TROUBLESHOOTING
Flying Problems
PROBLEM: The drone will not respond to the controller.
SOLUTION: (1) Charge or change the battery.
(2) Turn off the controller and disconnect the battery. Turn it back on
and connect the battery. Move the throttle stick Up/Down to arm
the motors.
PROBLEM: Red controller LED light flashes after linking.
SOLUTION: Replace with new AA batteries.
PROBLEM: Unable to flip.
SOLUTION: Battery voltage too low.
PROBLEM: Stabilization not working properly.
SOLUTION: (1) Battery voltage low.
(2) Calibrate the sensors.
(3) Check the rotor blades and motors for damage. A common
problem is lint wrapped around the motor shaft or bent blades.
PROBLEM: Will not take off.
SOLUTION: (1) Rotor blades incorrectly installed. See Blade Replacement section.
(2) Battery is not fully charged.
(3) Check the rotor blades and motors for damage.
PROBLEM: Shaking.
SOLUTION: Check the canopy, frame, motors and rotor blades for damage.
PROBLEM: Does not maintain altitude when the throttle stick is in the center
position.
SOLUTION: Calibrate the sensors.
Video Problems
PROBLEM: The Wi-Fi connection is lost during flight.
SOLUTION: (1) There may be interference in the area. Try flying in a different
location.
(2) You are exceeding the Wi-Fi range of the camera. Maintain a
closer proximity to your device during flight.
PROBLEM: Video skips during playback.
SOLUTION: Use a high quality class 10 memory card formatted to FAT32.
PROBLEM: The app does not re-establish connection after the connection has
been lost.
SOLUTION: Close the app and remove it from the background tasks. Restart the
app.
PROBLEM: Horizontal scrolling lines appear in video or pictures.
SOLUTION: Avoid aiming the camera directly into the sun or reflected sunlight.
5
